

Switch theme
Printers
On the Printers screen you decide which printer prints the receipts and, in hospitality, the order slips for the bar and kitchen. You open the screen from Options (the Printers card), and the same screen is also the last step of the initial setup.
Before you start
- You set up printers in the installed app (Windows, macOS or Android) — the web app cannot access printers. In the web app, receipts are printed through the browser's print window.
- The device must be registered — as a cash register or as a remote ordering device (see Devices).
- Your user group must have the Allow printers setup permission.
- The printer must be switched on and connected to the device: with a USB cable, over the local network, via Bluetooth (Android) or as the built-in printer of an Android POS terminal.
For receipts, we recommend a thermal printer with 58 mm or 80 mm paper roll. A receipt can also be printed on any other printer connected to a computer, for example an A4 printer.
Printer roles
Each row on the Printers screen is one role — a kind of document that is printed:
| Role | What is printed |
|---|---|
| Receipt | Receipts and reports. |
| Order | The whole order on one slip, regardless of the items' Print to setting (hospitality). |
| Bar | Order slips for the bar (hospitality). |
| Kitchen | Order slips for the kitchen (hospitality). |
| Sector I, Sector II | Order slips for additional preparation stations, for example a grill or a pastry station (hospitality). |
In retail, there is only the Receipt role. In hospitality, each item has a Print to field that decides which order printer it is printed on (see Inventory). Several roles can use the same printer.
Printers screen
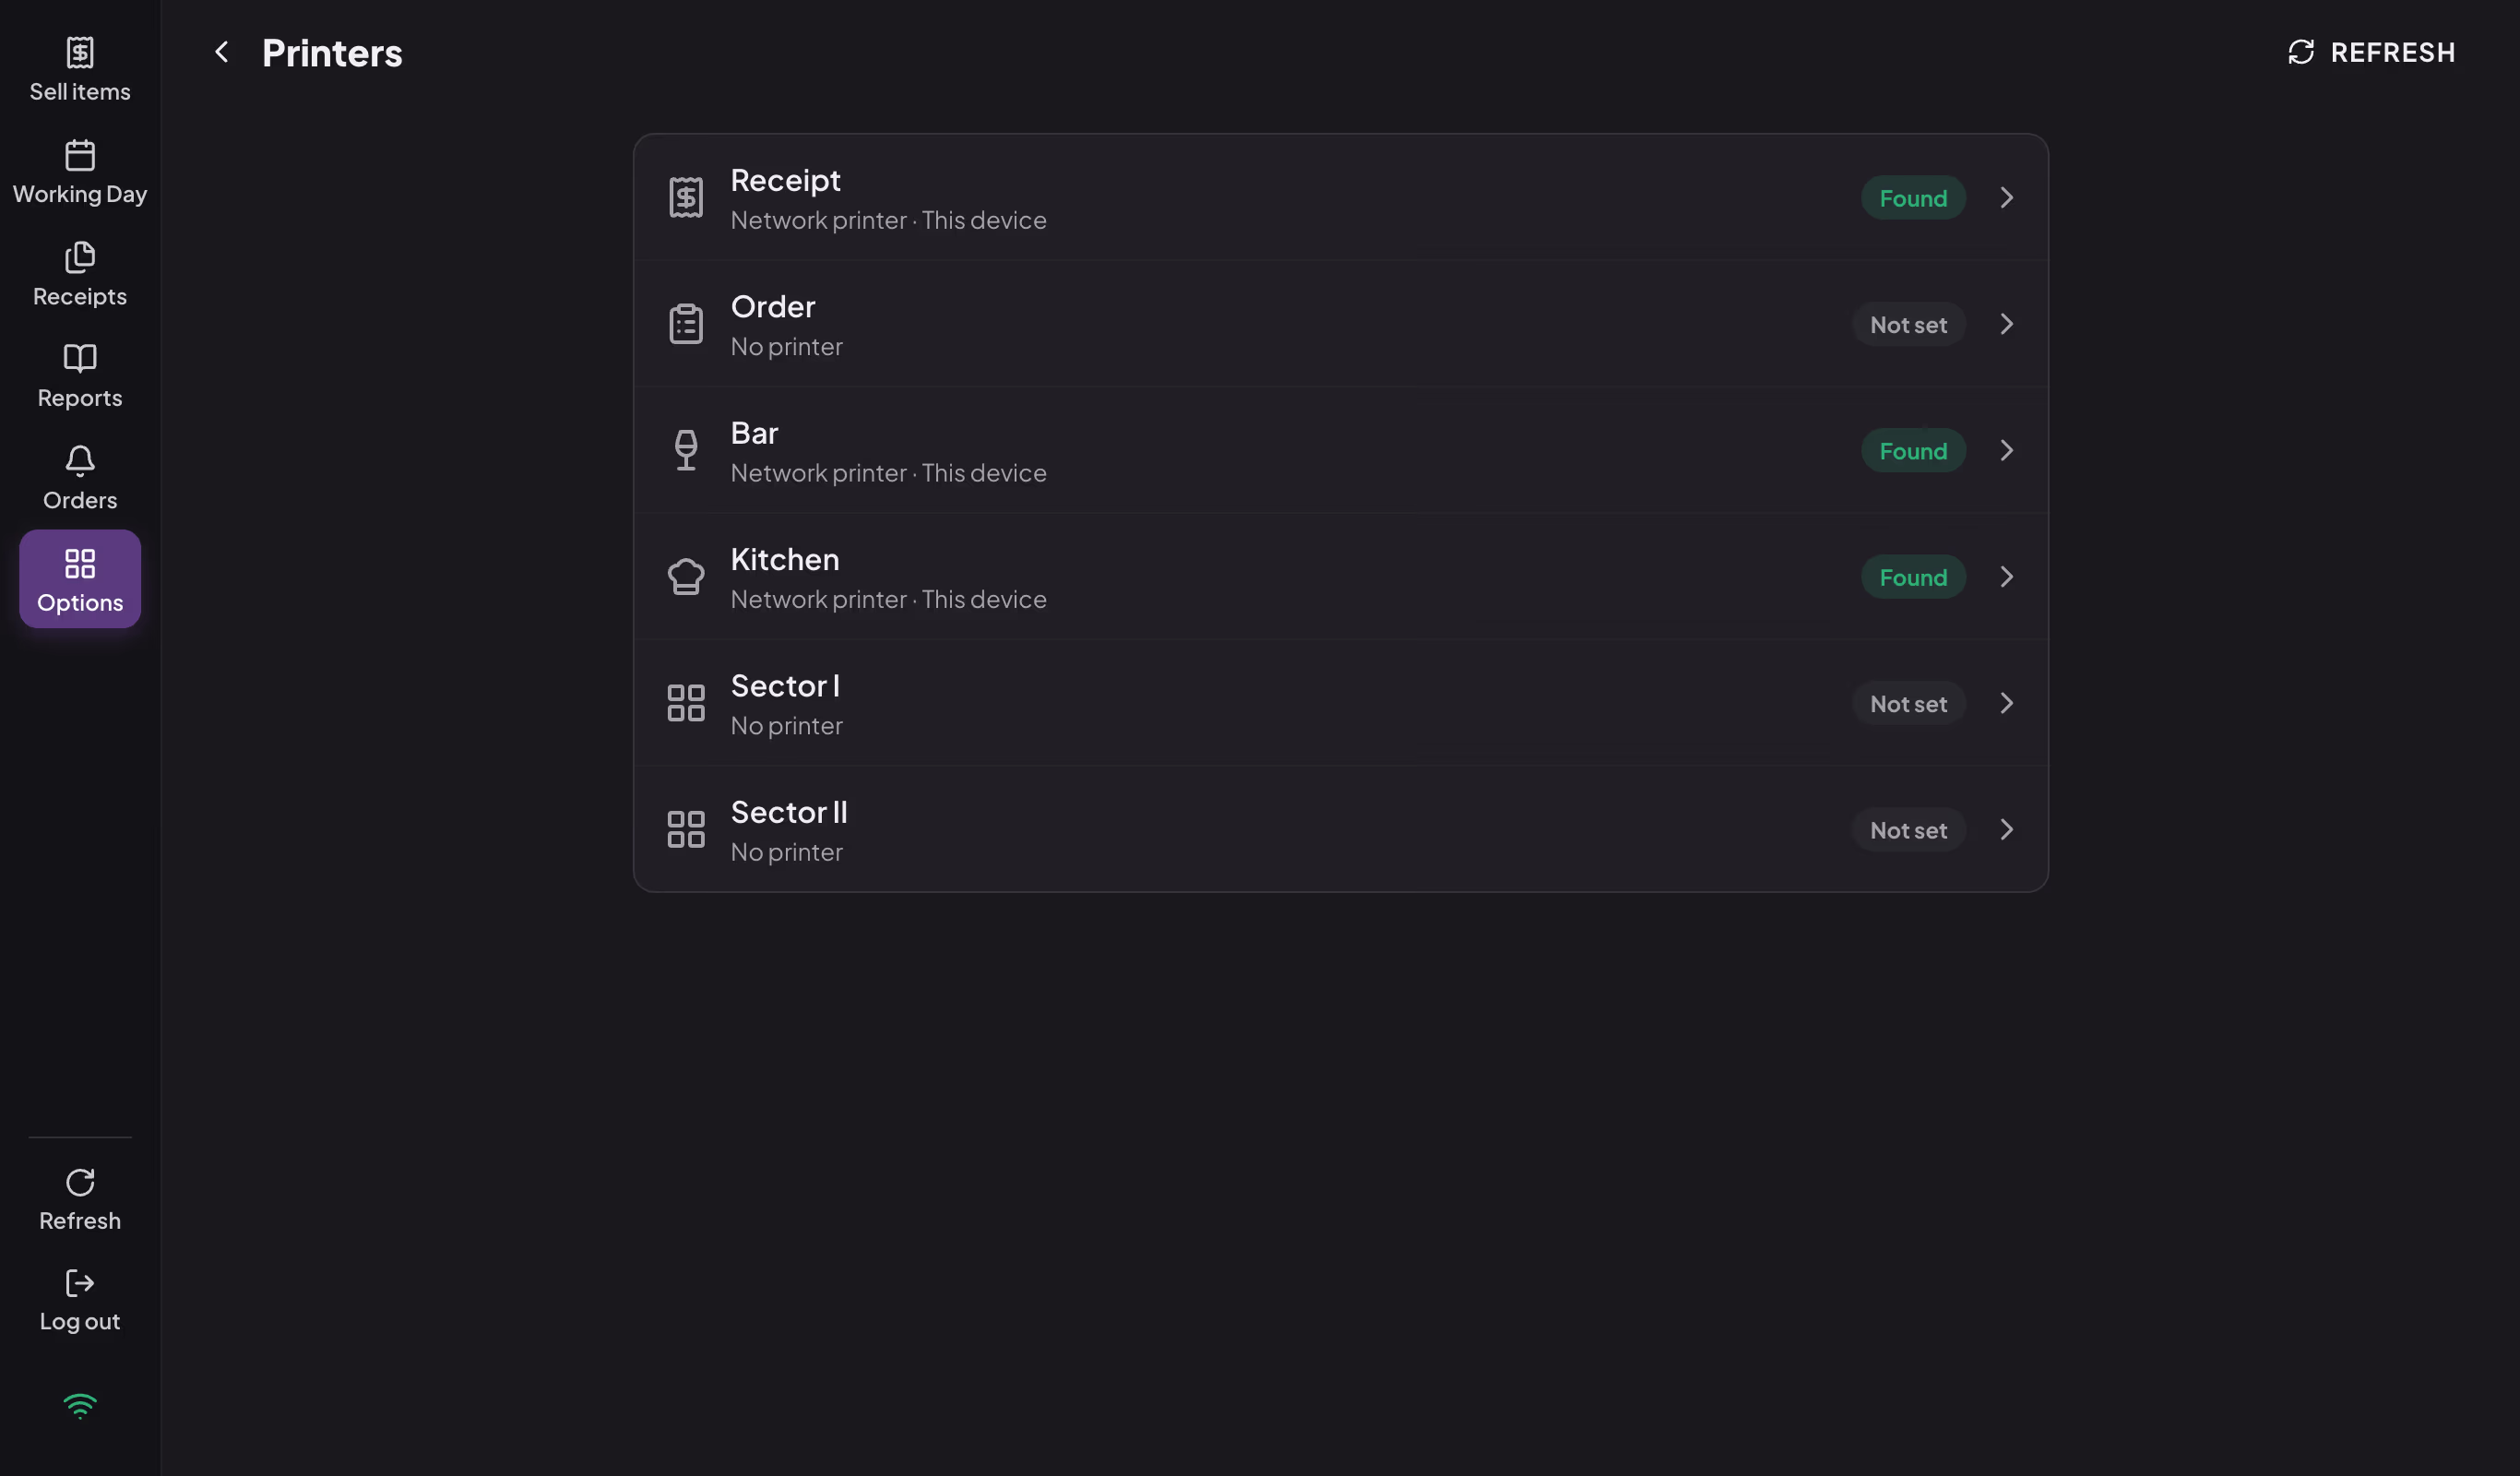
Printers screen in hospitality: the printer and status for each role
Next to each role you see the printer's name and the device it is connected to (This device or the name of another register), or No printer, and the status:
| Status | Meaning |
|---|---|
| Found | The device offers this printer. For a network, USB or Bluetooth printer, this does not yet mean that the printer is switched on. |
| Searching… | The app is still waiting for the device to respond. |
| Not found | The search is finished and the printer was not found — it is not there, or the device it is connected to did not respond (for example, another register is switched off). |
| Not set | The role has no printer. |
If a printer is not found, the warning Printer not found with the role's name is shown at the top of the screen. The REFRESH button in the header (on a phone, the refresh icon) searches for printers again.
Assigning a printer to a role
- Click the role (for example Receipt).
- Click the printer row. All found printers are shown, grouped by device: first This device, then other registers on the local network.
- Choose the printer. You return to the previous view, where the printer's Settings are shown below it.
- Set up the printer (see Settings by printer type).
- Click TEST PRINT and check the printout.
- Click DONE.
The change is saved immediately, with the message "Printer updated successfully". The ✕ button closes the window without saving. To remove a role's printer, choose No printer in the list and click DONE.
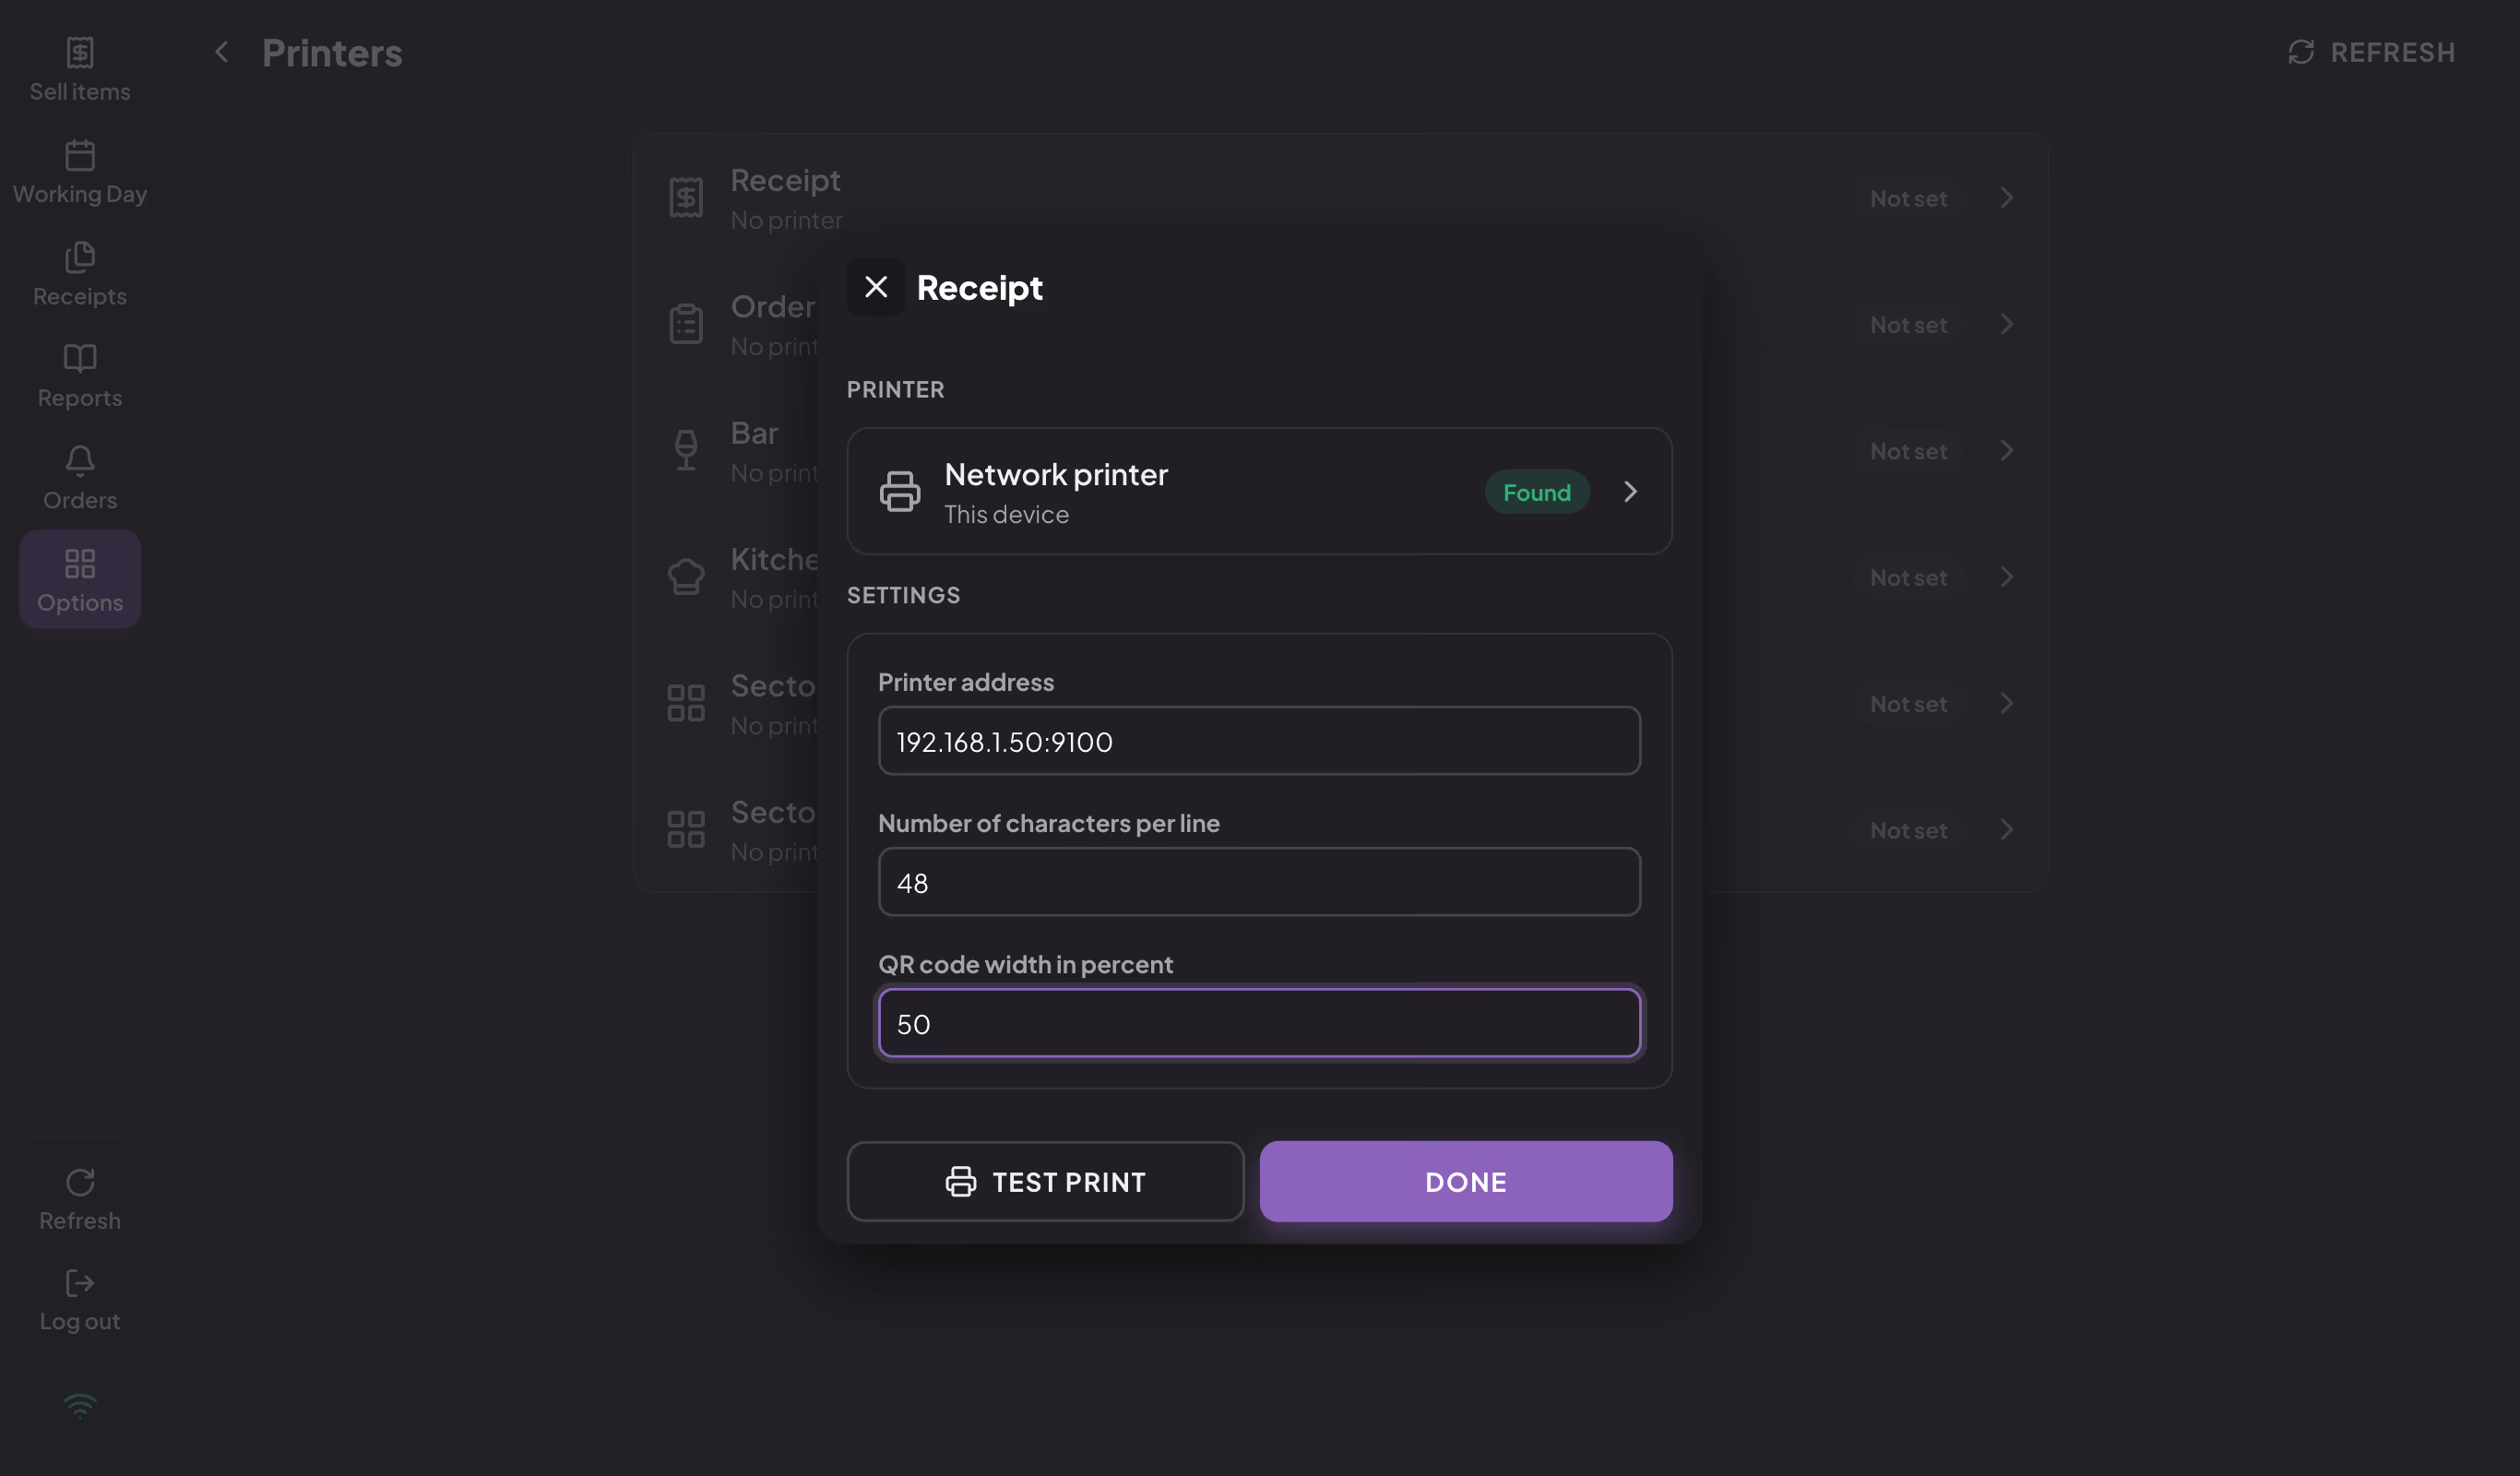
Setting up the receipt printer
TEST PRINT prints a test line and a test QR code, so you can check that the printer works. Check the Number of characters per line on a real receipt: if the lines wrap, decrease it; if the receipt does not reach the edge of the paper, increase it.
Settings by printer type
The fields depend on the printer type and the device it is connected to:
| Printer type | Settings |
|---|---|
| Network printer | Printer address — the IP address and port, for example 192.168.1.50:9100 (without the port, TEST PRINT and DONE stay unavailable); Number of characters per line; QR code width in percent. |
| Thermal USB printer without a driver (Windows, macOS) | Number of characters per line; QR code width in percent. |
| Printer with its own driver (Windows, macOS) | Paper size (Roll paper 58mm (50mm), Roll paper 80mm (72mm), A4 or Other); Width (mm), Length, Margin (mm), Scale Factor (%). |
| Printer on an Android device (integrated, USB, Bluetooth, network) | Width in millimeters; Number of characters per line; QR code width in millimeters; DPI (printer resolution). |
The usual Number of characters per line is 32 for 57–58 mm paper and 48 for 80 mm paper.
Tip
For a printer with its own driver, set the driver so that the printer cuts the paper right after the text, instead of feeding paper up to the set length.
USB thermal printer on Windows
If you do not see a thermal printer connected with a USB cable in the list, install a universal driver for it with the Zadig tool (download it from zadig.akeo.ie). On macOS, this step is not needed.
- Start Zadig and choose List All Devices in the Options menu.
- Choose your printer in the drop-down list.
- Click Replace Driver and wait for the installation to finish.
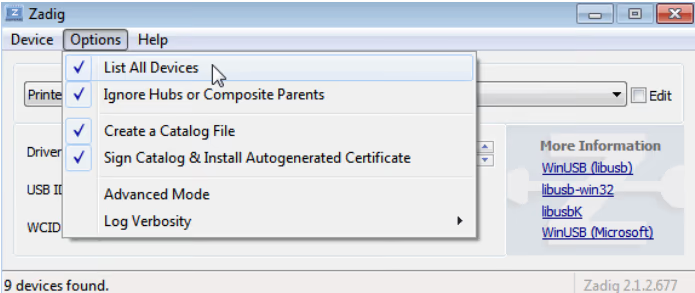
Zadig — installing a universal driver for a USB thermal printer
The printer then appears in the app as ESCPOS Printer with a number. Choose it and set the Number of characters per line.
Android and built-in printers
On an Android device, you choose the printer among the Integrated printer, Network printer, USB printer and Bluetooth printer types.
POS terminals with a built-in printer use the Integrated printer — choose it for the Receipt role, check the Width in millimeters and the Number of characters per line, and do a test print. Pair a Bluetooth printer in the Android device's settings first; the app uses the first paired Bluetooth printer.
If no printer is set for the Receipt role on an Android device, receipts are not printed and the app shows "Receipt printer not set up. Please set it up in order to be able to print receipts."
Printing through another register
A device can also print on a printer connected to another register — for example, a waiter's phone prints order slips on the kitchen printer connected to the register at the bar. In the printer list, such printers are grouped under that register's name.
For this to work, that register must be switched on, with the app running, and connected to the local network or the internet — printing over the local network is the fastest. A register on a computer (Windows or macOS) also serves as the central point for the devices on the local network (see Devices).
Common problems
| Problem | Solution |
|---|---|
| Status Not found | Check that the printer is switched on and connected, and for a printer on another register — that this register is switched on. Click REFRESH. |
| No printer in the list (USB, Windows) | Install the universal driver with the Zadig tool (see above). |
| Text wraps to a new line or is too narrow | Change the Number of characters per line and check it on a real receipt. |
| The QR code is too small or too large | Change the QR code width and print a test again. |
| The web app shows "No printers detected" | Printer setup is possible only in the installed app — download it with the buttons on the screen. |
| The Printers card in Options is grayed out | The device is not registered, or you do not have the permission to set up printers. |