Inventory Accounting
The Inventory Accounting section consists of the following subsections:
- Delivery In Notes
- Delivery Out Notes
- Beginning Inventories
- Price Calculations
- Price Levelings
- Write-Off
- Daily Revenue
- Inventory List
- Sales Purchase Ledger
Delivery In Notes
The first subsection is Delivery In Notes:
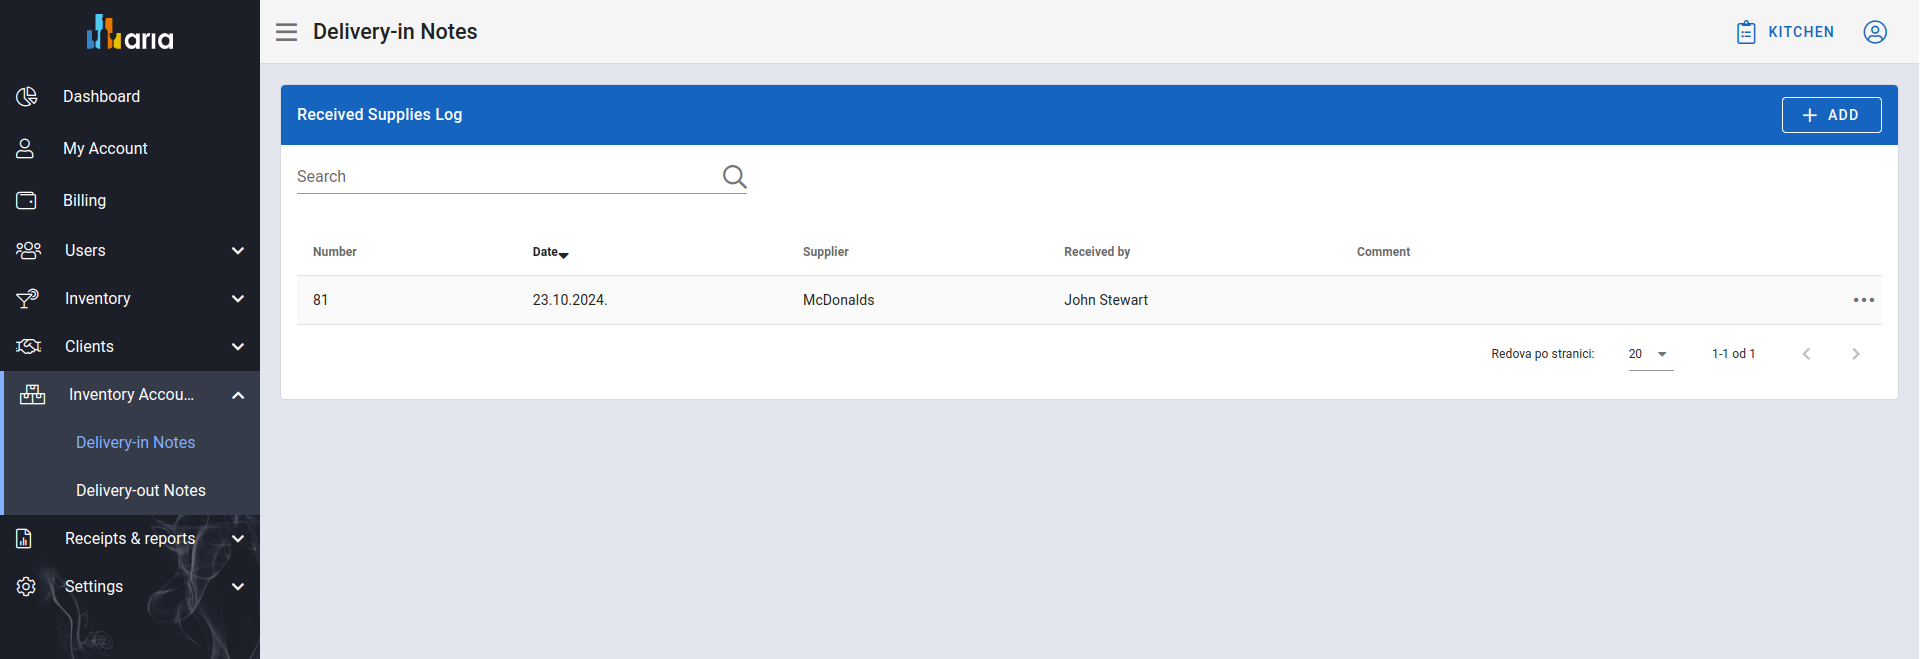
Delivery In notes
Add Delivery In Note
By clicking the ADD button located in the top right corner of the delivery in notes table (see the image above), a form for adding delivery in notes will open:
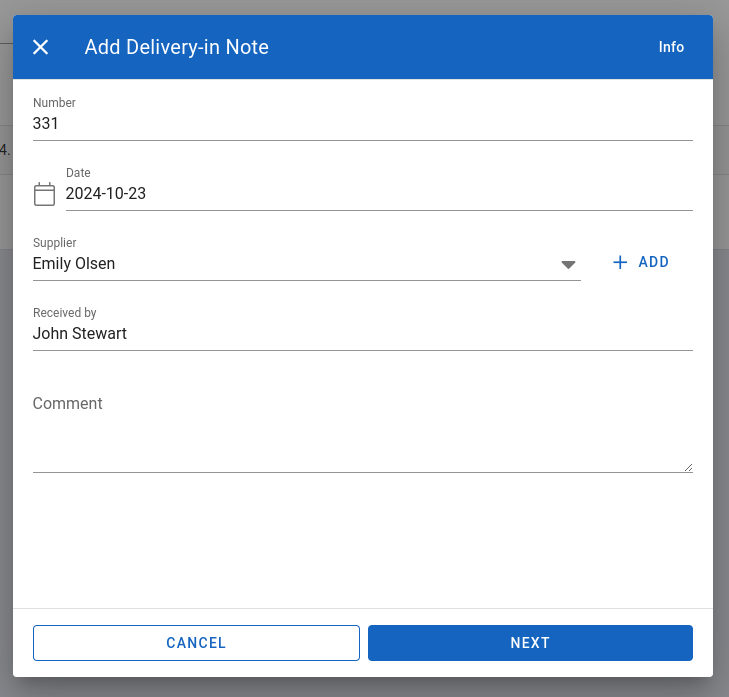
First part of the form for adding delivery notes
The first part of the delivery in note addition form looks like the image above when filled out. By clicking the NEXT button, we proceed to the second part of the form, where fields for entering quantities of specific items are located:
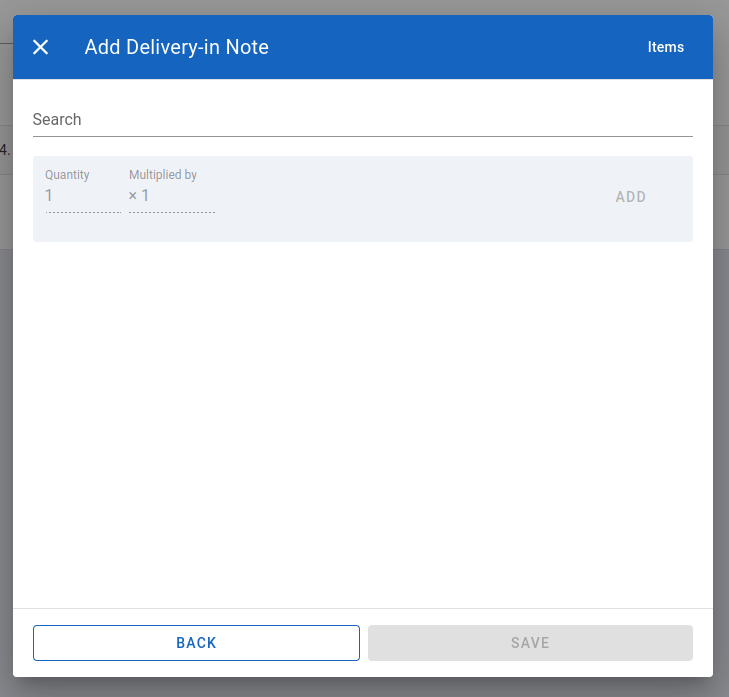
Second part of the form for adding delivery in notes
In the Search field, you can search for the desired item that was previously entered in the adding items section. Once you find the item, click on it, select the quantityand finally select the ADD option.
When the ADD button is clicked, the form will look like this:
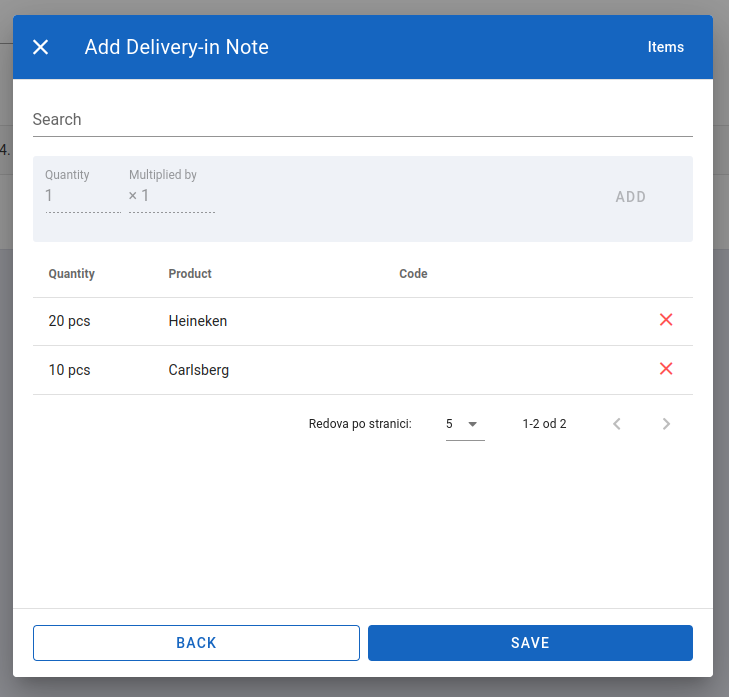
Successfully filled second part of the form for adding delivery in notes
There can be multiple items in this table. After entering all items for the given delivery in note, clicking the SAVE button will successfully save the entered delivery in note data.
Options for Delivery In Note Management
At the end of the row in the delivery in notes table, there are three dots representing options for managing a specific delivery in:
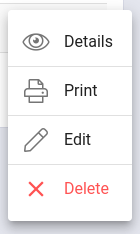
Options for Delivery In Note Management
Delivery In Note Details
By clicking on Details, the following will be displayed:
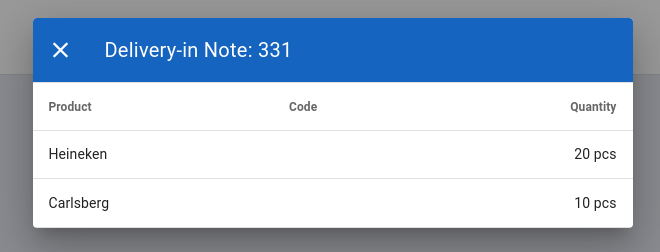
Details of the delivery in note
Print Delivery In Note
By clicking on PRINT, a window for printing the delivery in note in the following format opens:
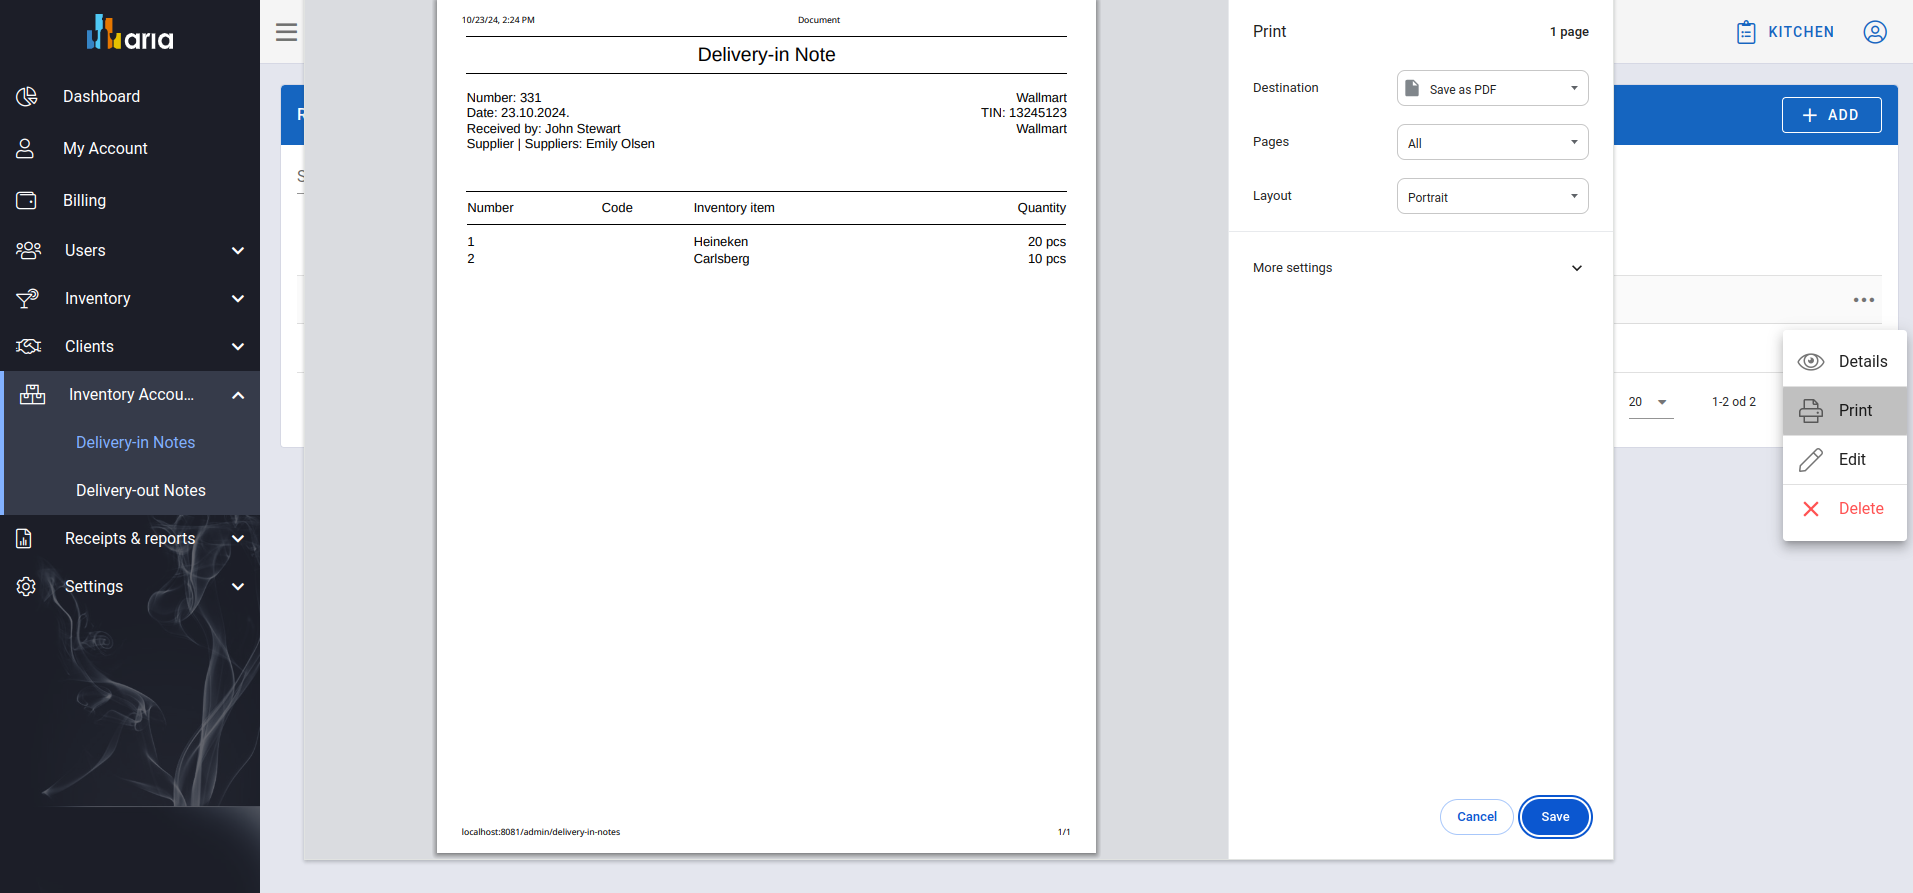
Window for printing the delivery in note
Edit Delivery In Note
By clicking the Edit option, a form with pre-filled data of the selected delivery in note will open:
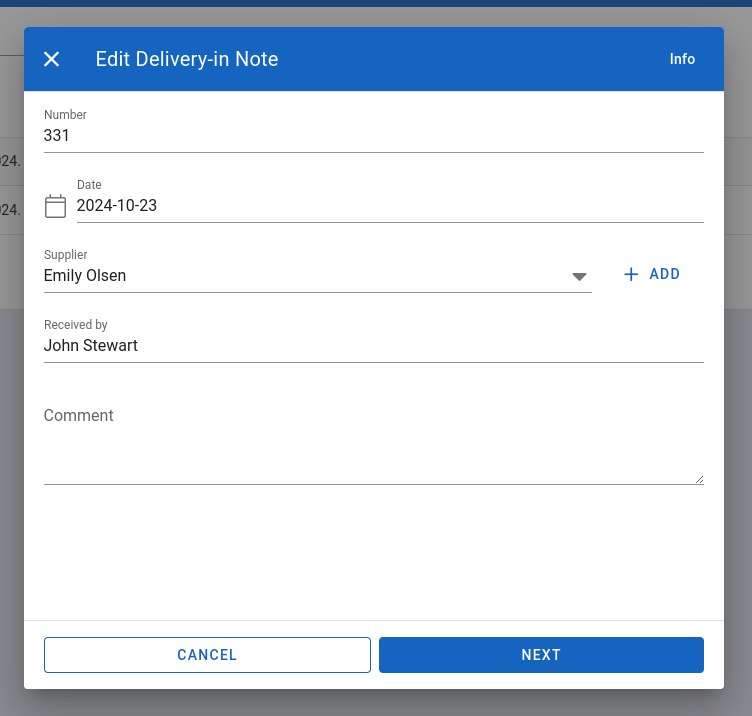
First part of the form for editing the delivery in
To proceed to the second part of the form, click the NEXT button:
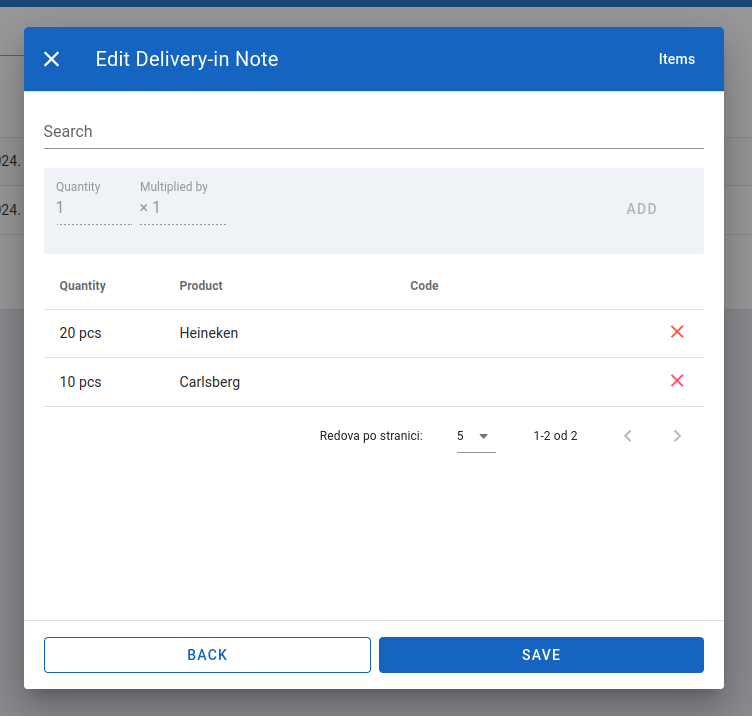
Second part of the form for editing the delivery in
We can add new items to the delivery in note list or delete old ones by clicking the X icon.
When we are sure we have edited the appropriate fields of the selected delivery in note, clicking the SAVE button will successfully save the changes.
Delete Delivery In Note
By clicking the Delete option from the delivery in note management options, a confirmation window for deletion will open:
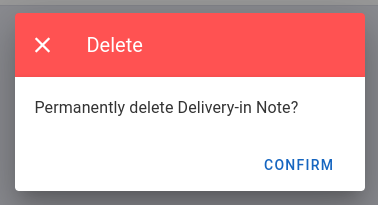
Window for confirming the deletion of the delivery in note
Upon confirmation, the delivery in note will be permanently deleted from the system.
Delivery Out Notes
The second subsection is Delivery Out Notes:
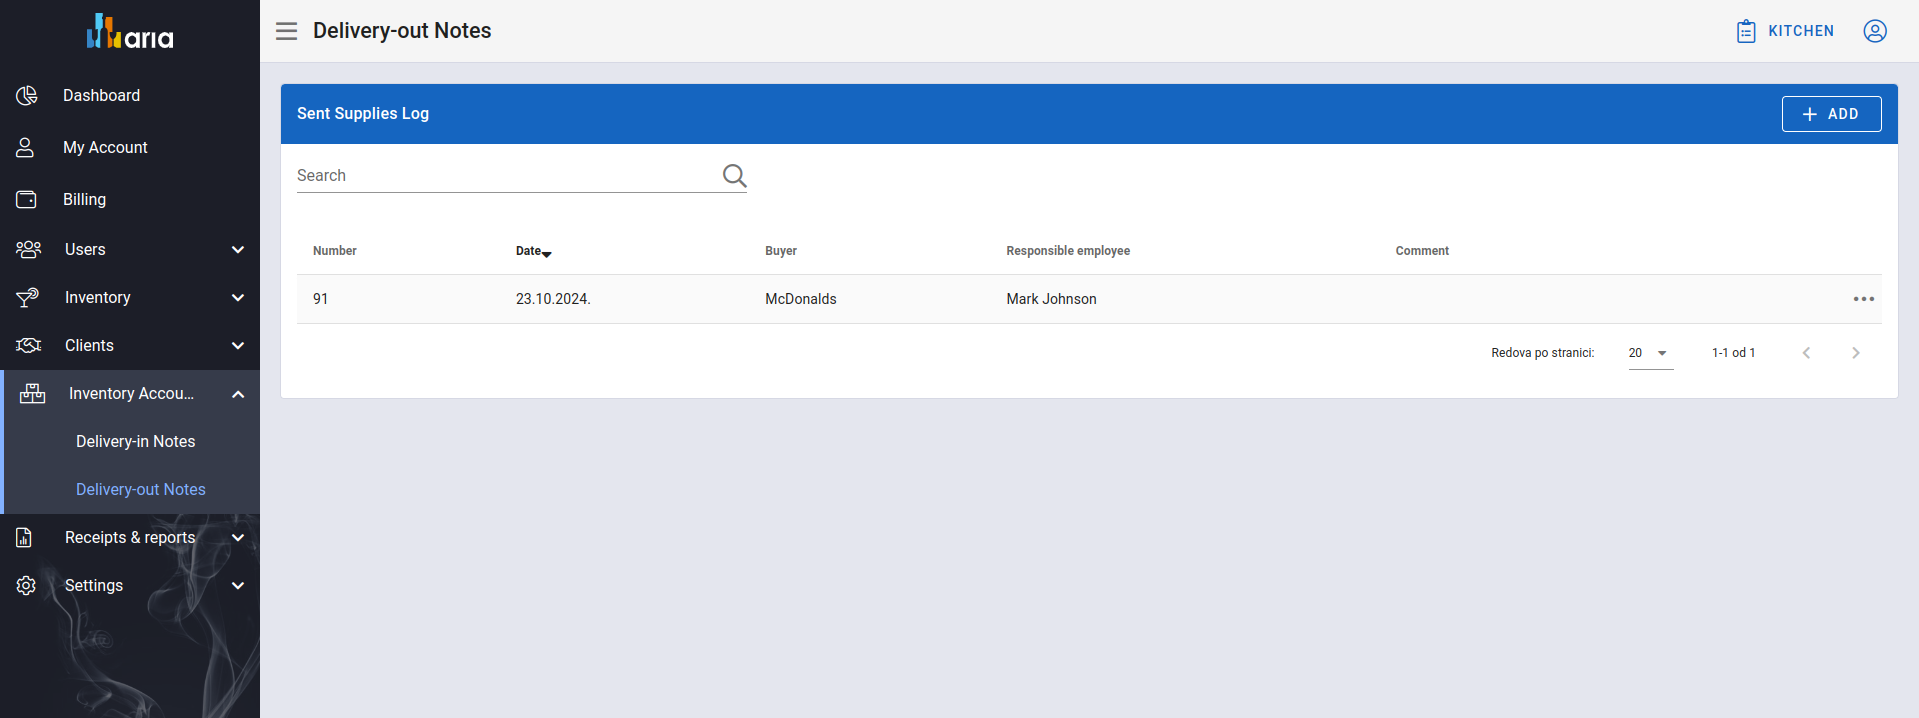
Delivery out notes
Add Delivery Out Note
By clicking the ADD button located in the top right corner of the delivery out notes table (see the image above), a form for adding delivery out notes will open:
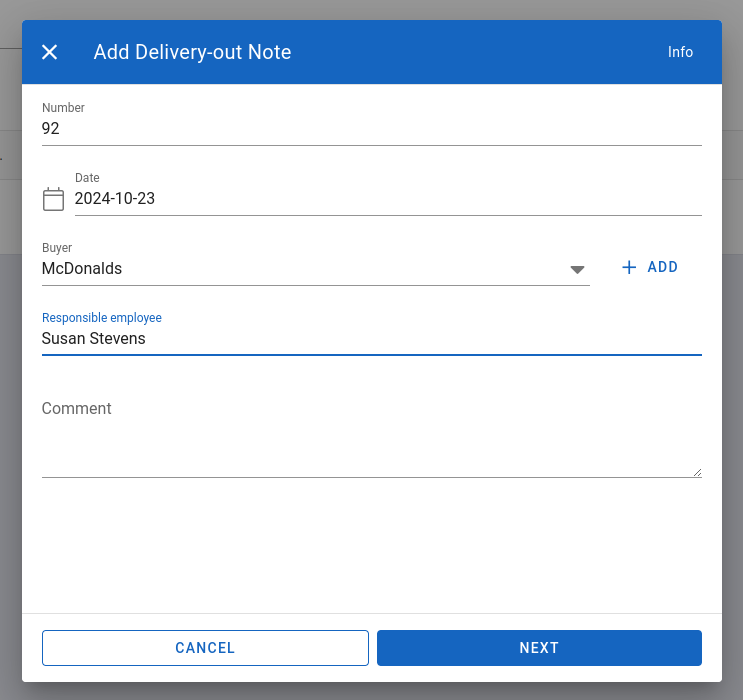
First part of the form for adding delivery out notes
The first part of the delivery out note addition form looks like the image above when filled out. By clicking the NEXT button, we proceed to the second part of the form, where fields for entering quantities of specific items are located:

Second part of the form for adding delivery out notes
In the Search field, you can search for the desired item that was previously entered in the items section. Once you find the item, click on it, select the quantity, and finally selectthe ADD option.
When the ADD button is clicked, the form will look like this:
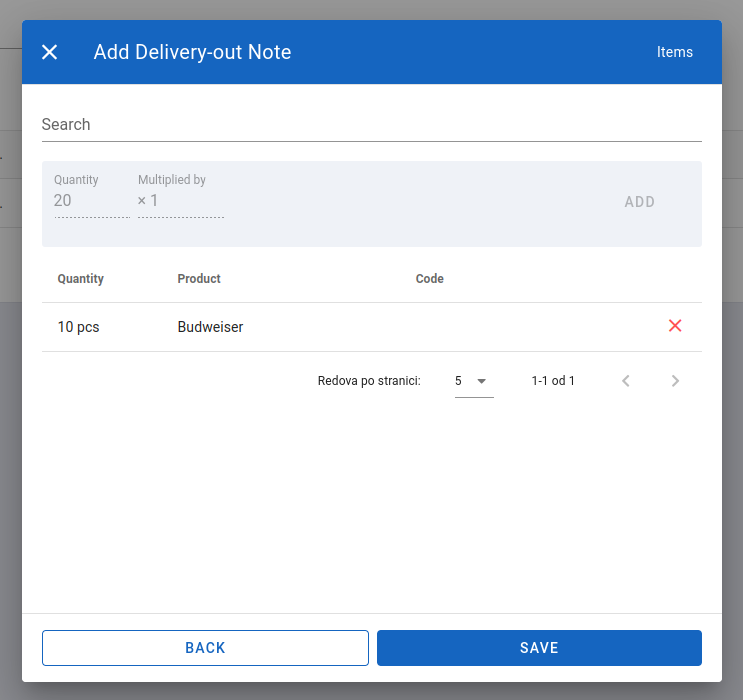
Successfully filled second part of the form for adding delivery out notes
There can be multiple items in this table. After entering all items for the given delivery out note, clicking the SAVE button will successfully save the entered delivery out note data.
Options for Delivery Out Note Management
At the end of the row in the delivery out notes table, there are three dots representing options for managing a specific delivery out note:
Options for managing delivery out notes
Delivery Out Note Details
By clicking on Details, the following will be displayed:
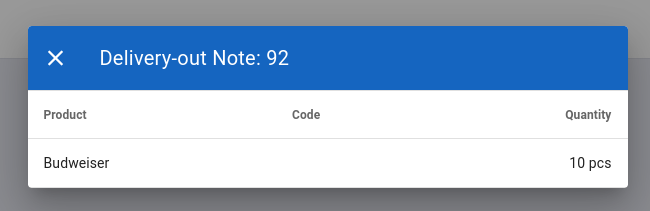
Details of the delivery out note
Printing Delivery Out Notes
By clicking on PRINT, a window for printing the delivery out note in the following format opens:
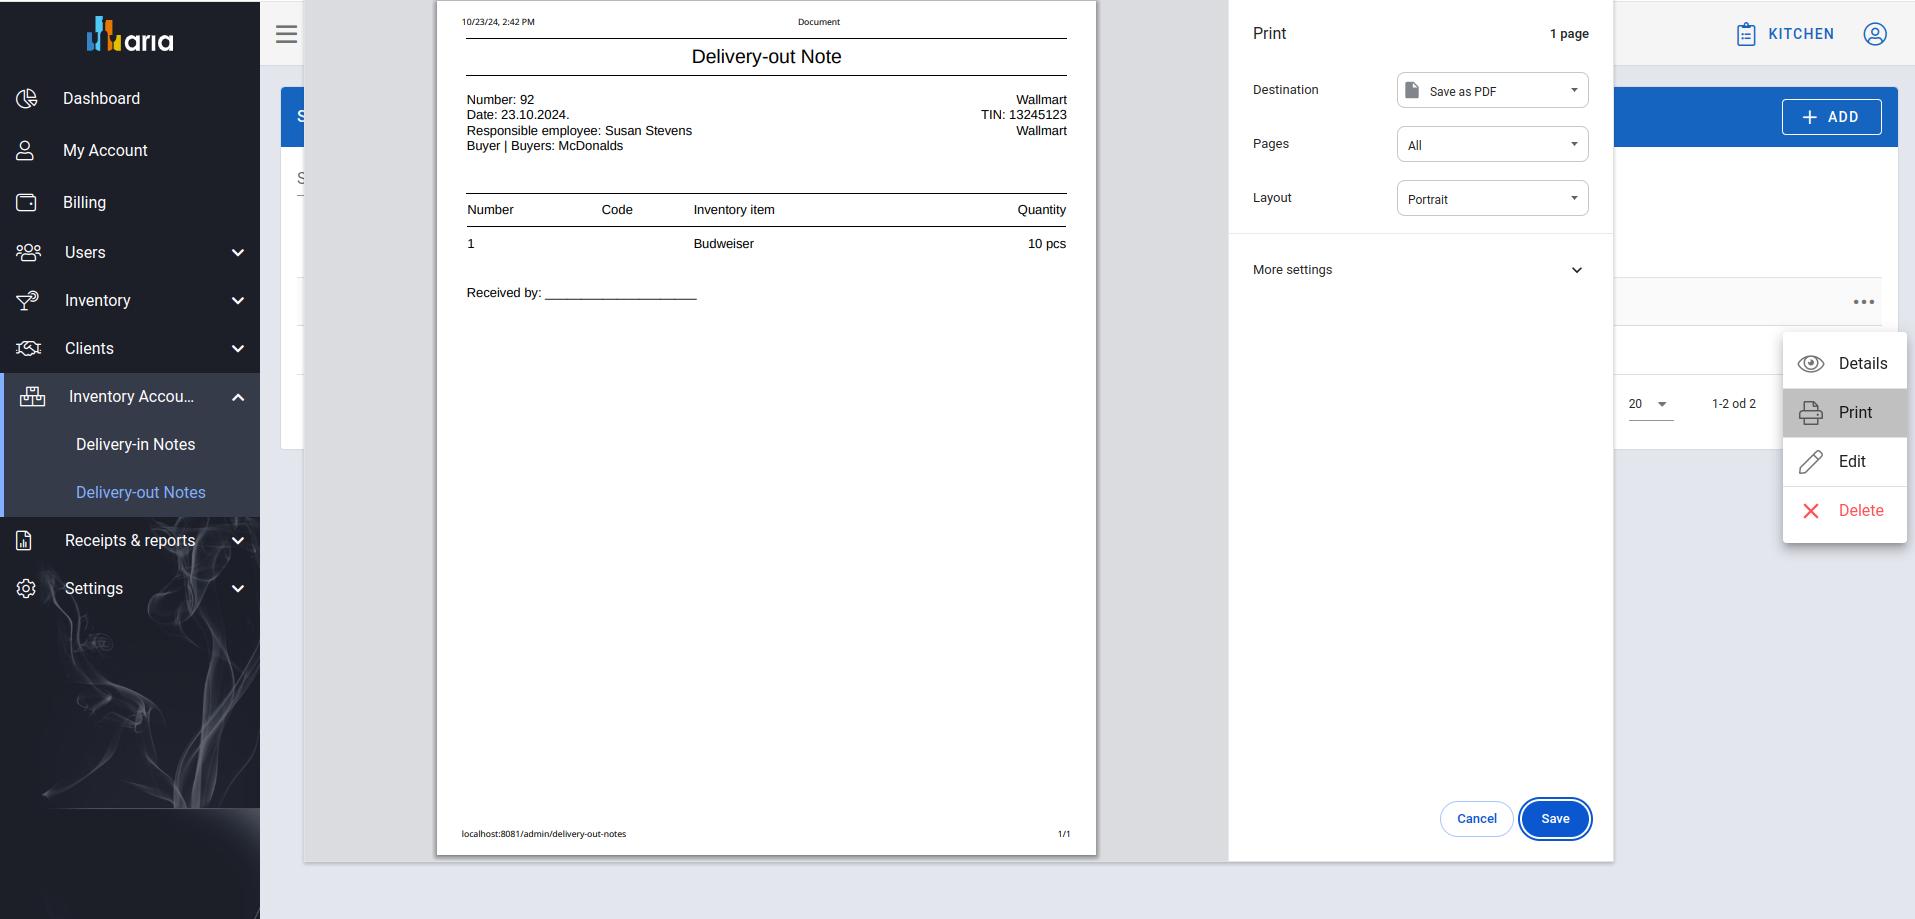
Window for printing the delivery out note
Edit Delivery Out Notes
By clicking the Edit option, a form with pre-filled data of the selected delivery out note will open:
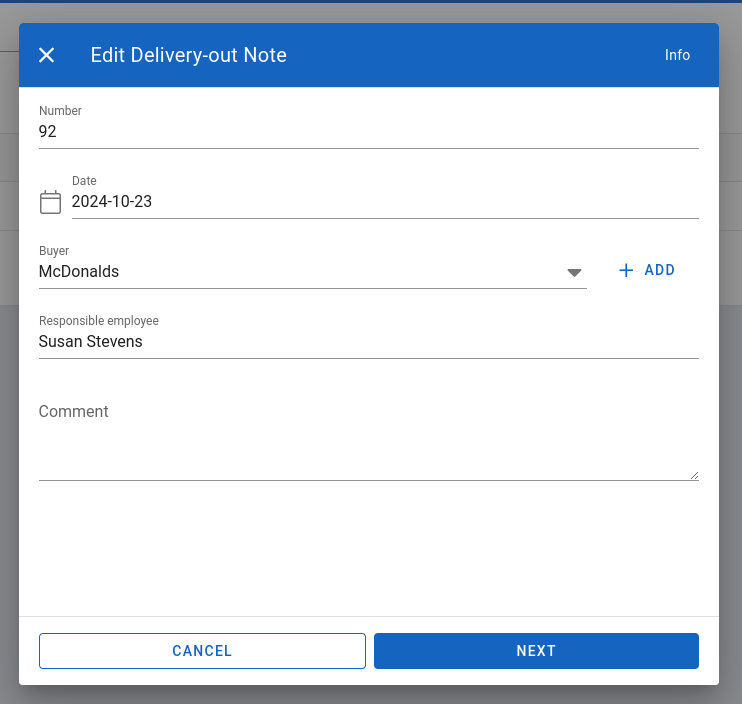
First part of the form for editing the delivery out note
To proceed to the second part of the form, click the NEXT button:
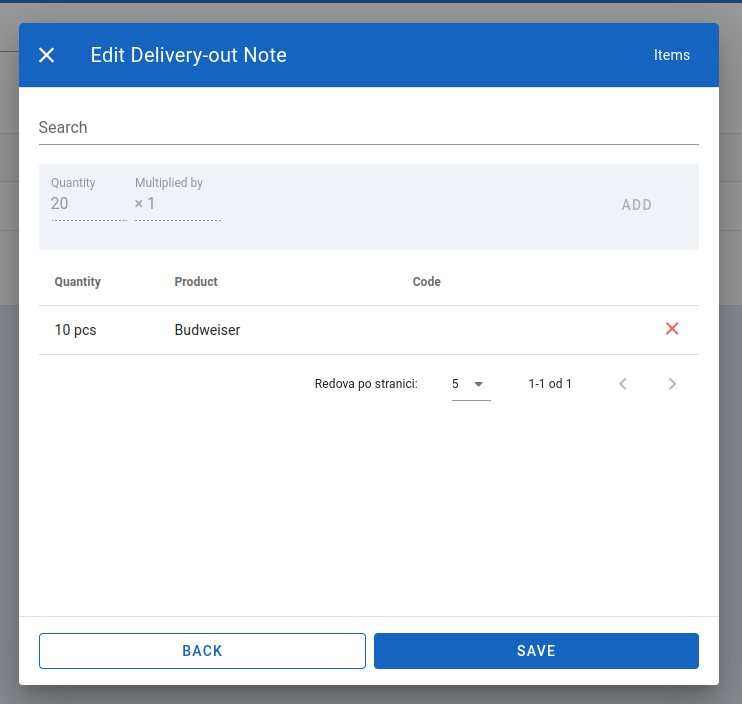
Second part of the form for editing the delivery out note
We can add new items to the delivery out note list or delete old ones by clicking the X icon.
When we are sure we have edited the appropriate fields of the selected delivery out note, clicking the SAVE button will successfully save the changes.
Delete Delivery Out Notes
By clicking the Delete option from the delivery out note management options, a confirmation window for deletion will open:
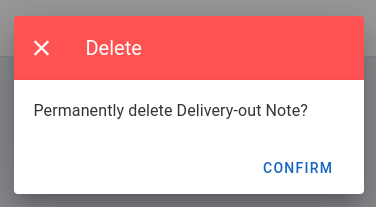
Window for confirming the deletion of the delivery out note
Upon confirmation, the delivery out note will be permanently deleted from the system.
Beginning Inventories
Next up is the Beginning Inventories, which displays a list of all booked and unbooked beginning inventory states:
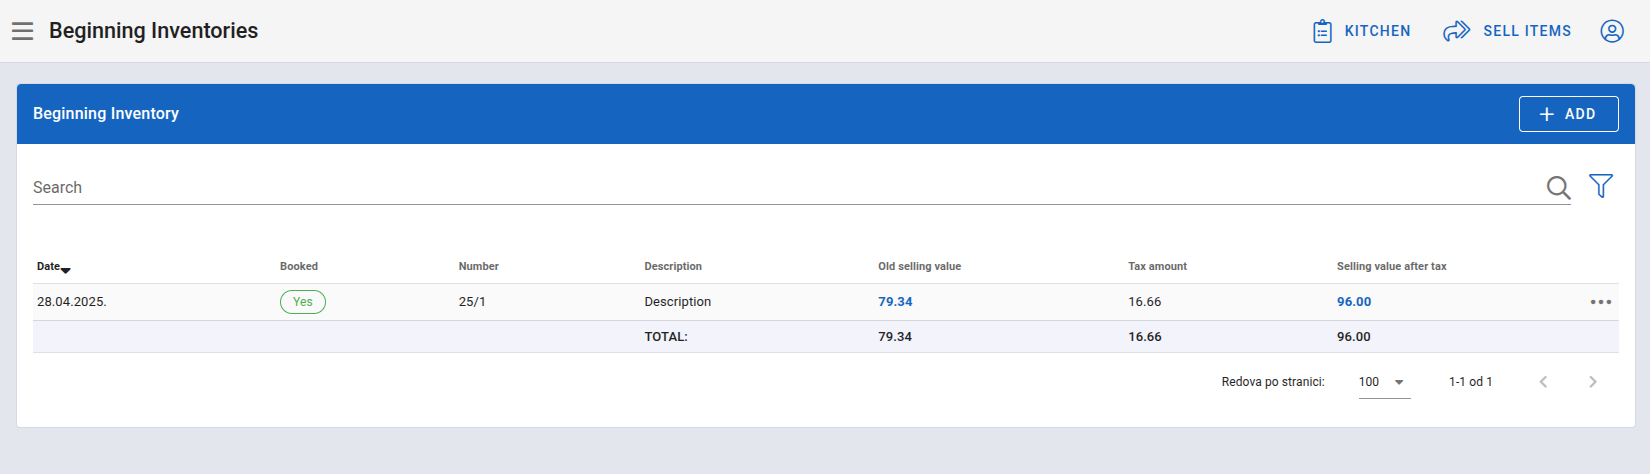
Beginning inventory states of all items
Search and Filter Beginning Inventories
Searching is done by entering the description of the initial item in the Search field located above the table. In addition to manual searching, you can also search by clicking the funnel icon located to the right of the Search field.
By clicking the funnel icon, an area for additional filters will open above the table, as shown below:
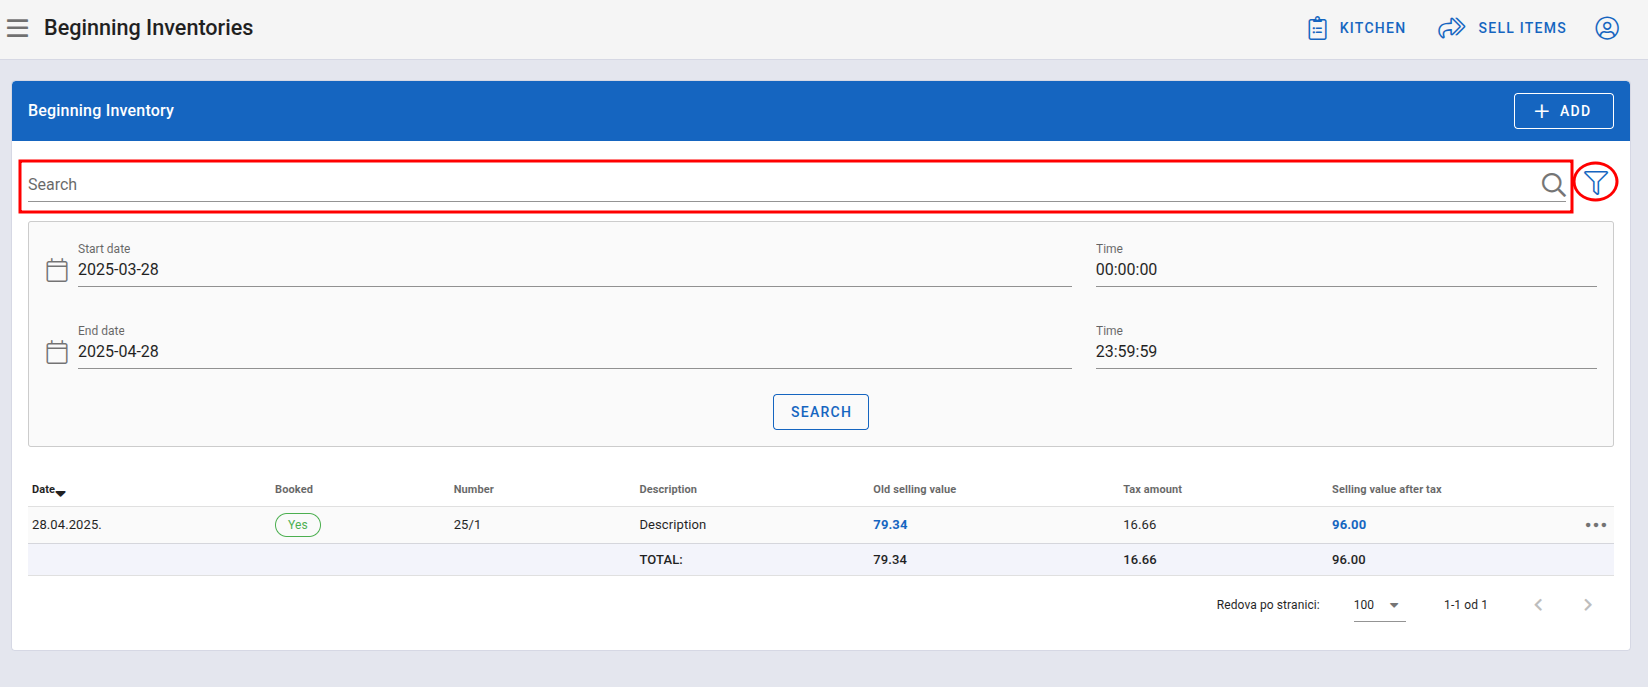
Additional filters
Here you can search by start and end date, as well as time for those two dates. After selecting the desired values for these filters, click the SEARCH button, and the system will perform the search, displaying the results if successful.
Add New Beginning Inventories
By clicking the ADD button located in the top right corner above the table, two options will appear:
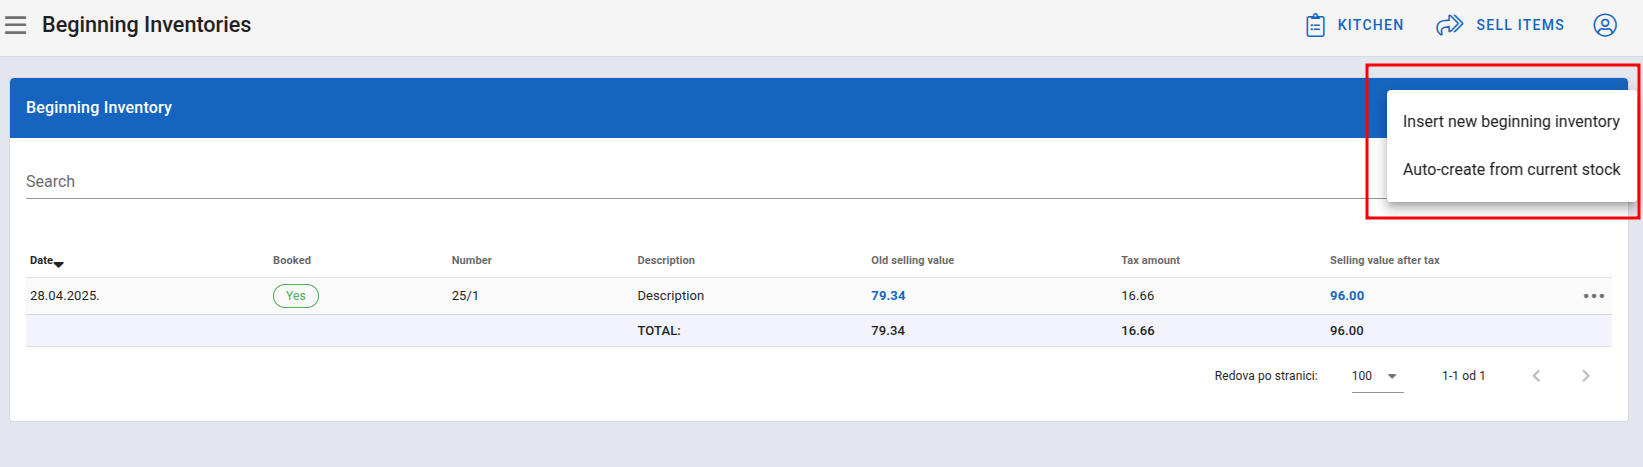
Options for adding new beginning inventory
Insert New Beginning Inventory
If you choose the first option, the following screen will be displayed:
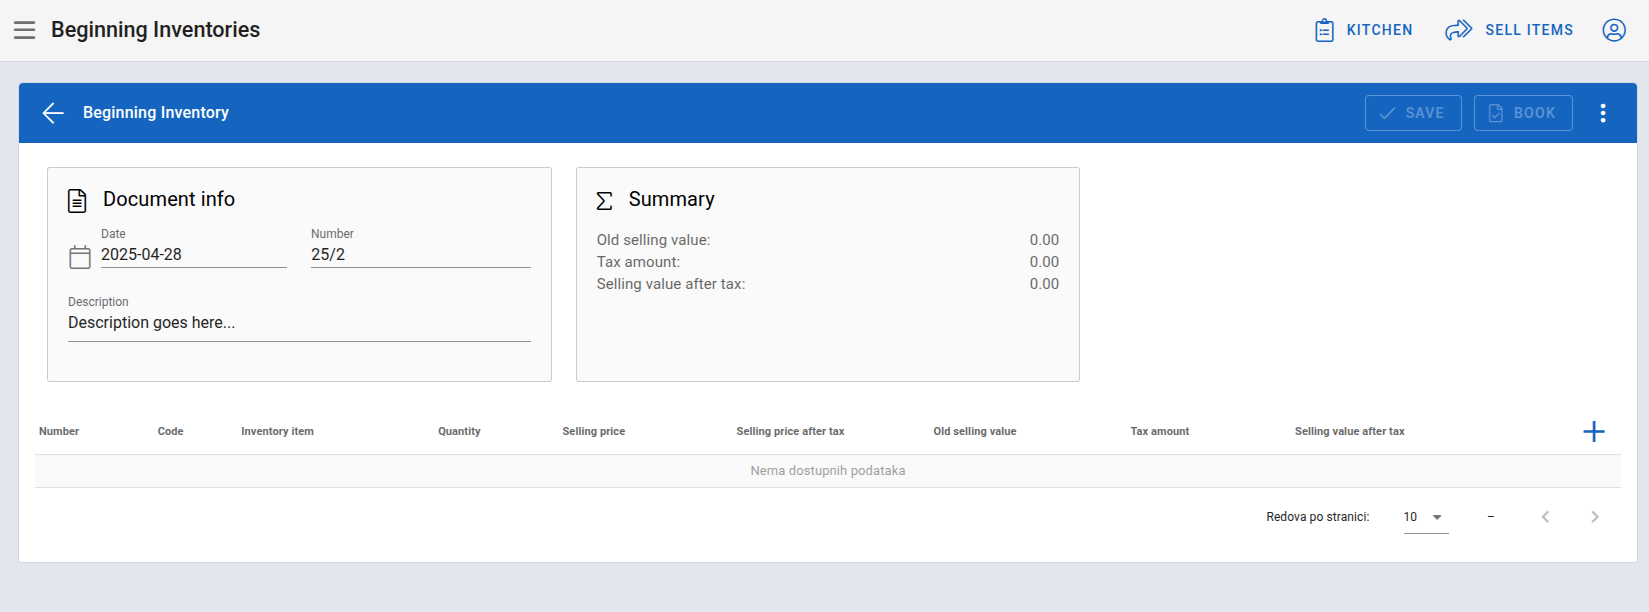
Overview and adding new beginning inventory
On this page, it is possible to create initial states for a specific item and the option to book or book that document.
By clicking the + icon located in the middle of the screen on the right side below the form, the form for adding the initial state of the item will open:
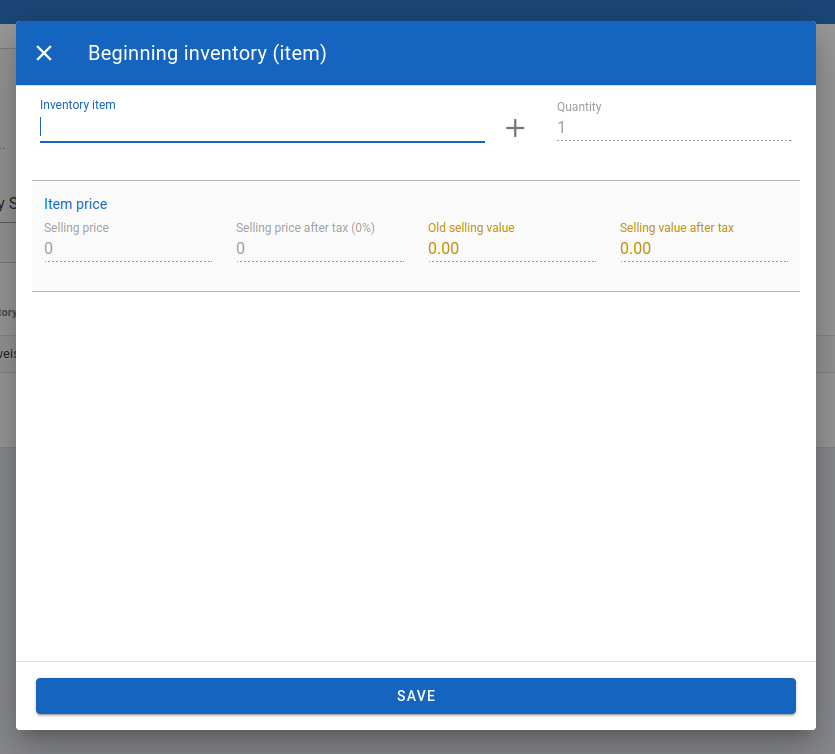
Form for adding the initial state of an item
For example, if we want to enter that the initial state for Carlsberg is 100 units:

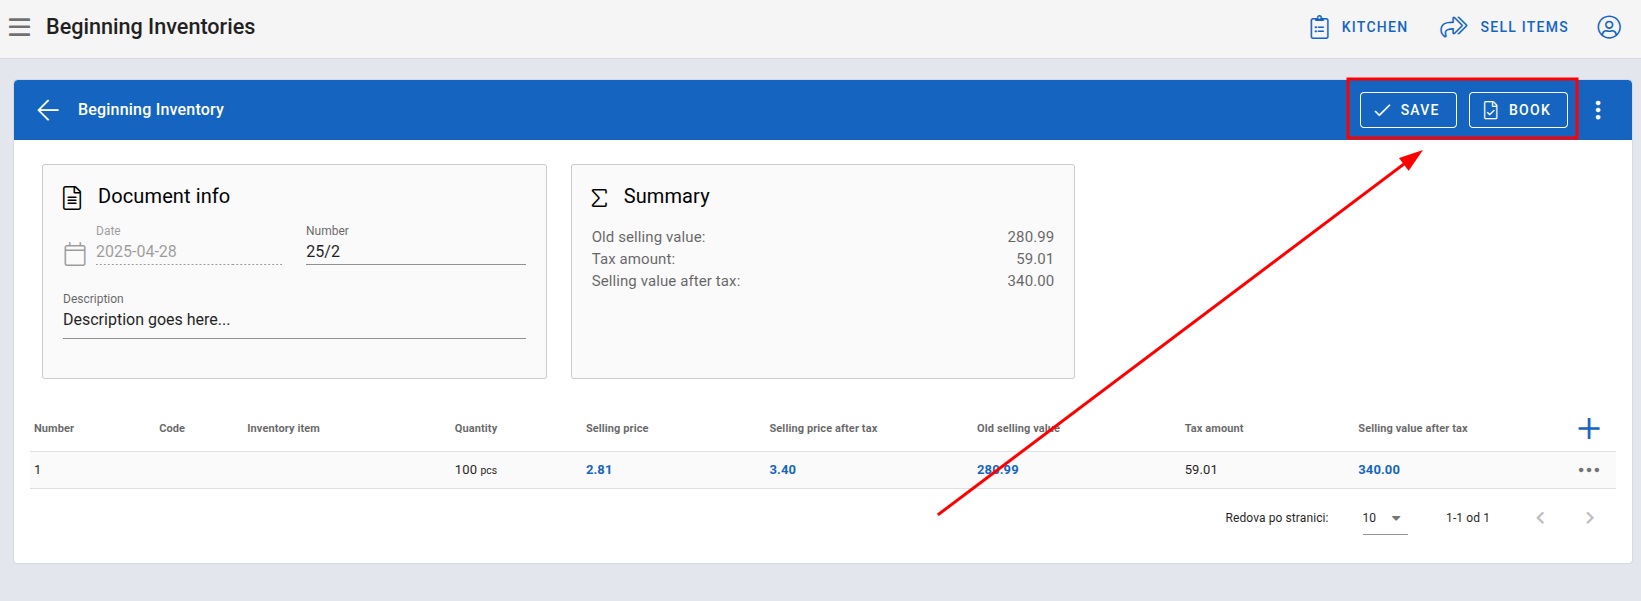
Completed form for adding the initial state of an item
By clicking SAVE, we will save the new initial state. After that, the initial state of that item will be displayed in the table.
Book Beginning Inventory
Next, it is possible to book the document. To do this, in the form above the table, you can optionally enter a Description (not mandatory), a Number, and then click the BOOK button:
Book option
This will book the document.
If you, however, do not want to book it, you can click the SAVE button. This will save the previously entered initial states of the items without posting them.
Auto-Create From Current Stock
By clicking the second option, the system will automatically create beginning inventory based on the current stock.
Options for Beginning Inventory Management
At the end of the row in the beginning inventory states table, there are three dots representing options for managing the beginning inventory :
Options for managing the beginning inventory
Print Beginning Inventory
By clicking the Print option, you can print the beginning inventory.
View Beginning Inventory
By selecting the View option, you display the details of the beggining inventory state, as well as the status of whether the document has been previously booked or not. If the document has been booked, there will be an option to UNBOOK it.
If it has not been booked, the option to book the document will be available.
Delete Beginning Inventories
NOTE: Only beginning inventory states that are not booked can be deleted.
By clicking the last option Delete, a confirmation window for deletion will open:

Confirmation window for deleting the beginning inventory
By confirming, the beginning inventory will be permanently deleted from the system.
Price Calculations
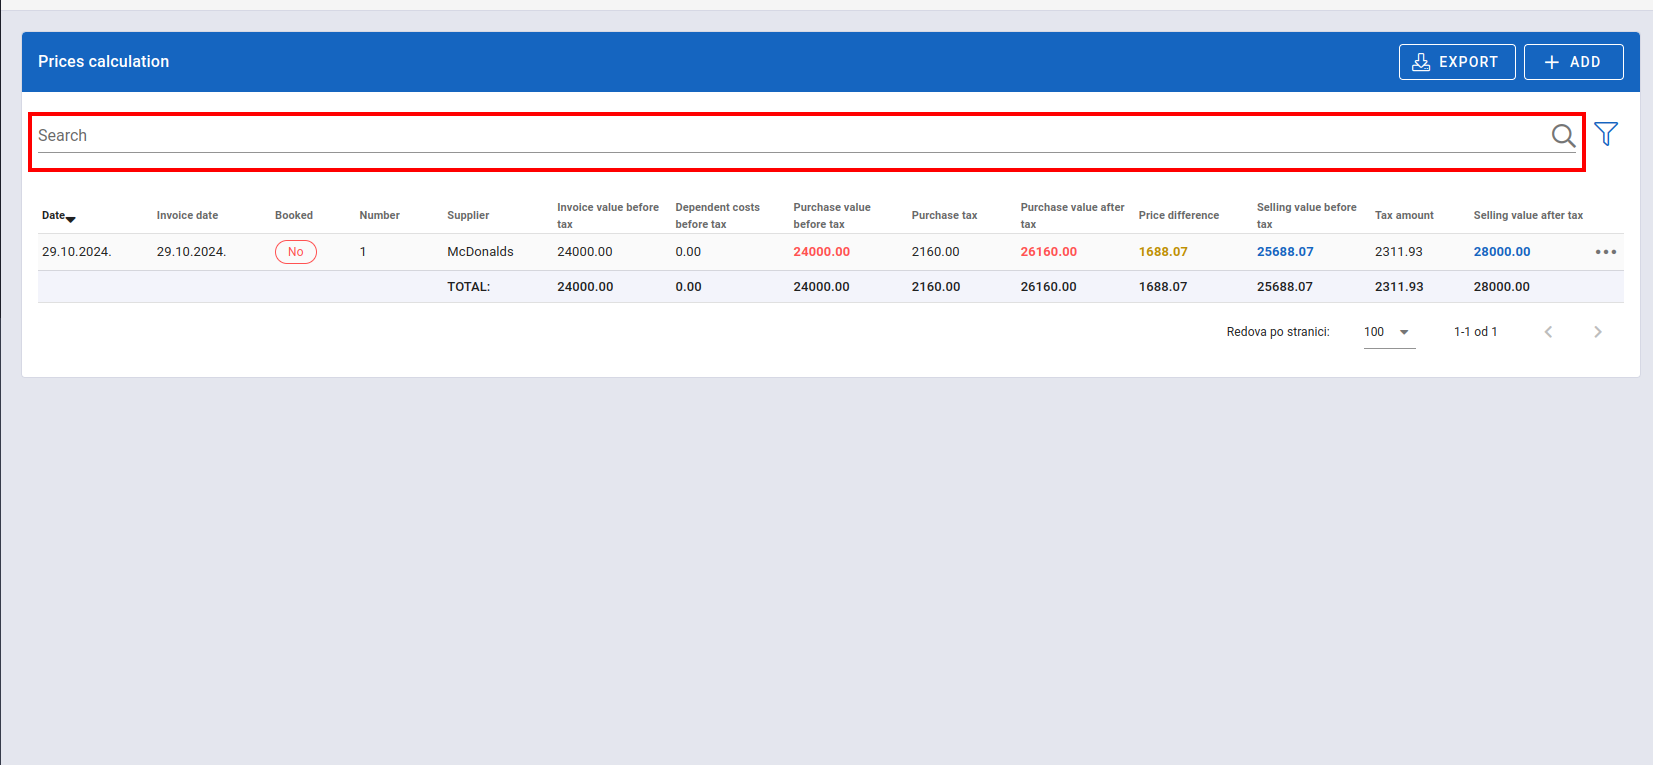
The Price Calculations page displays a list of documents that show the difference between purchase and sale prices.

Price Calculations
The purchase value is displayed in red.
The sale value is displayed in blue.
The price difference is displayed in yellow.
Search and Filter Price Calculations
Search by description or number by entering a search term in the Search field:
Search Field
Advanced search is enabled by clicking on the funnel icon:
Funnel Icon
A section above the price calculation table will open where filters are displayed:
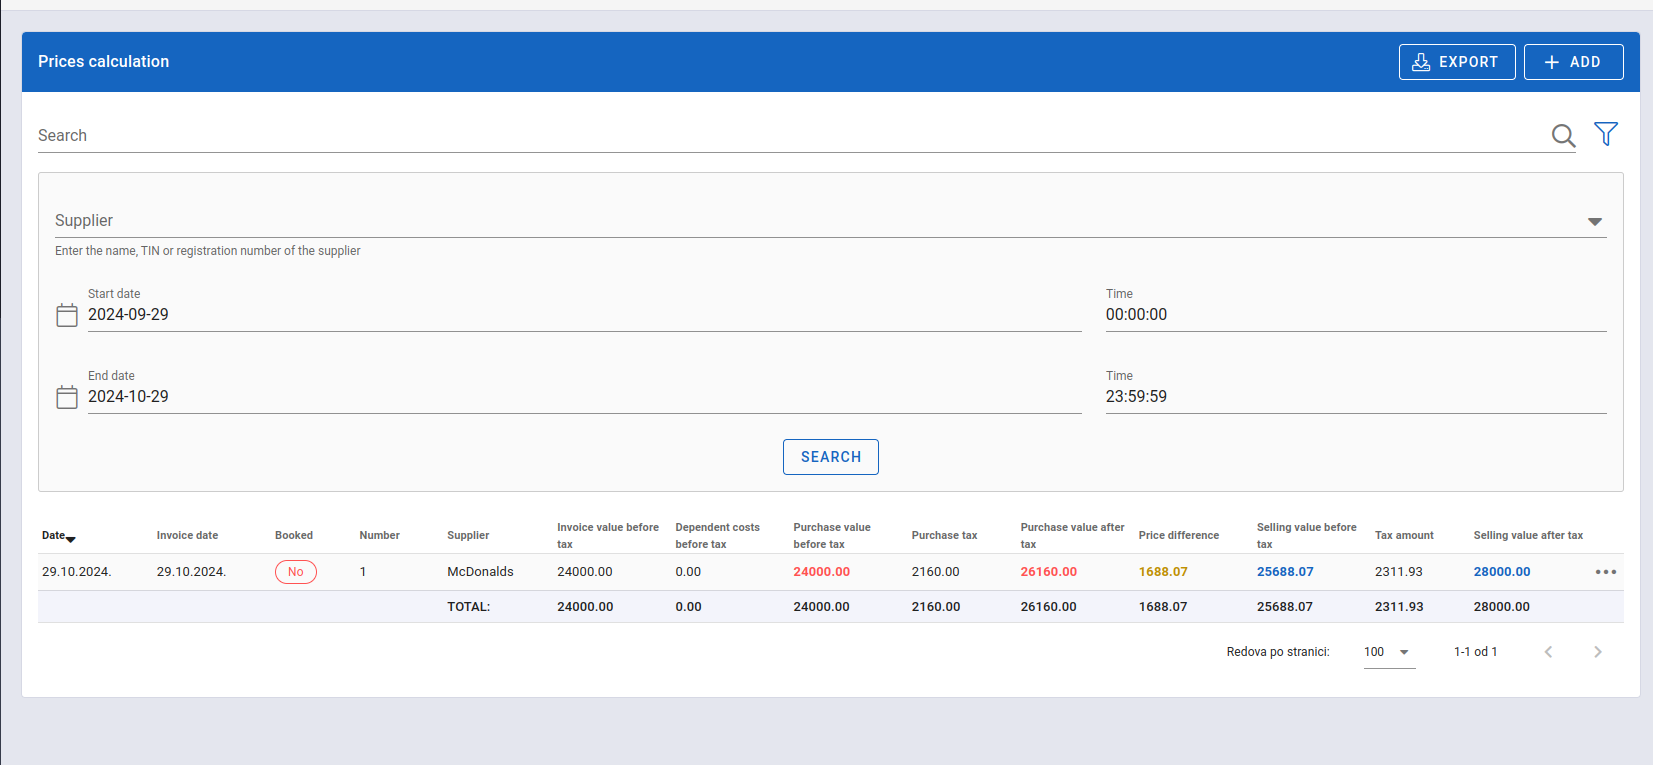
Filters
In addition to filters for start and end date and their time, it is also possible to search by supplier by entering the name in the first Supplier field. After selecting the desired filters, click SEARCH to perform the search.
Export Price Calculations
Above the table, on the right, there are two buttons, EXPORT and ADD. By clicking Export, an Excel file with all price calculations will be downloaded to your computer.
Add Price Calculation
Clicking on the ADD button opens the page for creating a new price calculation:
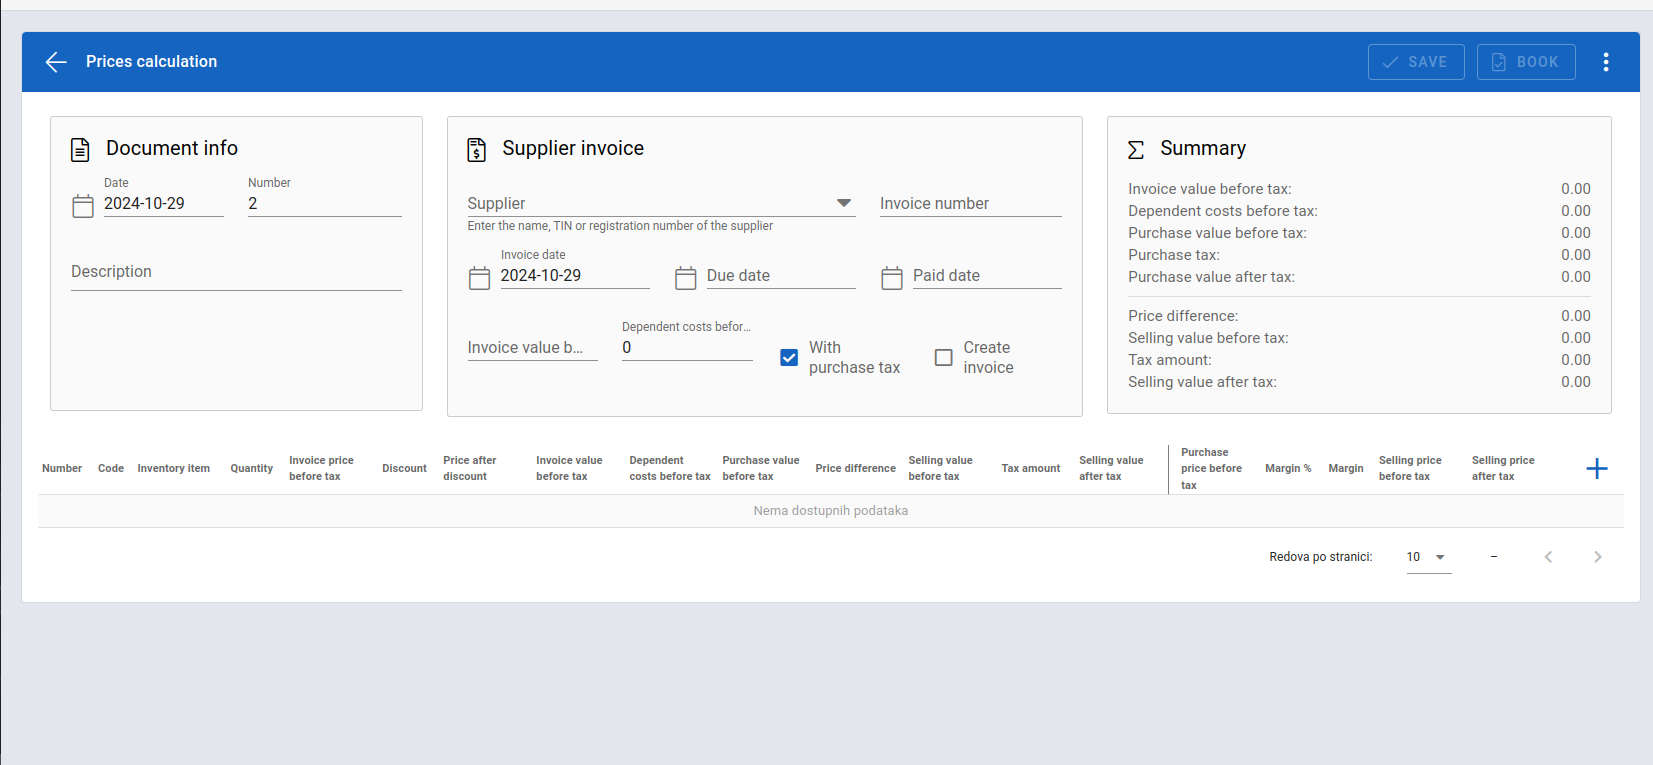
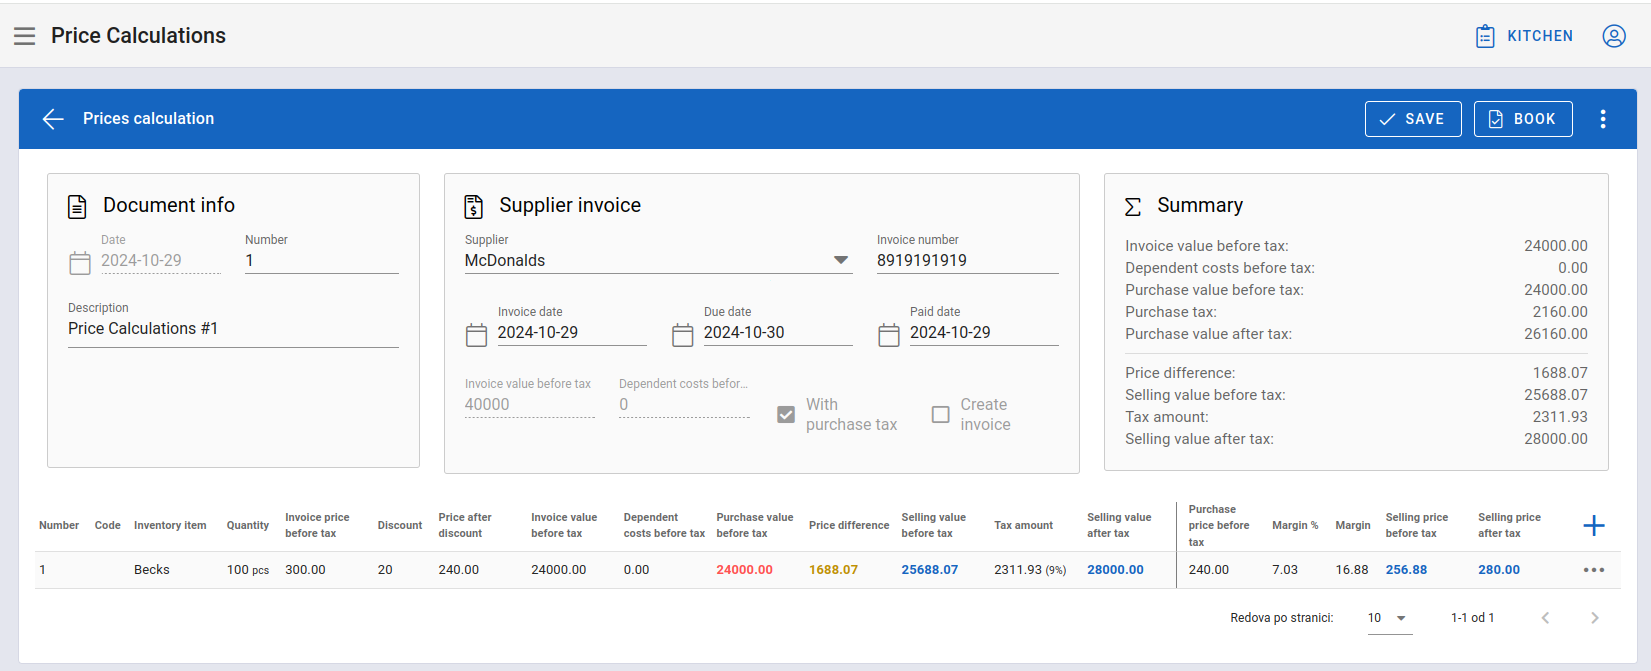
Page for Adding a New Price Calculation
The page consists of several parts. The first part contains general information about the document, displayed above the table in the previous image. First, fill in the information about the Document number and description. Then, enter details related to the Supplier Invoice.
After filling out these two sections, the form should look like this:
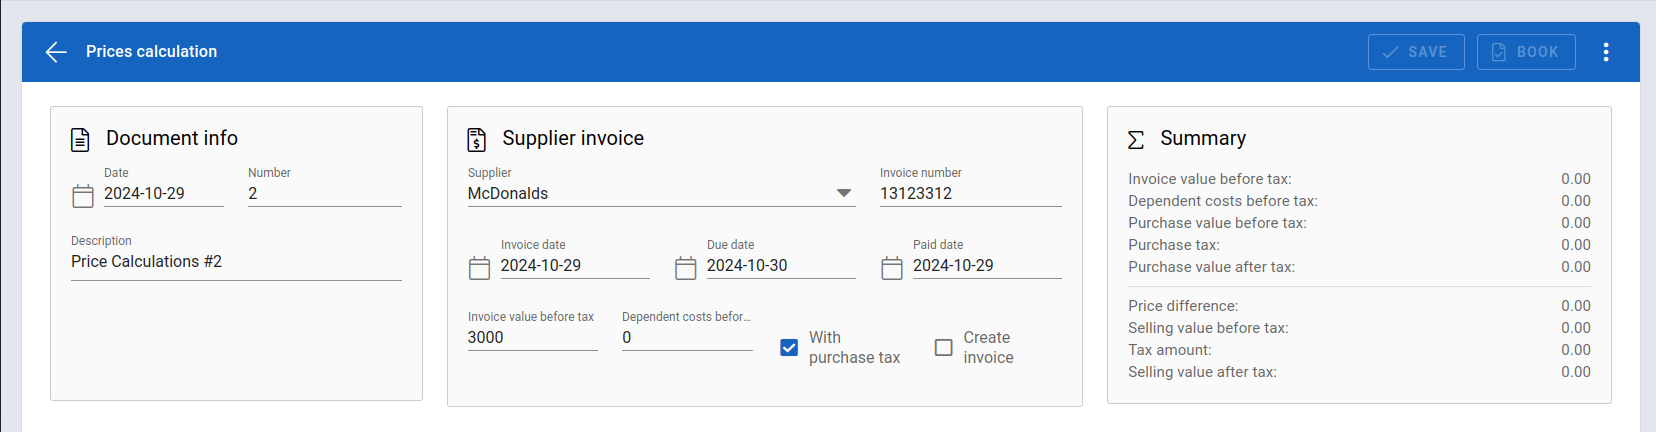
Completed First Part of the Price Calculation Form
Next, add items to the document for which we are calculating the price. Click on the + icon at the bottom right below the filled form:
+ Icon
A window for calculating the item price will open:
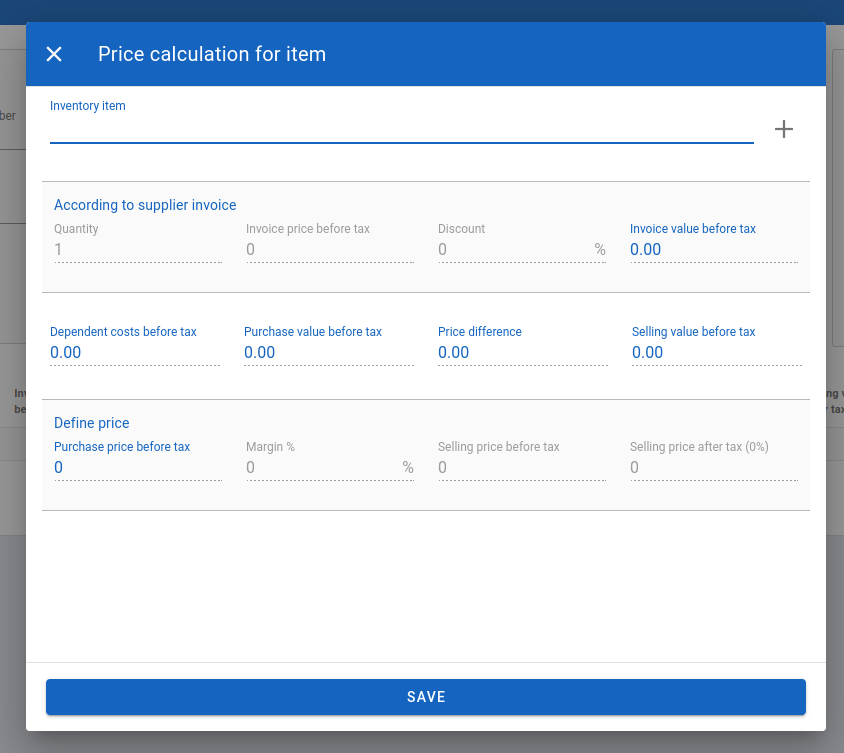
Item Price Calculation Window
First, enter the item in the Inventory Item field. It is also possible to create new items by clicking the + icon next to the item field, which will open a form as explained in the section for adding items.
Next, enter the item quantity, the invoice price before tax, discount and invoice value before tax.
A completed item price calculation form looks like this:
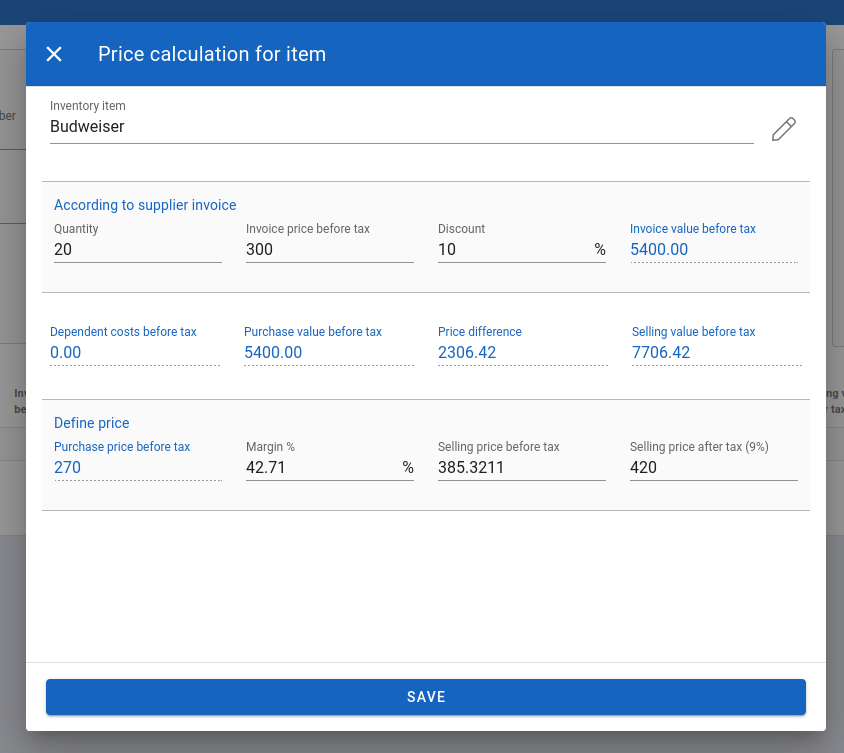
Completed Item Price Calculation Form
Click SAVE to add the item price calculation to the document. The page will then look like this:
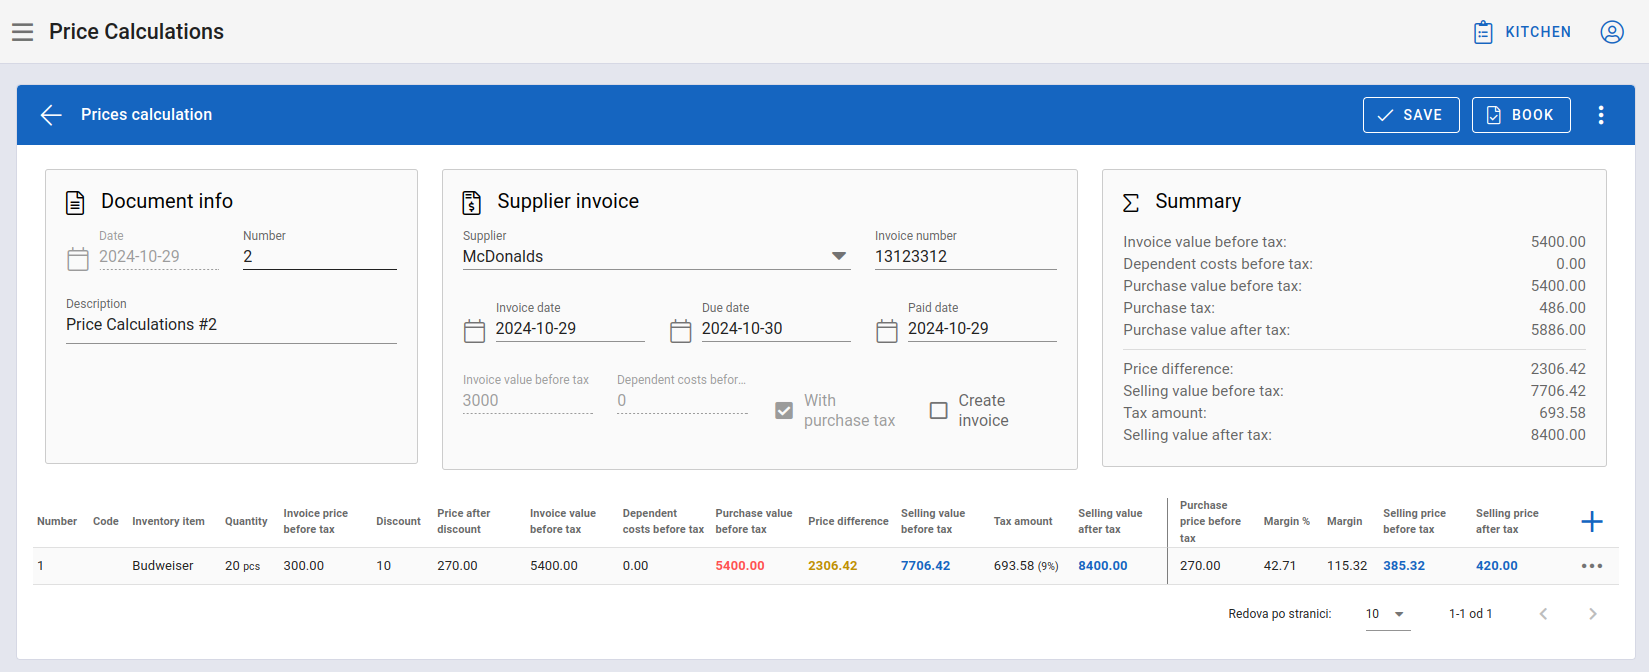
Page After Completing Both Forms
The document can then be SAVED and BOOKED. These two options are located in the top right corner above the form:
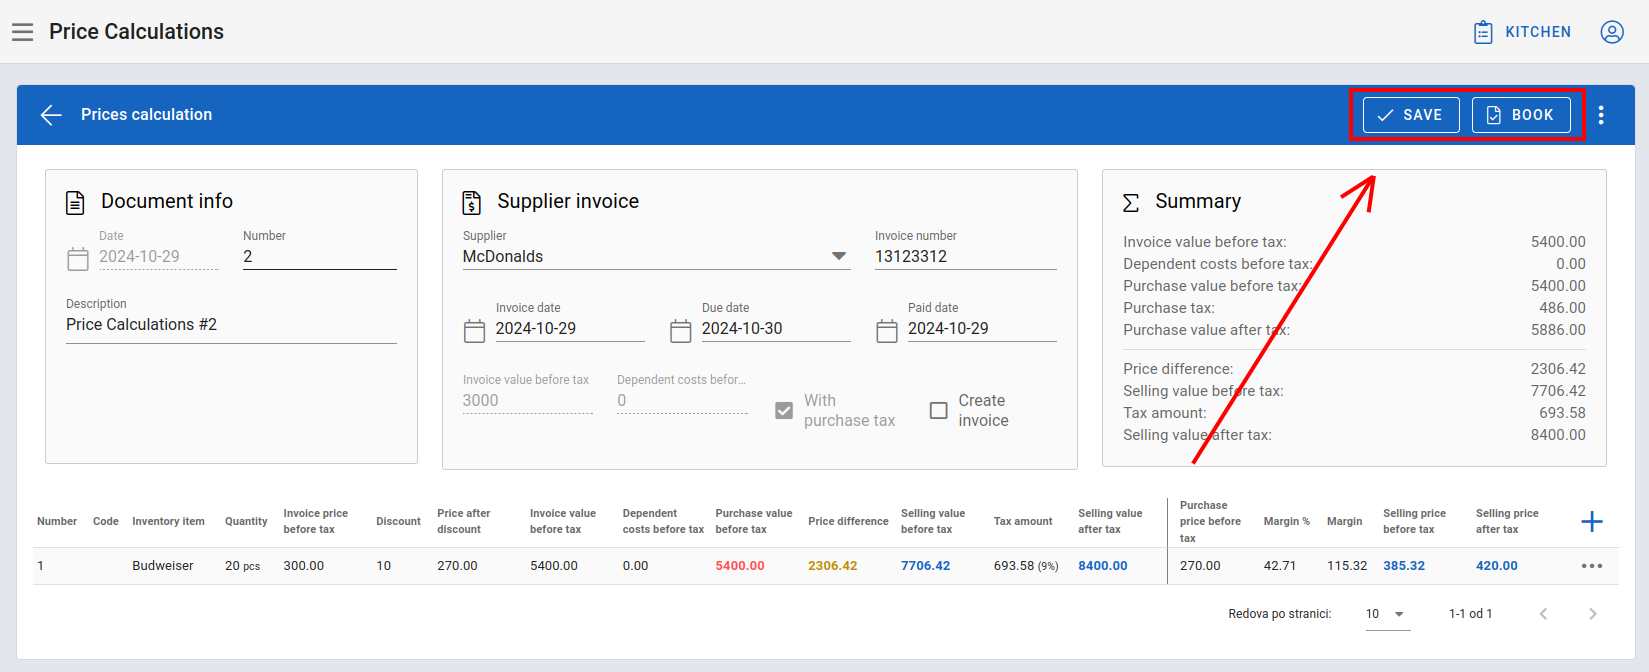
Save and Book Options
Clicking on the three dots next to these options allows the option to print the document. This action is only possible if the document is booked.
In our case, we will book the document. After posting, the application will take us to the main Price Calculations page.
Options for Price Calculations Management
To access price calculation management options, click on the three dots in the last column of the table.
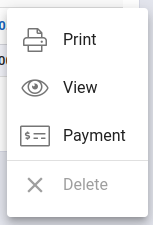
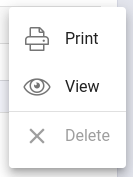
Price Calculations Management Options
NOTE: A booked document cannot be deleted.
NOTE: An unbooked document cannot be printed.
Print Price Calculation
Clicking on the first option will open a window for printing the price calculation document in the following format:
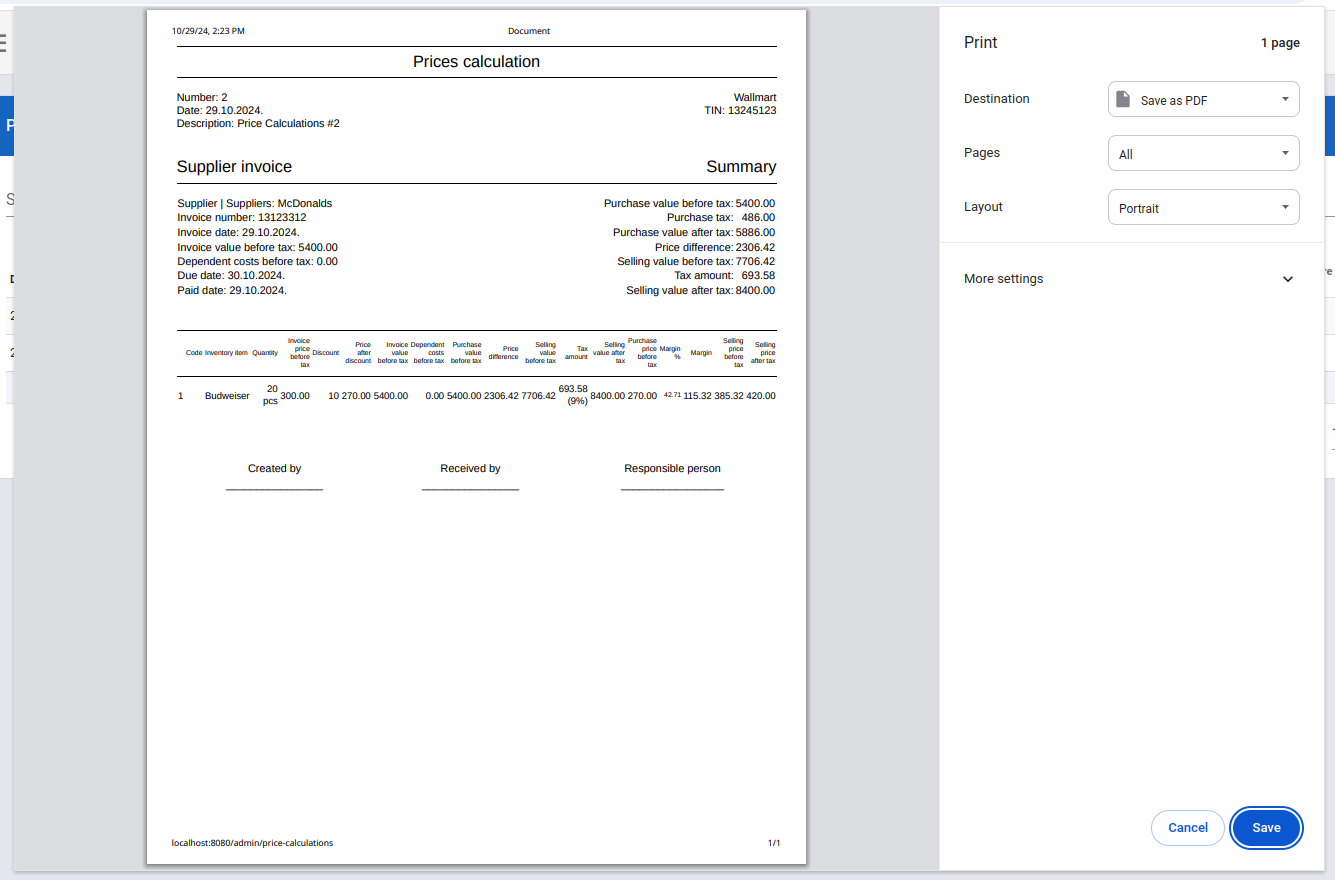
Print Screen
View Price Calculation
If we select the second option View, there are two cases:
- Viewing a booked document
- Viewing an unbooked document
When viewing a previously booked document, the following screen will appear:
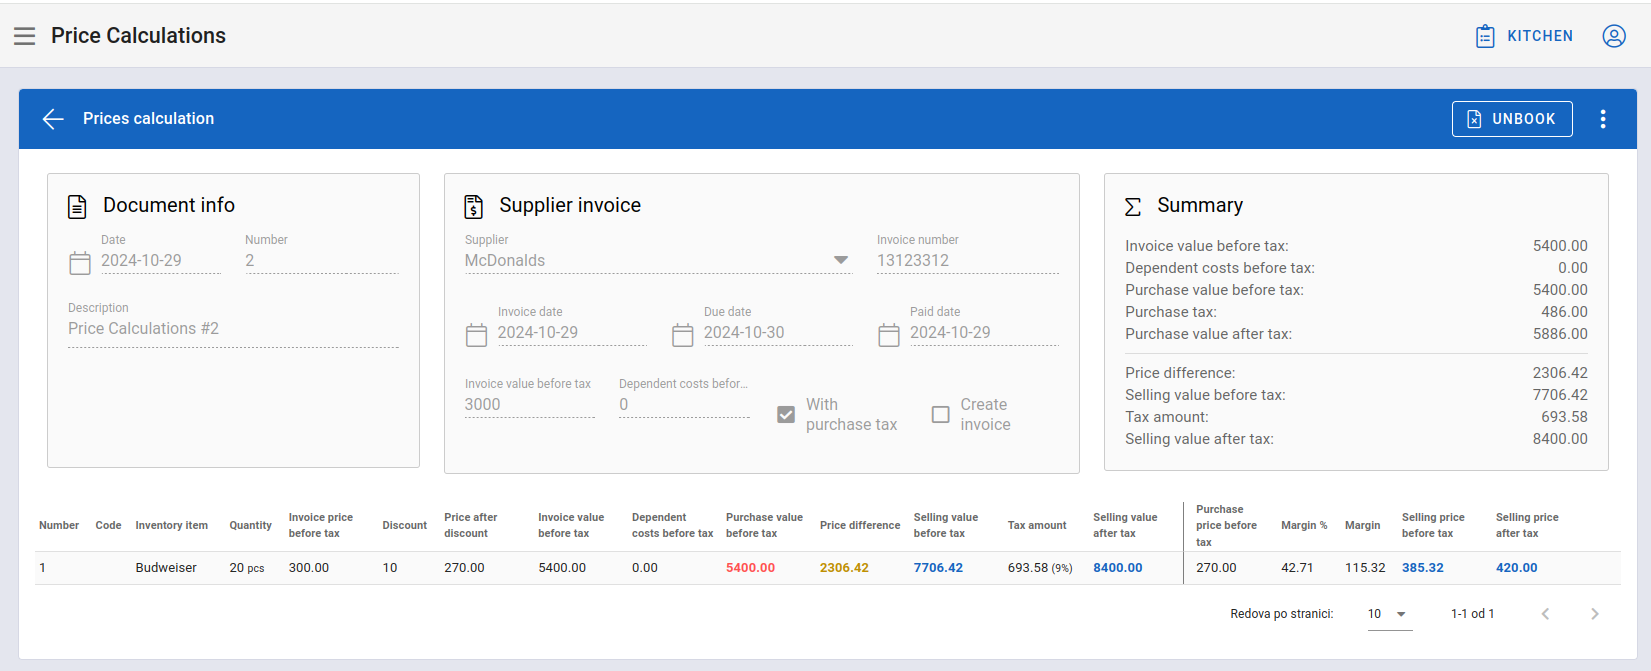
Page for Editing a Previously Posted Price Calculation Document
Here we can see that editing the document is not possible until it is unbooked. This option is available by clicking the UNBOOK button in the upper right corner.
On the other hand, when viewing a price calculation that was not previously booked, the following screen will appear:
Page for Editing a Previously Unbooked Price Calculation Document
For an unbooked document, it is possible to:
- book the document by clicking the BOOK button in the upper right corner
- edit document information and supplier invoice details
- add new items by clicking the '+' icon above the table on the right
- modify or delete existing price calculations for items
The last action, modifying or deleting existing price calculations for items, is done by clicking the three dots in the last column of the item table for the item we want to edit or delete. Options for managing that item will appear:
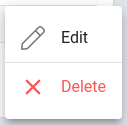
Options for Managing Item Price Calculations
Edit Price Calculations for an Item
Clicking on the first option Edit will open a screen for editing the item's price calculation:
Edit Screen for Item Price Calculation
After making the desired changes, click SAVE to close the window and save the changes.
Payment
Selecting the Payment option opens a window where we define the payment date for our price calculation:
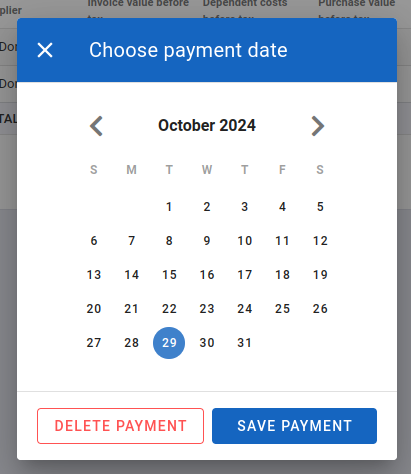
Payment Window
Clicking SAVE PAYMENT registers that the payment has been made.
Delete Price Calculations for Items
Deleting items from the price calculation list is done by clicking Delete from the options for managing the price calculation for the item.
NOTE: It is important that after making any changes to the price calculation, you click the SAVE button in the upper right corner to ensure that previous changes are saved.
Price Levelings
The Price Levelings page displays a list of all documents that record price changes for items:
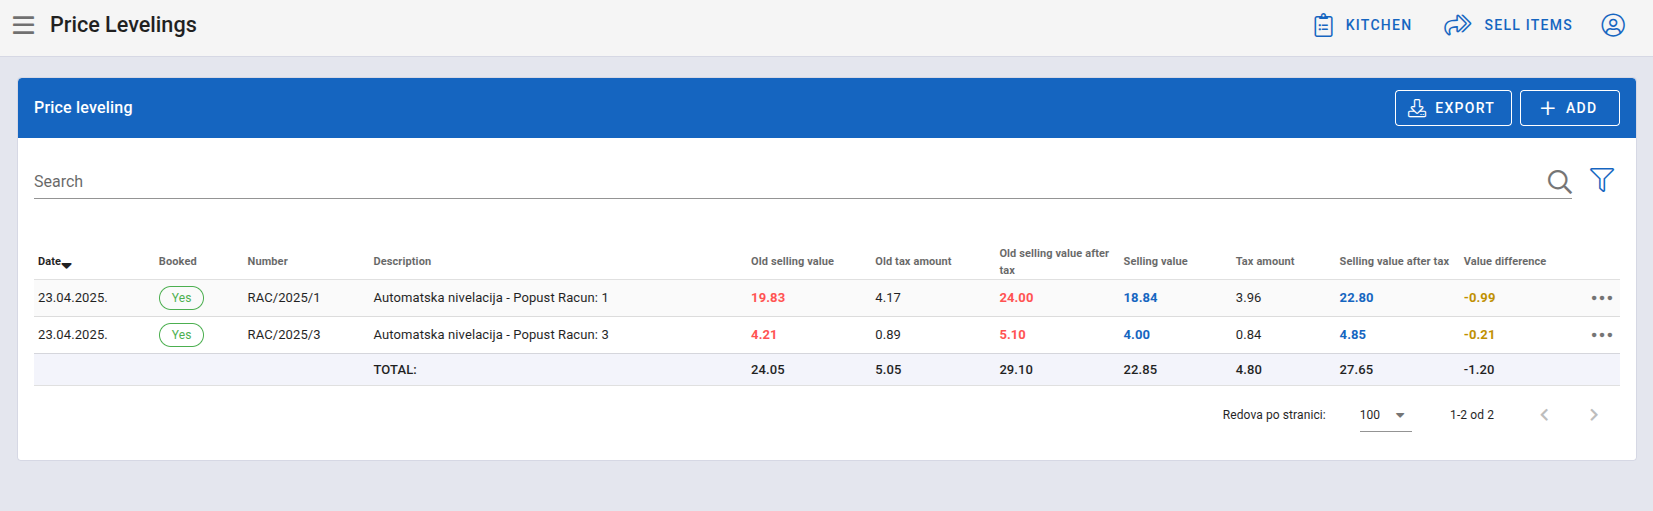
Price Levelings Page
The old selling value is shown in red, the current selling value in blue, and the value difference in yellow.
Search and Filter Price Levelings
Search by description or number by entering a term in the Search field above the table. In addition, advanced search is available by clicking the funnel icon. After clicking, a filter section for advanced search will appear above the table:
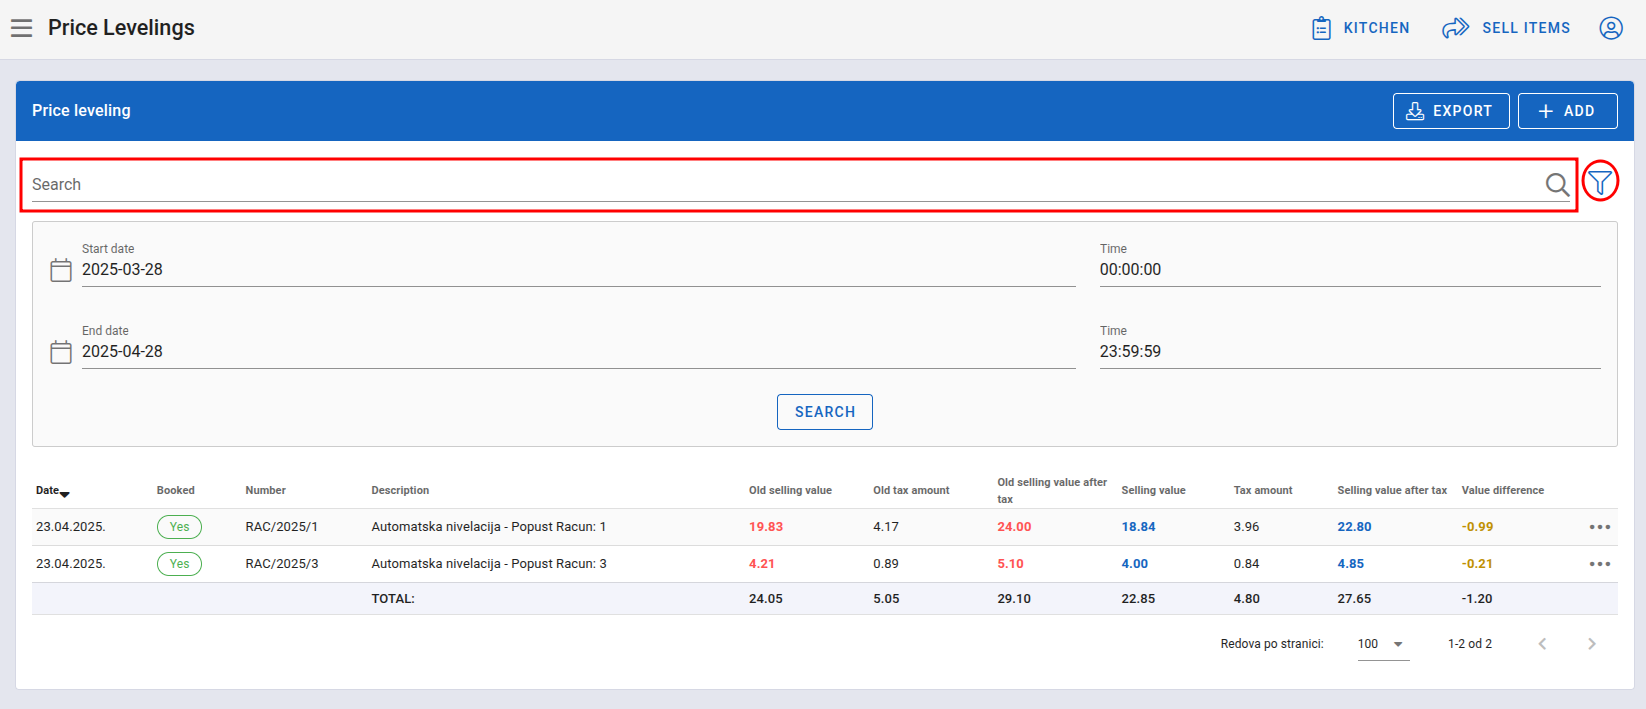
Filters for Advanced Search in Price Levelings
Here, you can search by start and end dates, and times of those dates. After selecting values for these filters, click SEARCH to retrieve results, if any are found.
Export Price Levelings
To save data from the table in an Excel file, click the EXPORT button:

Price Levelings Export Button
The file will then be downloaded to your device.
Add Price Leveling
To add a new price leveling document, click the ADD button next to the export button. The application will display the following screen:
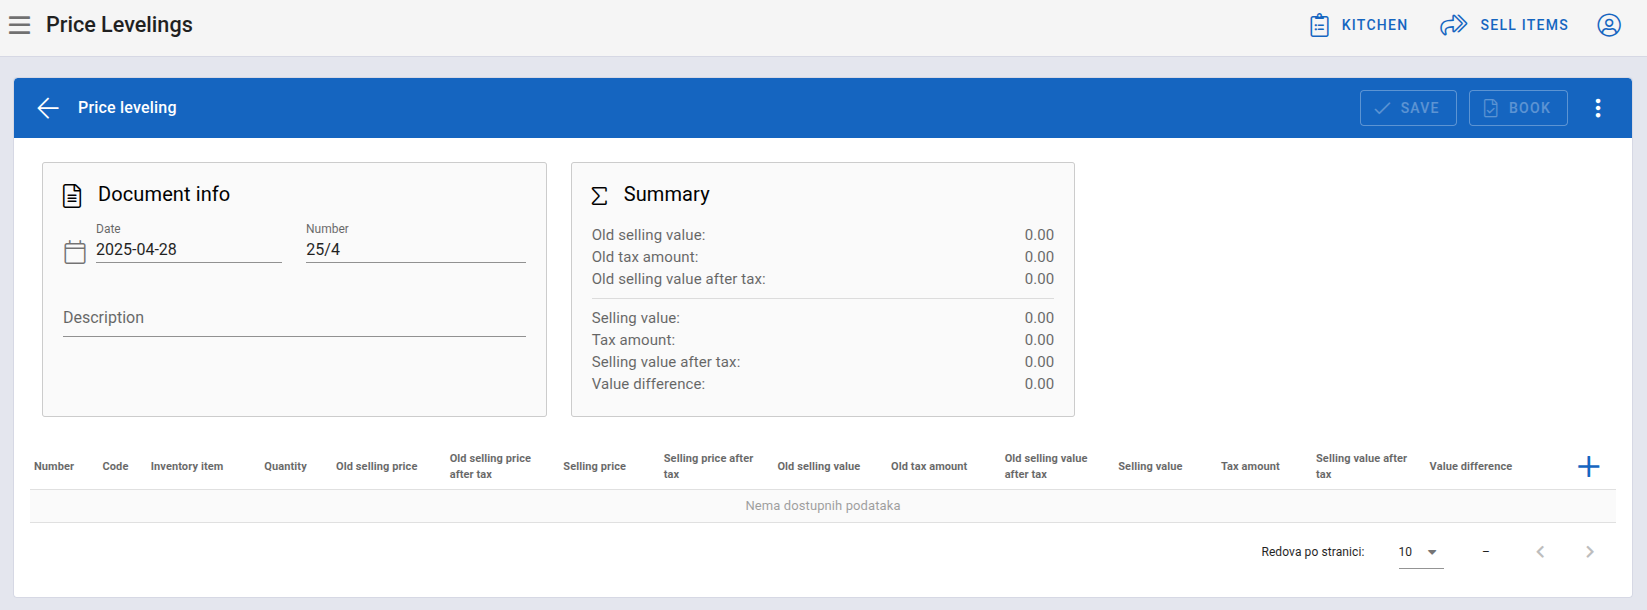
First Part of Form to Add a New Price Leveling Document
First, enter the basic document information: Date, Number, and Description.
After completing the first part of the form, it should look like this:
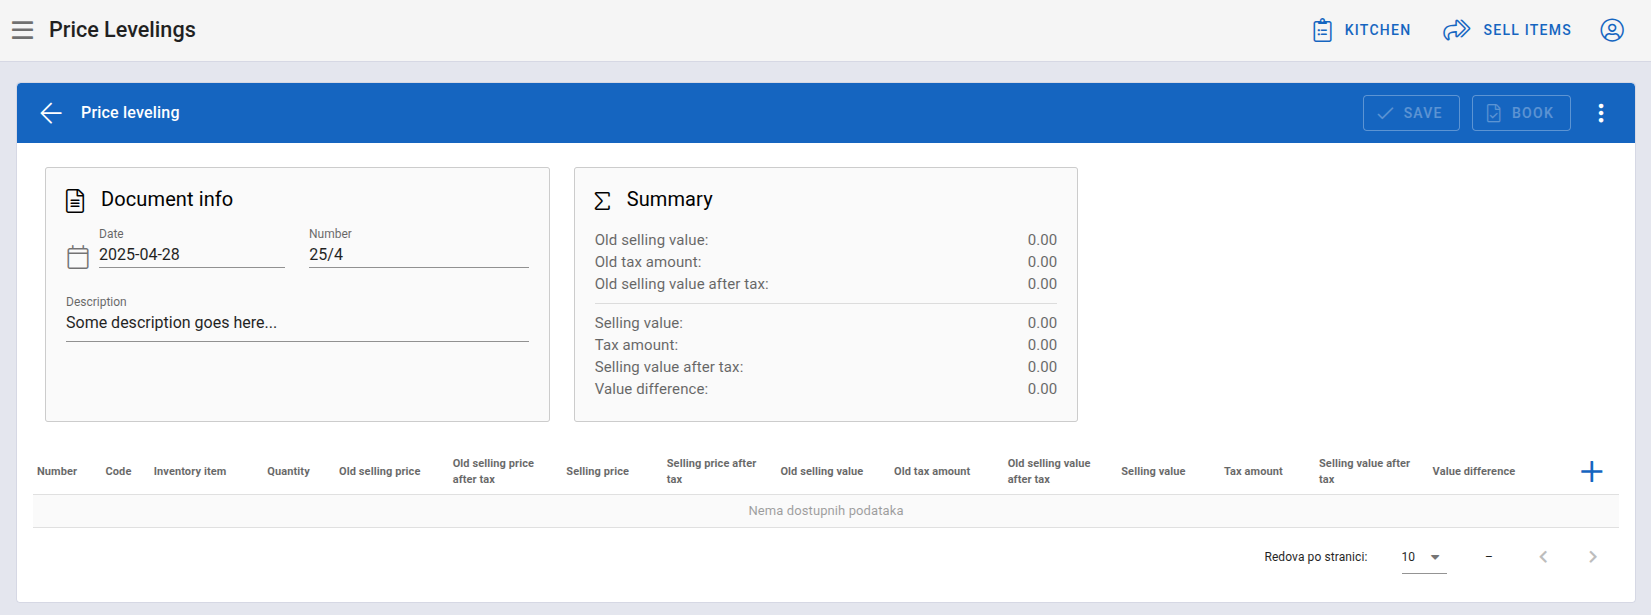
Completed First Part of Price Leveling Document Form
Then, click the + on the right side of the screen, below the completed form to open the second part of the form:
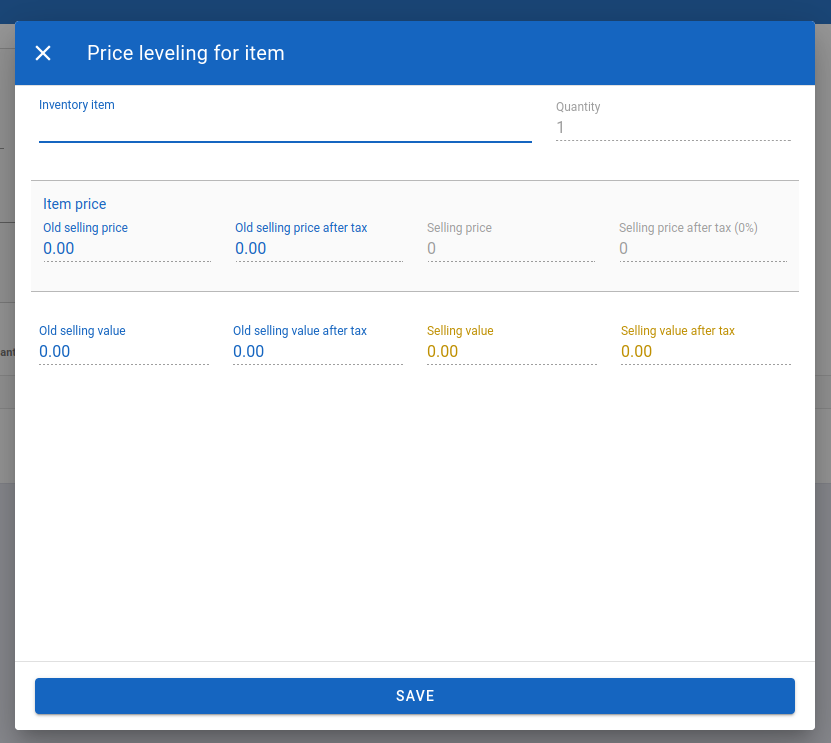
Second Part of Form to Add a New Price Leveling Document
In the Inventory Item field, enter the item for which the price leveling is being created. Once an item is selected:
- The Quantity field will be auto-filled with the current stock quantity (modifiable).
- Old selling price and Old selling price after tax will be auto-filled.
- Old selling value and Old selling value after tax will also be auto-filled.
Next, enter the new selling price in the Selling price field, after which Selling price after tax, Selling value, and Selling value after tax fields will be auto-filled.
The completed second part of the form should look like this:
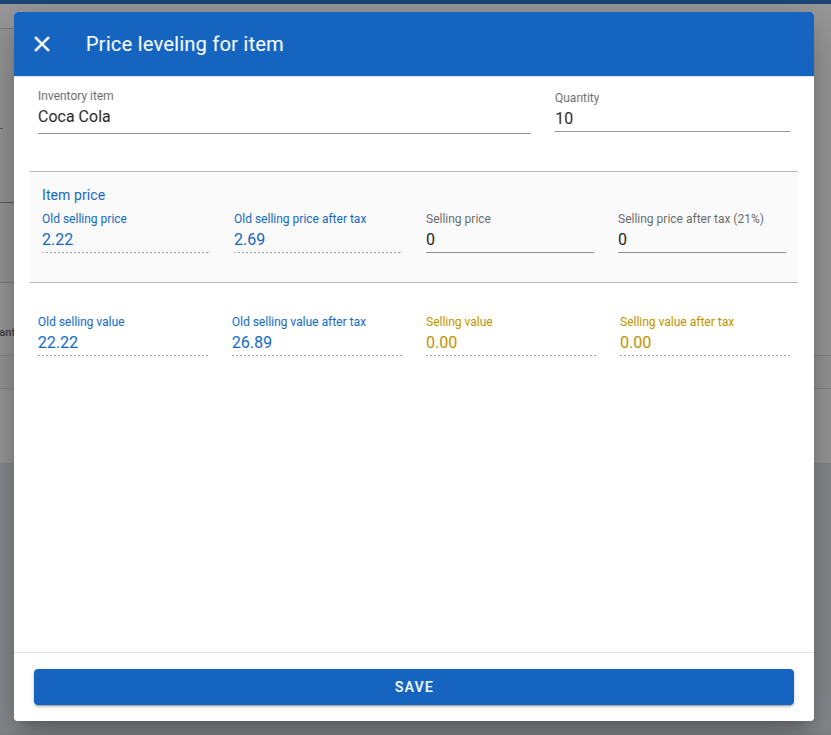
Completed Second Part of Price Leveling Document Form
Click SAVE to save the item for price leveling. Note that additional items can be added if necessary. After this step, the following screen will appear:
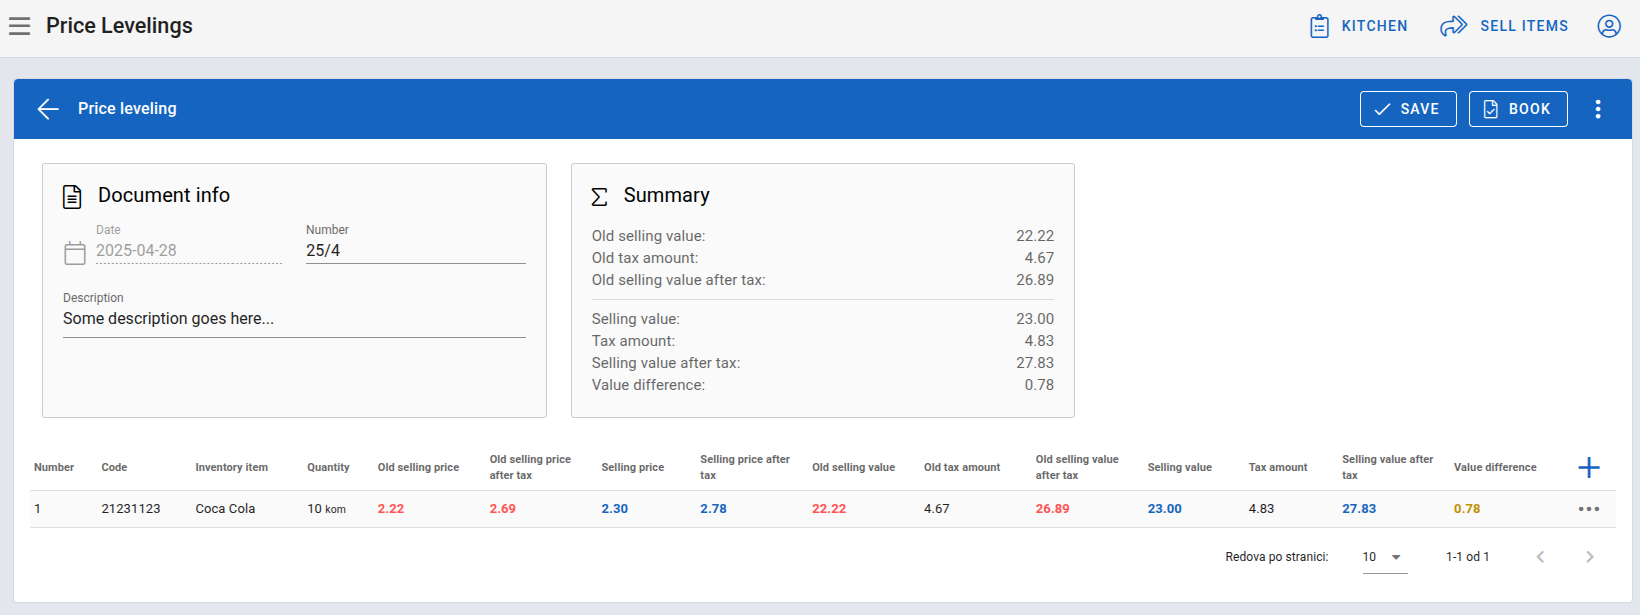
Completed Price Leveling Form
Finally, save the entire document and book it if desired. In this example, we will not book it. Clicking SAVE in the upper right corner above the table will save the document to the system.
Options for Price Leveling Management
To access options for managing price levelings, click the three dots in the last column of the table for the specific document:
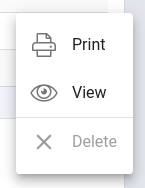
Options for Managing Price Levelings
Print Price Leveling
The first management option for a price leveling document is Print. Selecting this option displays a screen for printing the price leveling document.
View and Edit Price Leveling
Selecting the second option, View, displays the following screen:
Price Leveling View and Edit Screen
Here, you can edit the document: change the document number, description, book or unbook it, etc.
If you need to edit a specific item within the price leveling document, click the three dots in the last column of the item table to display two options: Edit and Delete:
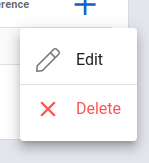
Options for Editing Item in Price Leveling Document
- Selecting Edit opens a window similar to the add form, pre-filled with all item data, allowing you to adjust the new item price.
- Selecting Delete opens a warning window for confirmation before removing the item from the document.
Delete Price Leveling
To delete a price leveling, select the Delete option in the options for price leveling management.
NOTE: Booked documents cannot be deleted.
After clicking Delete, a confirmation window will appear:
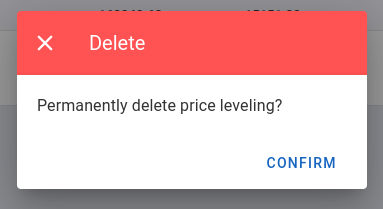
Confirmation Window for Deleting Price Leveling Document
Confirming will permanently delete the price leveling from the system.
Write-Off
The next item in the Inventory Movement is Write-Off.
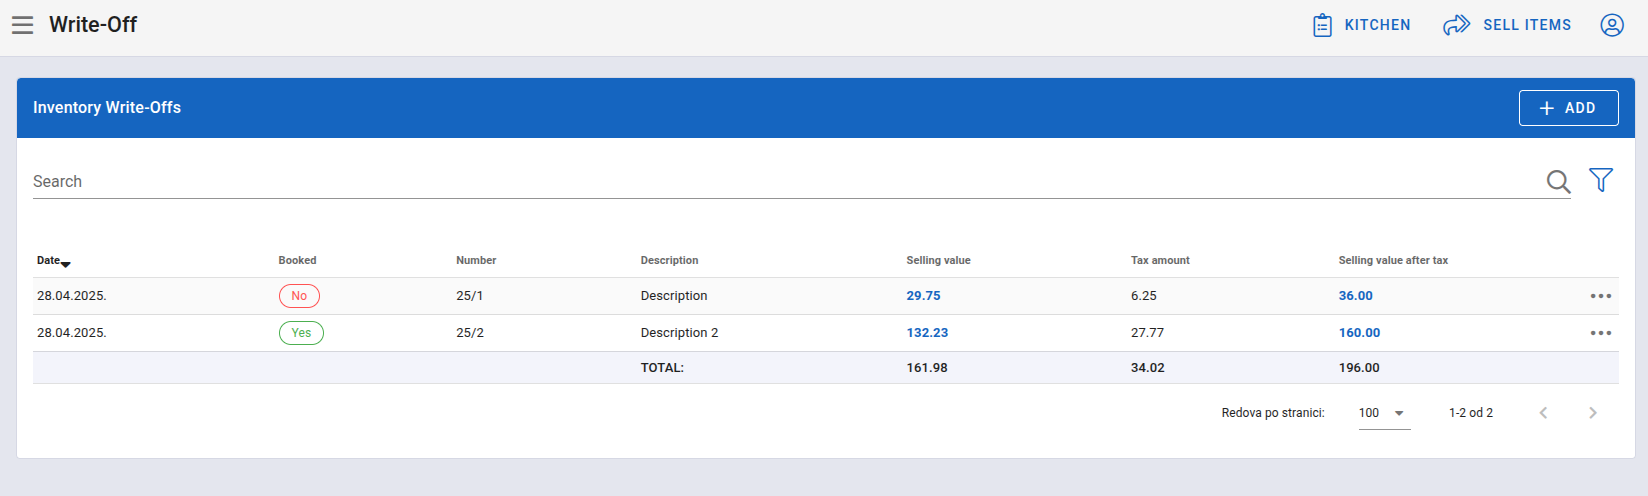
Write-Off Page
On the Write-Off page, a list of all documents that register the items that have been written off is displayed.
Search and Filter Write-Offs
You can perform a regular search or an advanced search by filters for all write-off documents. The regular search is done by entering a search term in the Search field located above the table. Additionally, advanced search for all documents can be accessed by clicking on the funnel icon, located in the top right corner above the table, next to the Search field.
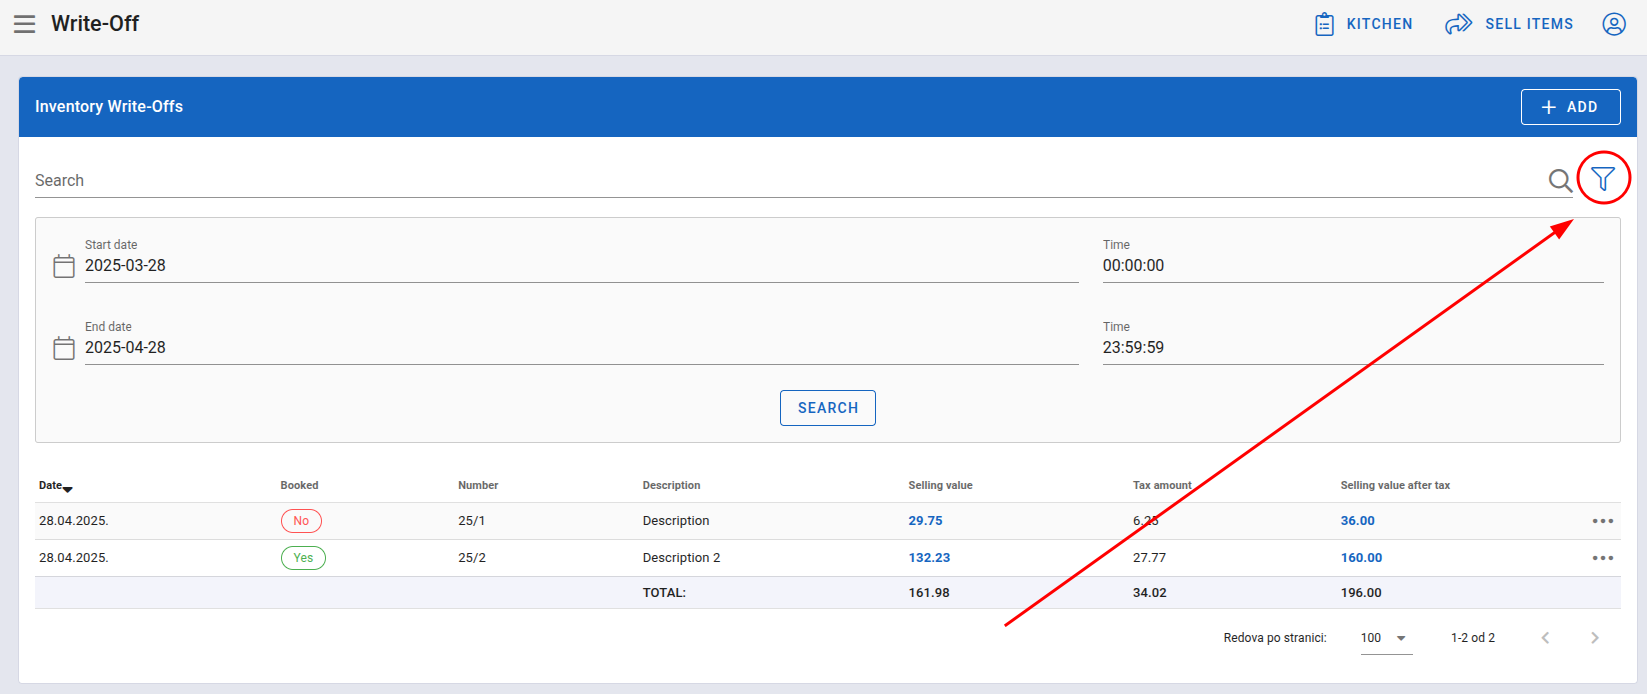
Advanced Filters
Among the advanced filters, the following options are available:
- filters for start and end date
- filters for time of the start and end date
After applying the desired filters, simply click the SEARCH button, and the system will perform the search and display the results if any exist. Closing the advanced filters is done by clicking the funnel icon again.
Add Write-Off
If you want to add a new document for a write-off, click the ADD button, next to the funnel. By clicking the button, the system will take you to the following page:
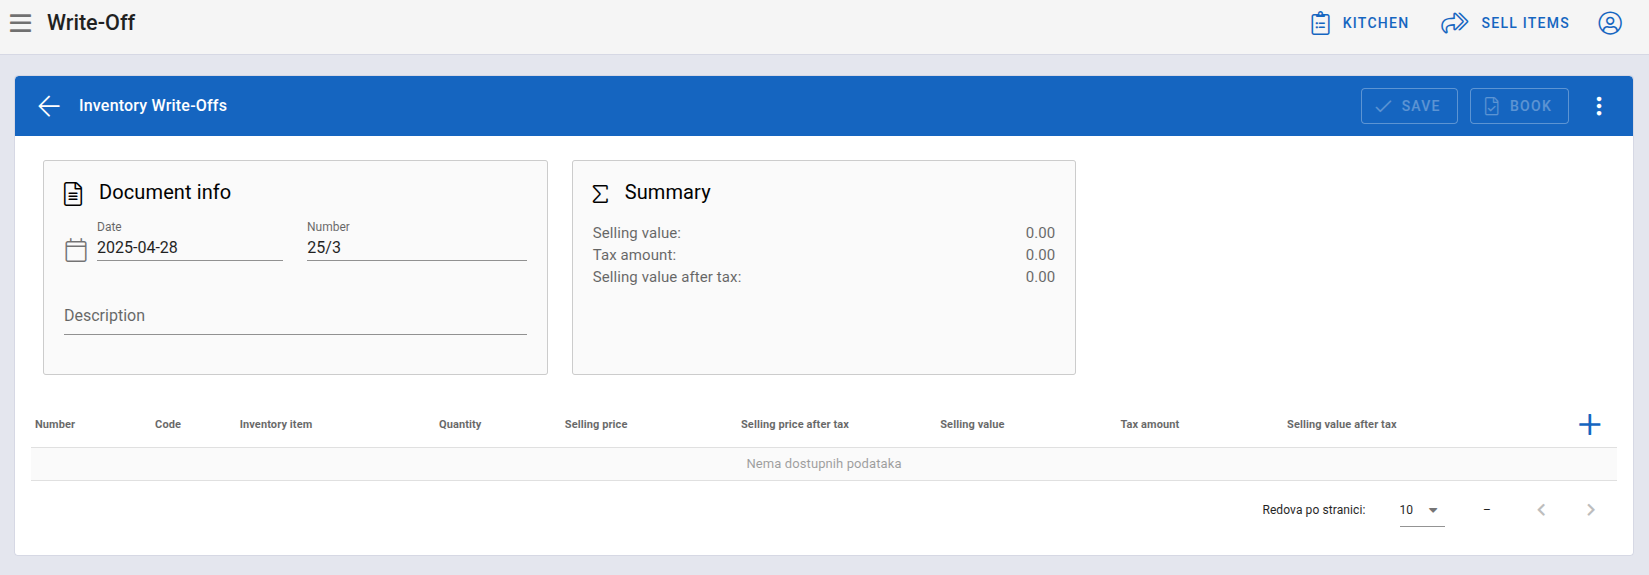
Screen for Adding Write-Off Document
The first part of adding a document is filling in the basic information about the document, such as Date, Number, and Description of the document.
After that, the form should look like this:
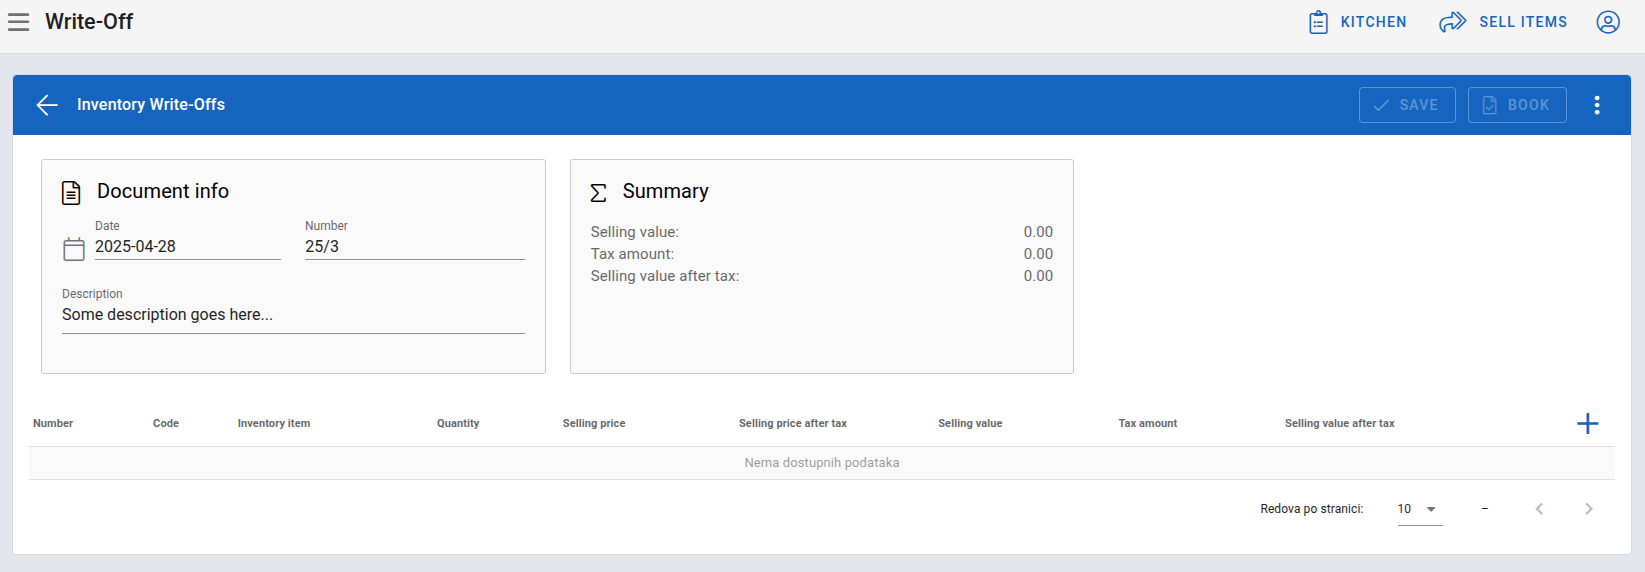
Completed Part of Write-Off Document Form
Once we successfully fill out the first part of the form for adding a new write-off, we need to add the items we want to write off to that document. We will do this by clicking on the + icon marked in the next image:
'+' Icon to Open Window for Adding Goods to Document
After clicking the icon, a window for adding items for write-off will open:
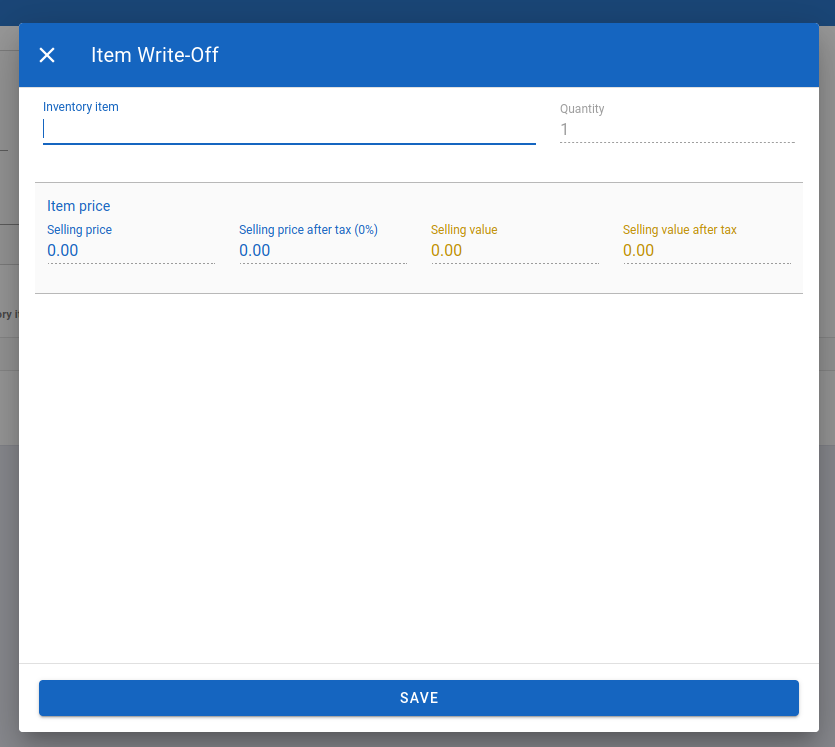
Part of Form for Adding Items for Write-Off
In the Item field, type the name of the item, and the system will find the item automatically. By clicking on it, we select that item. After that, in the Quantity field next to the Item field, we enter how many pieces of the selected item we want to write off.
NOTE: It is important to note that if we enter a number greater than the current stock level of the item, the system will report an error.
For example, if we want to write off 10 units of Carlsberg beer, the form will look like this:
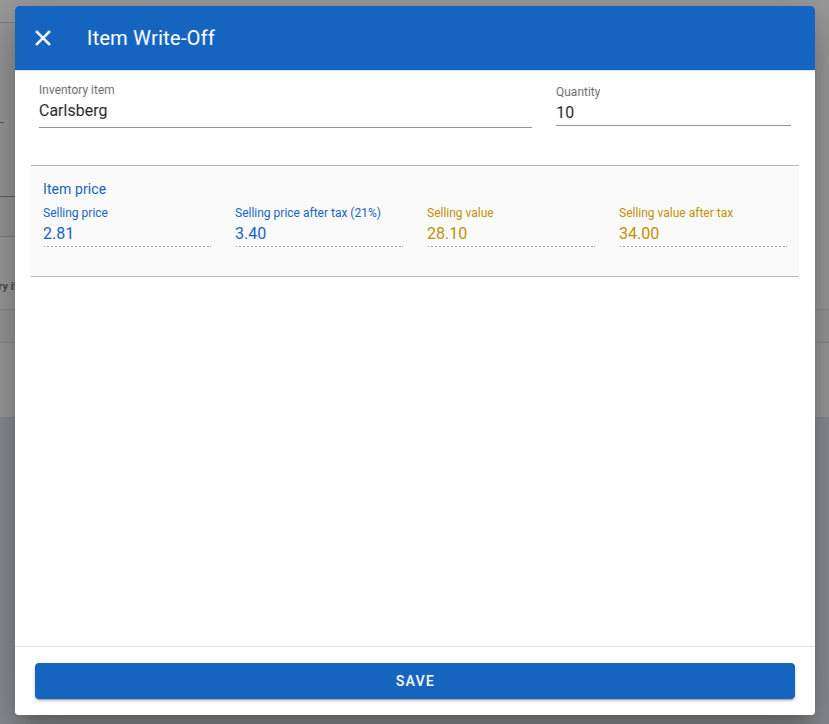
Completed Part of Form for Adding Items to Write-Off
By clicking SAVE, we close the window, save the entered information, and add the item and its quantity to the write-off document. The screen will then look like this:
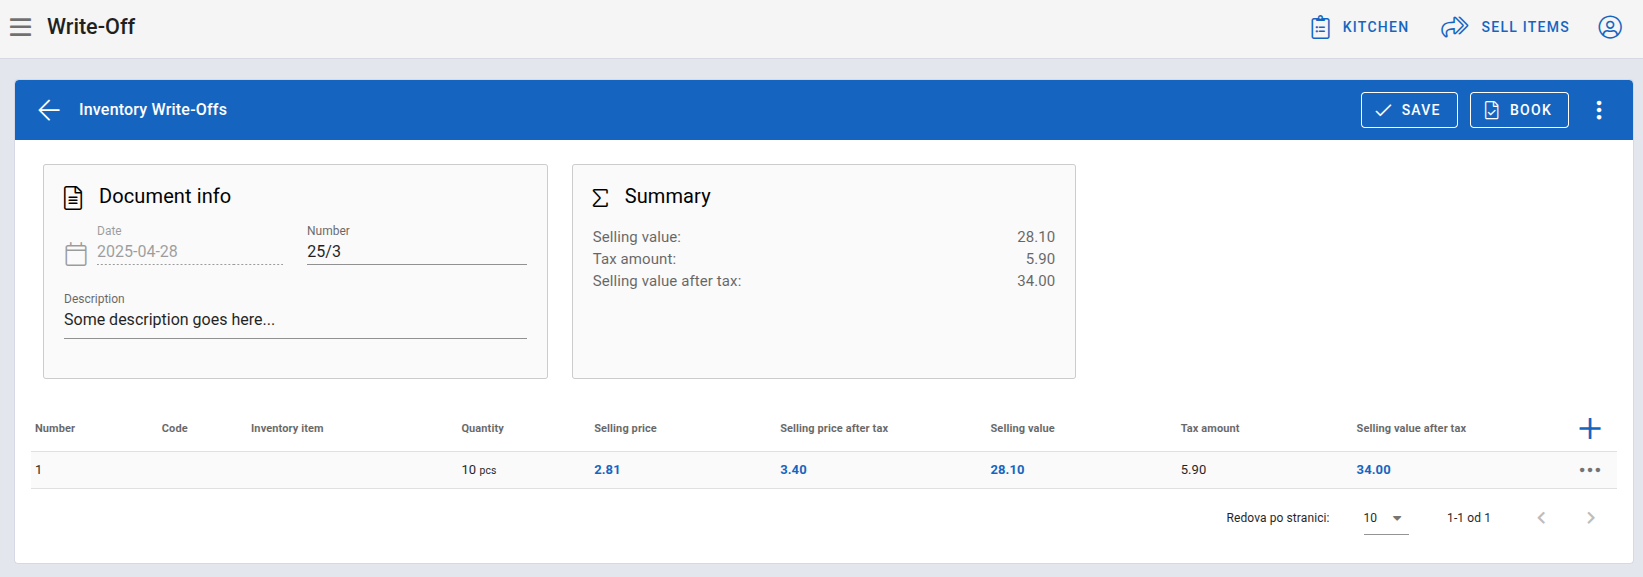
Completed Form for Adding Write-Off Document
NOTE: It is possible to add multiple items to the write-off document. We do this by clicking the + icon again and filling out the previously mentioned form once more.
After that, we can either save the document or book it. These two options are provided in the right corner:
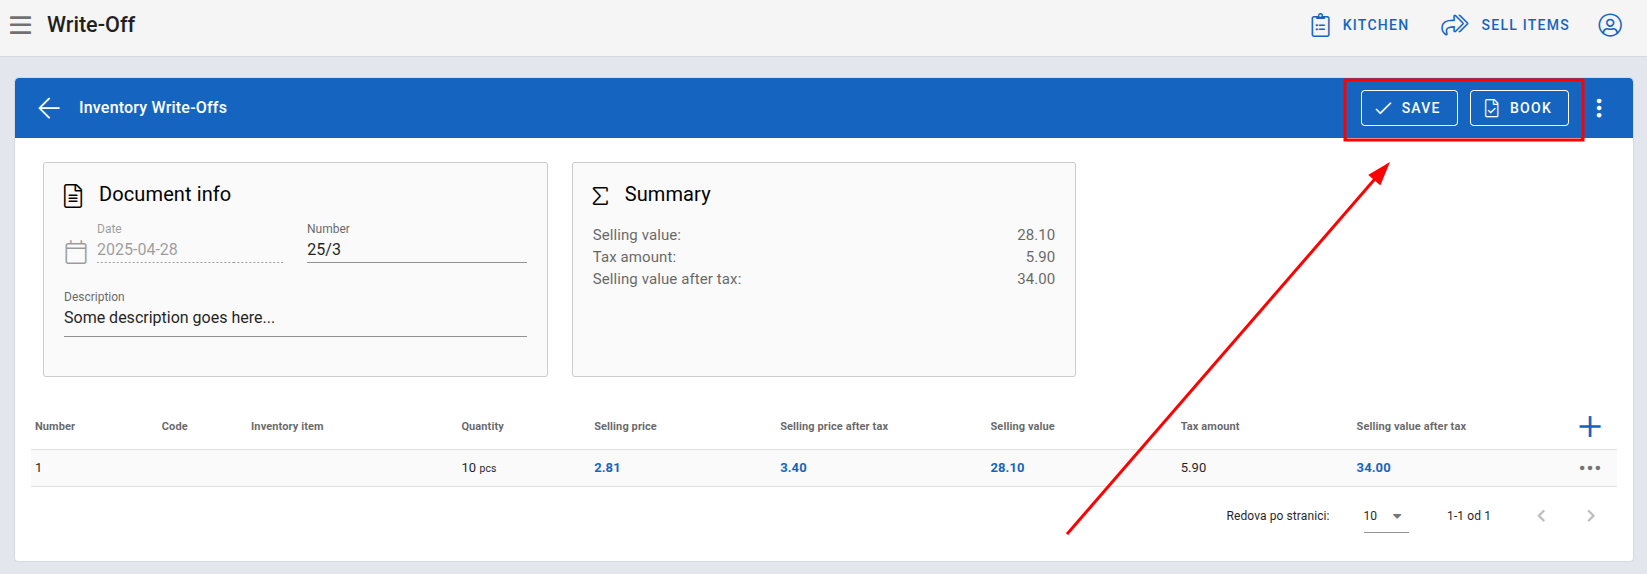
Save and Book Options
If we choose the SAVE option, the system will save the document but it will remain unbooked.
In our case, we will book the document and click the BOOK button. After that, the system will return us to the main screen for Write-Off where we will be able to see our newly created document at the top of the table.
Options for Write-Off Management
Access to the options for managing the document about the inventory movement is possible with a simple click on the three dots located in the last column at the end of the row of the inventory movement document. After clicking the three dots in the row of the write-off document we want to manage, the following options will be displayed:
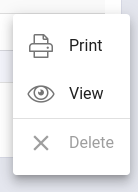
Options for Managing Write-Off Document
Print Write-Off
By clicking the first offered option, Print, a window will open showing the format in which the selected document will be printed.
NOTE: Printing is not possible for documents that are unbooked.
View Write-Off
By selecting the second option, View, the user will be redirected to the screen for editing and reviewing an existing write-off document:
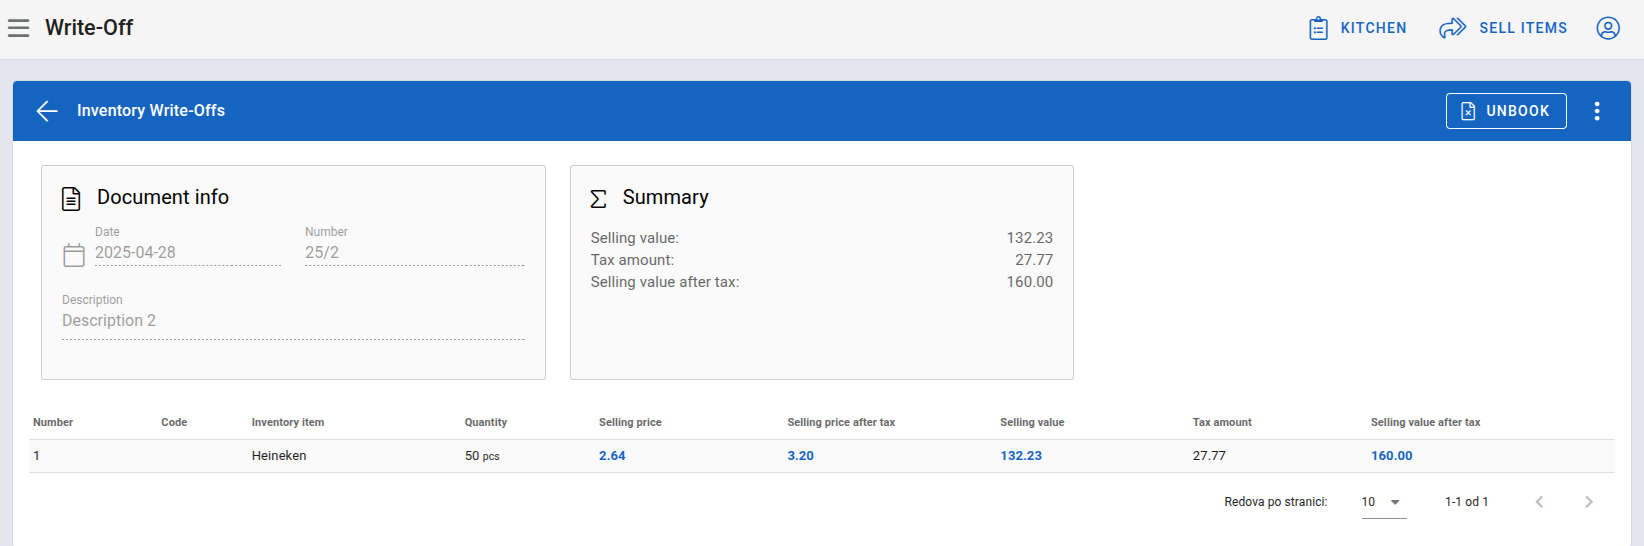
Edit Screen for Write-Off Document
If the document has previously been booked, the option to UNBOOK the document will appear in the top right corner. If the document has not been previously booked, the options SAVE and BOOK will appear in the top right corner.
For our example, we will take a document that was not previously booked:
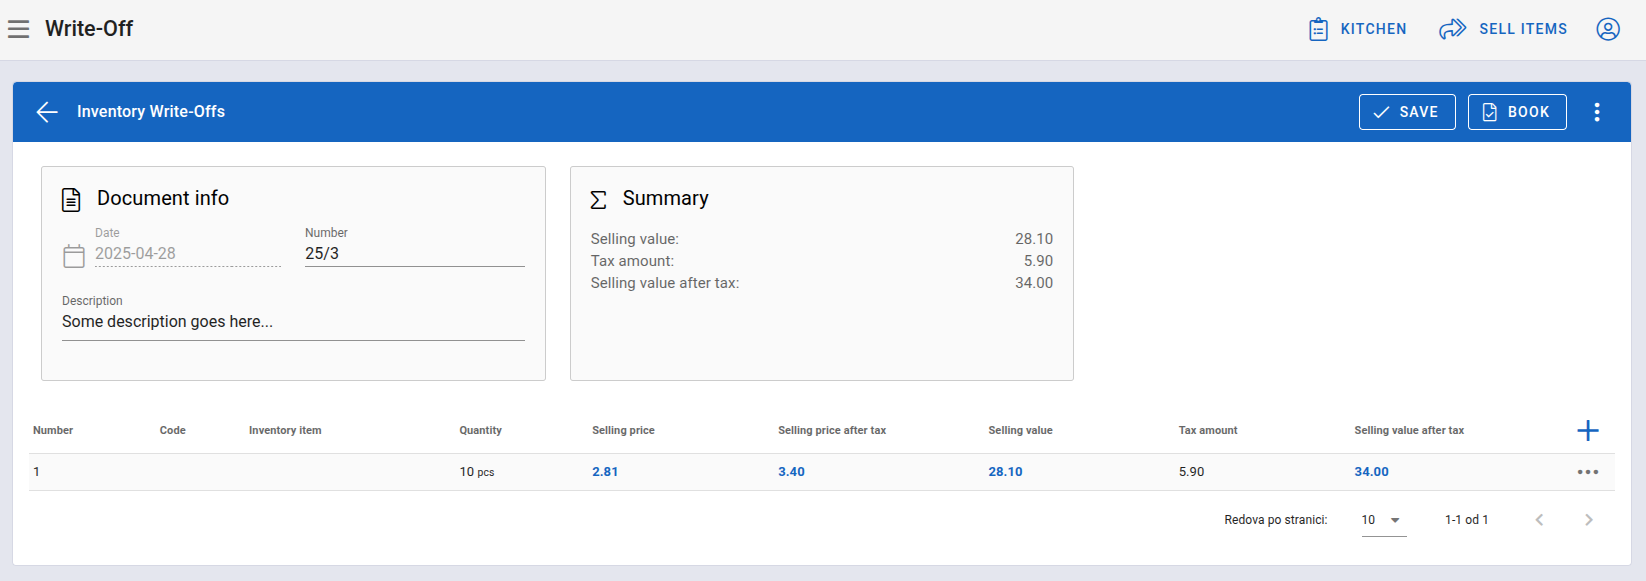
Edit Screen for Write-Off Document That Has Not Been Posted
NOTE: If the document was previously booked, it is not possible to change its Description and Number, as well as the items designated for write-off, until it is unbooked.
Managing the items that are for write-off on the document is possible by clicking the three dots in the last column in the table below the document information. After clicking the three dots in the row of the item we want to manage, two options will appear:
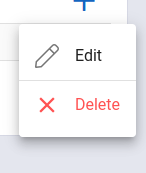
Options for Managing Write-Off Item
Edit Write-Off Item
By clicking Edit, the screen for editing the write-off of the item will open:
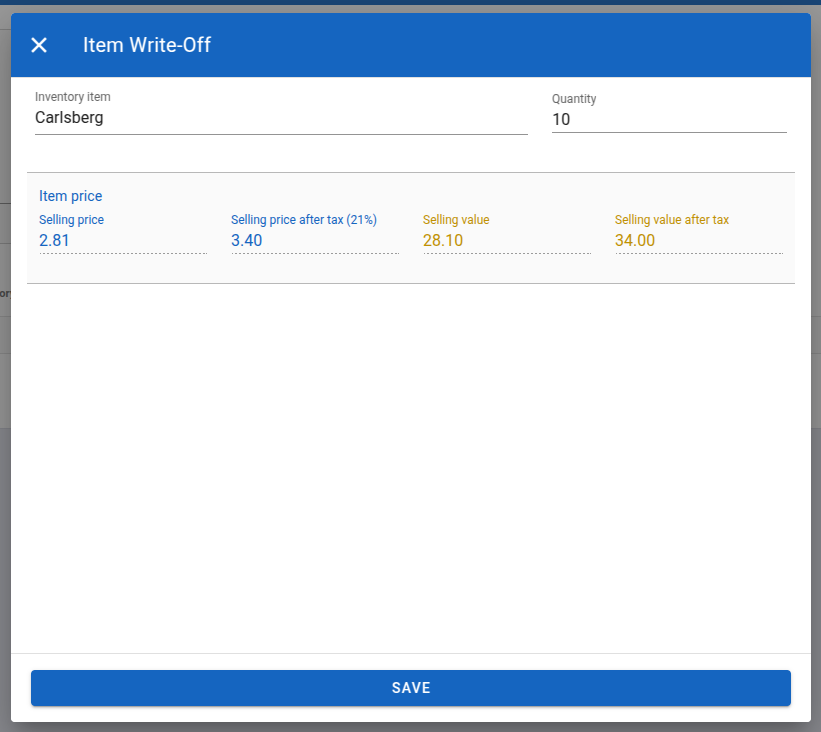
Edit Screen for Write-Off Item
After making the desired changes, by clicking SAVE, we save the changes and close the window.
Delete an Item from the Write-Off Document
If we select the Delete option in the item options for the write-off, the item will be temporarily removed from the write-off document.
NOTE: The item will only be permanently deleted after clicking the SAVE button for the entire document.
Delete Write-Off
If we select the option DELETE from the options for write-off management, the system will ask us to confirm deleting the write-off document:
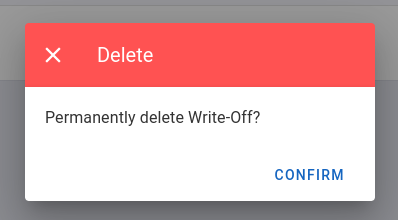
Confirmation for Deleting Item from Write-Off Document
By clicking Confirm, we permanently delete the write-off from the system.
NOTE: Deletion is not possible for documents that have been booked.
Daily Cash Sales
After selecting the Daily Cash Sales item, the following page is displayed:
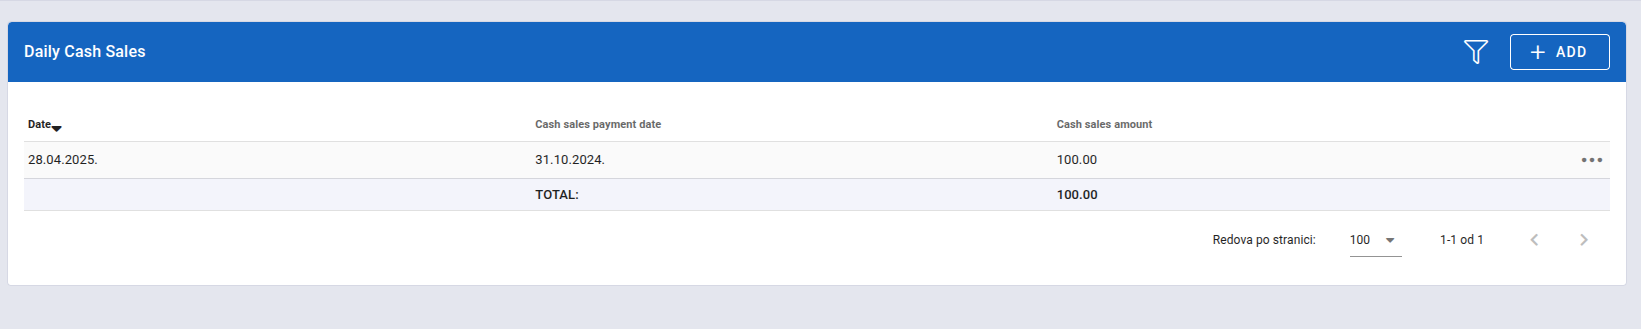
Daily Cash Sales
Here, you can view all daily sales by date, cash sales payment date, cash sales amount, and the TOTAL of all daily sales in the table's last row.
Search and Filter Daily Cash Sales
To search through daily cash sales using specific filters, click the funnel icon located in the upper-right corner above the table. After clicking it, an advanced filter area appears above the table:
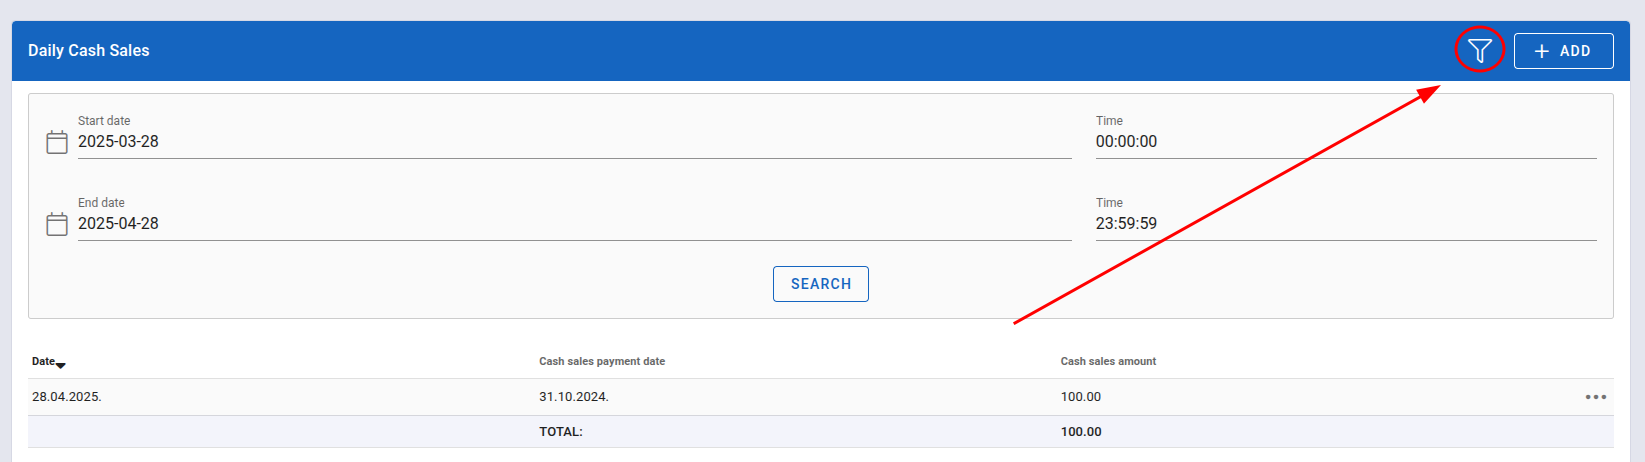
Advanced Search Filters for Daily Cash Sales
The advanced search with filters allows you to search all daily cash sales by start and end date, as well as by specific times within those dates. Once you select the desired filters, click SEARCH to apply them, and the system will perform the search. If results are found, they will display in the table below.
Add Daily Cash Sale
The ADD button, positioned next to the funnel icon, allows you to add new daily cash sales. Clicking this button opens the following window:
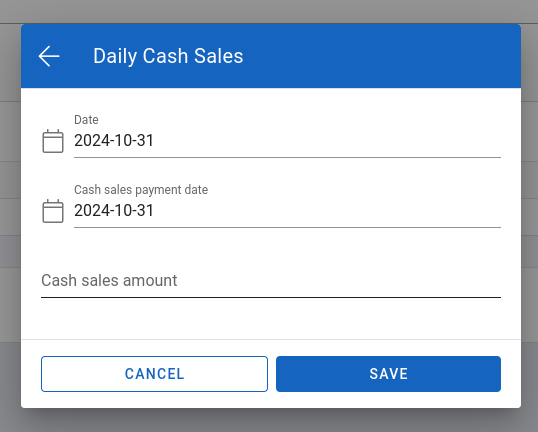
Form Window for Adding New Cash Sales
This window contains a form to add new daily cash sale, which includes the following fields:
- Date - the date for which the cash sales are deposited
- Cash sales payment date - the date when the cash was payed
- Cash sales amount - the cash sales amount
NOTE: If the date selected already has a recorded daily cash sale, the system will display an error, and you will need to change the date.
After filling in all fields, click SAVE to create and save the new daily cash sale entry in the system. Clicking CANCEL closes the window without saving.
Options for Daily Cash Sales Management
Clicking on the three dots in the last column of the table row for a specific cash sale opens management options:
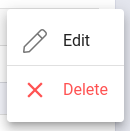
Daily Cash Sales Management Options
Edit Daily Cash Sale
The first item, Edit, allows editing an existing daily cash sale. Clicking it opens the editing window:
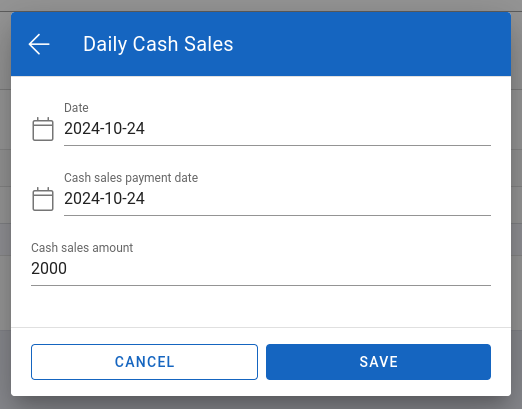
Edit Cash Sales Window
After making the desired changes, click SAVE to apply the changes in the system.
Delete Daily Cash Sales
The second item, Delete, in the options for managing cash sales, allows you to permanently delete a daily cash sale from the system. After clicking, a deletion confirmation window will open:
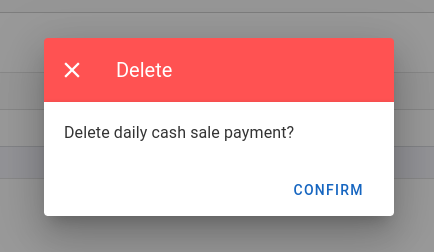
Daily Cash Deposit Deletion Confirmation Window
Selecting CONFIRM permanently deletes the cash sale from the system and closes the window.
Stock
The Stock page displays all items in stock:

Stock Page
Search and Filter Stock
Search across all items in stock by entering a search term (item name) in the Search field above the table:
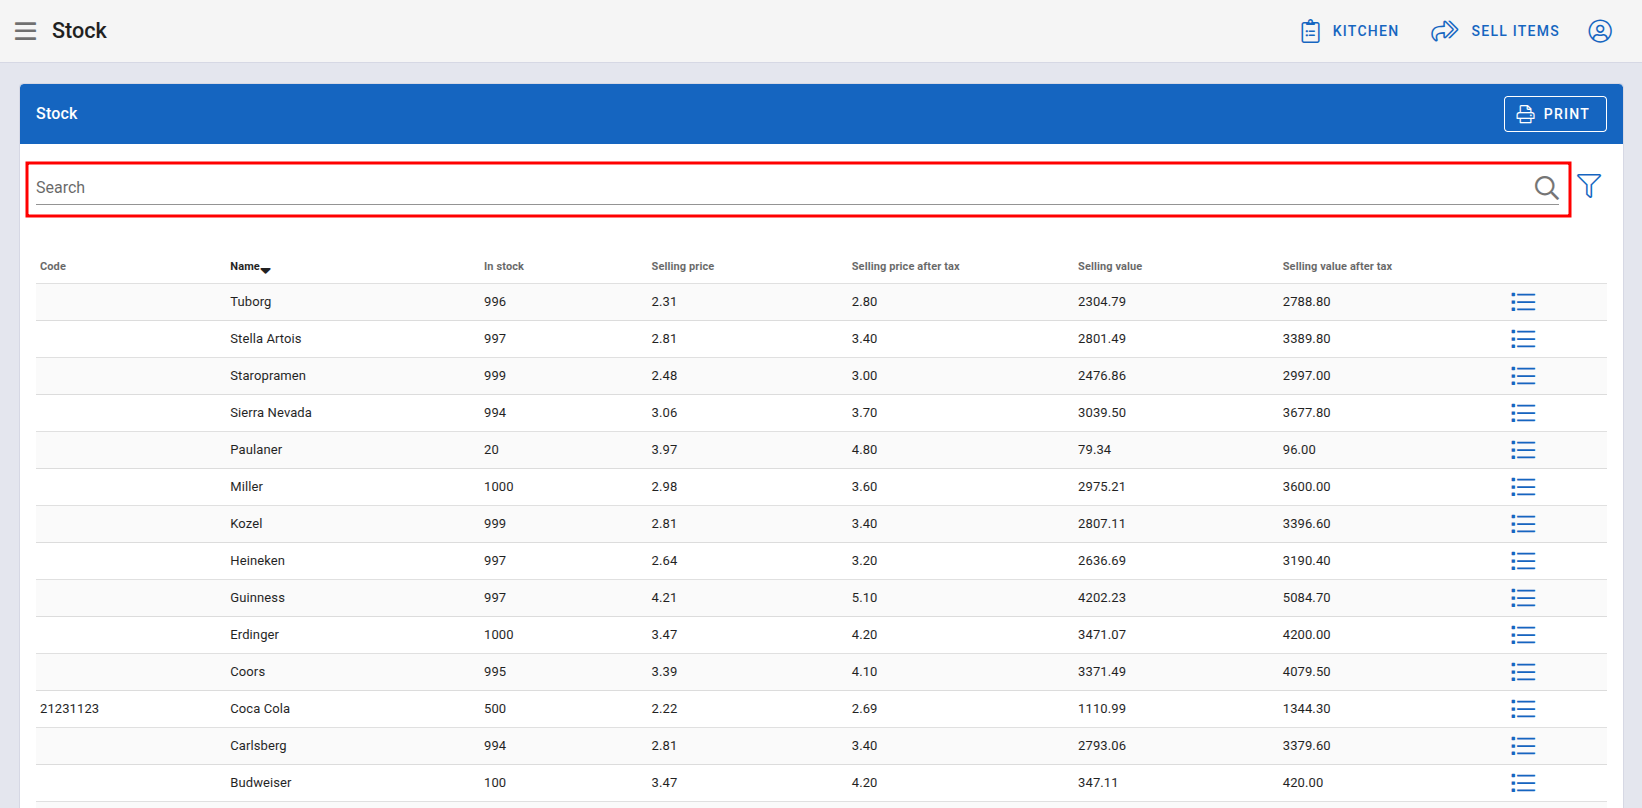
Search Field
Advanced search by filters is done by clicking the funnel icon in the upper-right corner:
Funnel Icon
This opens an area above the table:
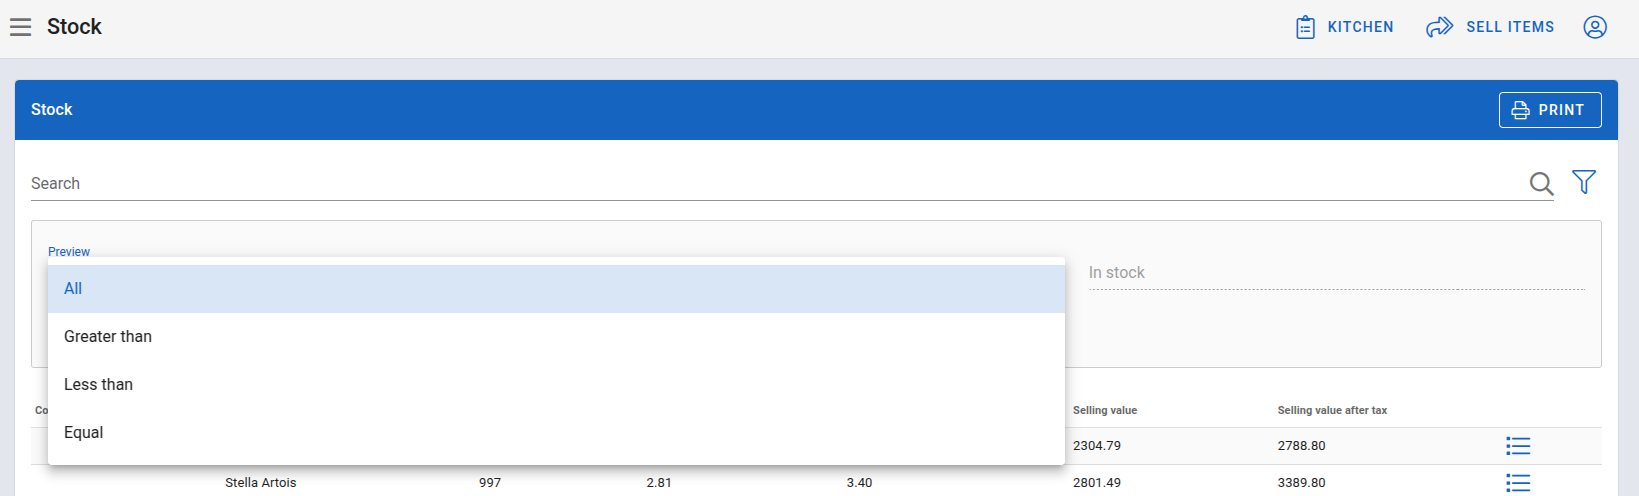
Advanced Search
Advanced search by stock can be performed by selecting, from the first dropdown menu on the left, whether we want to display all stock or stock quantities that are greater than, less than, or equal to the amount entered in the In Stock field on the right.
Print Stock
If we want to print the current stock status, click the PRINT button in the upper-right corner will print the report for stock items.
Stock Item Transactions
In the last column of each row in the stock list, clicking the icon:
Stock Item Transactions Icon
will lead us to a separate page for the Stock Item Transactions.
- The Stock Item Transactions page provides a comprehensive report showing all changes related to a particular stock item.
- It includes all item entries and exits from the stockroom, price changes, and similar transactions.
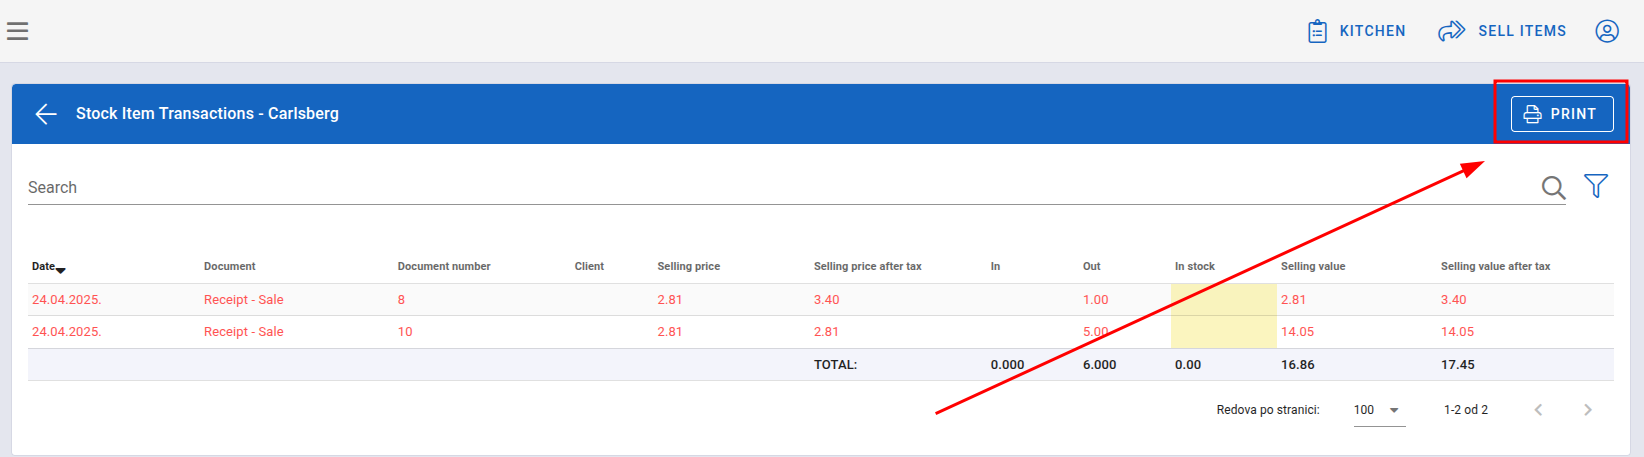
For example, let’s view the transactions for the item Carlsberg:

Stock Item Transactions
The table displayed above lists all documents that reflect changes in the selected item’s stock quantity.
The table consists of the following columns:
- Date
- Document
- Document number
- Client
- Selling price
- Selling price after tax
- In - quantity of the item that entered the stockroom based on the document
- Out - quantity of the item that exited the stockroom based on the document (sold, issued, written off, etc.)
- In stock - item quantity available after the change recorded by the document
- Selling value
- Selling value after tax
Search and Filters Stock Item Transactions
Simple search within stock item documents is done using the Search field above the table. Advanced search can be done in a similiar way by clicking the funnel icon.
Here, you can enter filters for start and end date and time. Then, by clicking the SEARCH button, the system will search and display results if any are found.
Print Stock Item Transactions
To print the Stock Item Transactions, click the PRINT button:
Stock Item Print Button
Clicking it opens the next window where you will see the document format for printing.
Sales Purchase Ledger
The last item under Goods Movement is the Sales Purchase Ledger page:
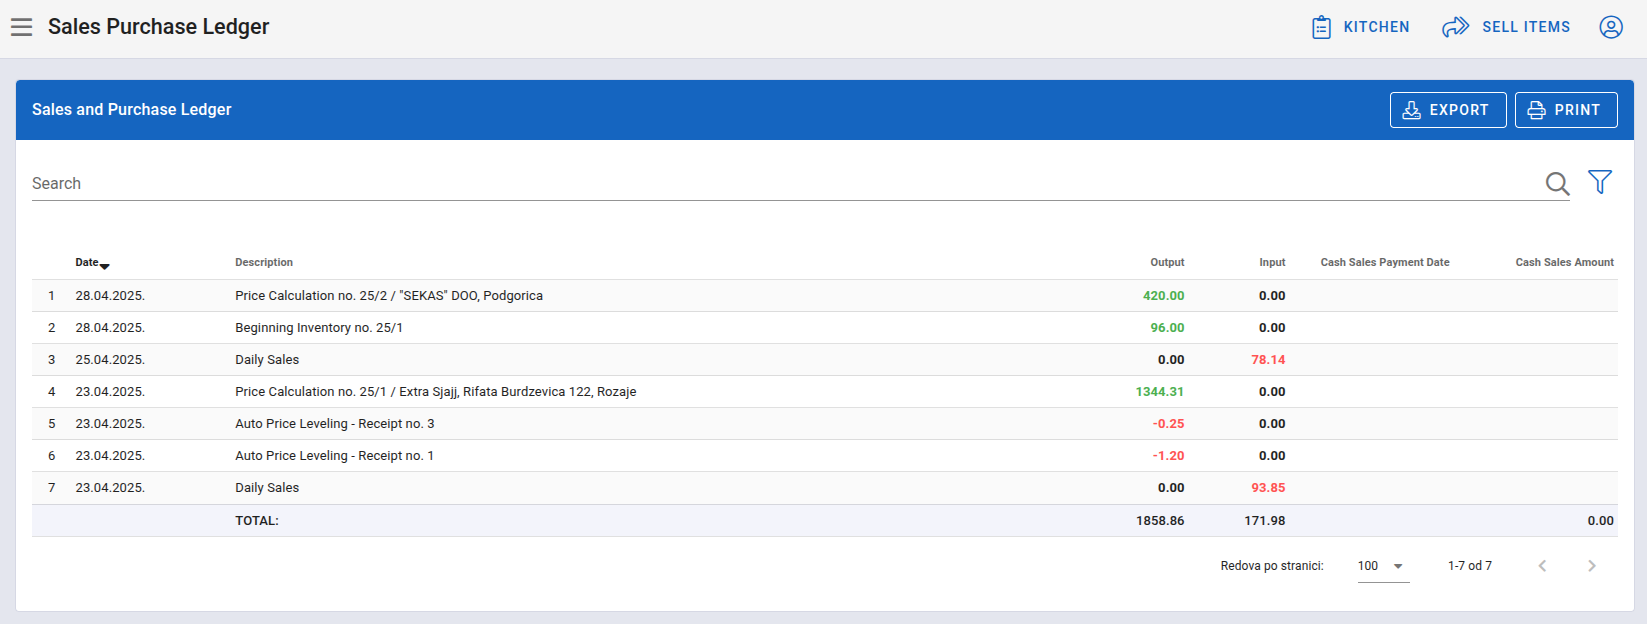
Sales Purchase Ledger Page
Search and Filter Sales Purchase Ledger
Searching in the Sales Purchase Ledger can be done by entering a search term in the Search field above the table. Additionally, filtering is possible by clicking the funnel icon located in the upper right corner. Clicking this icon opens the filter section:
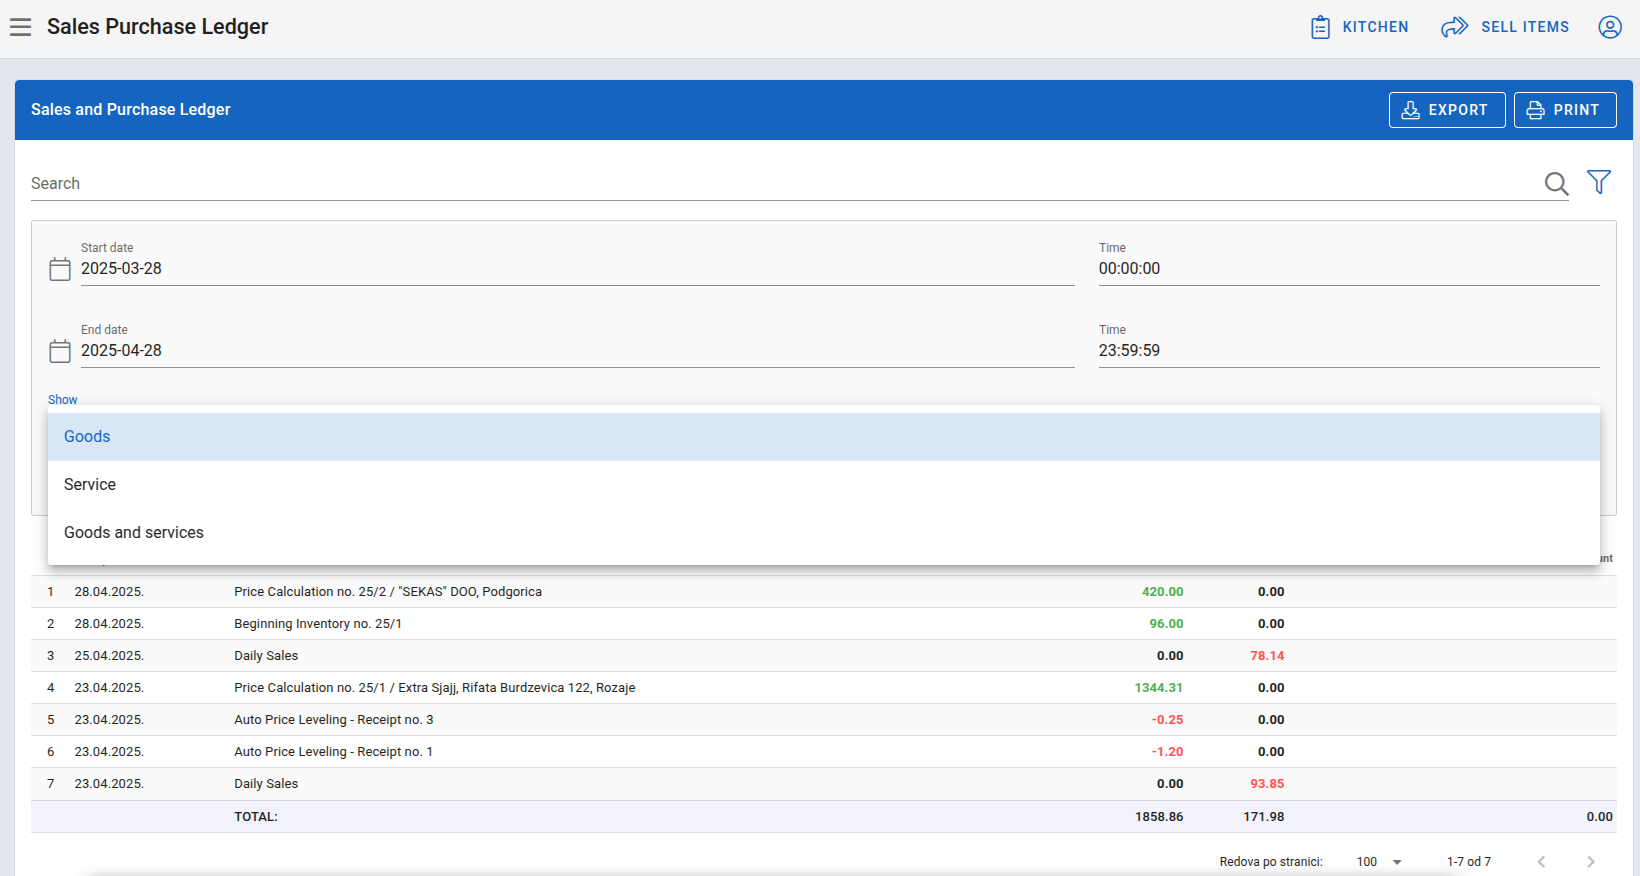
Filtering Section
Here, filtering can be done by start, end date, and their times, as well as by displaying:
- Goods
- Service
- Goods and Service
After selecting the desired filters, clicking SEARCH will execute the search based on the chosen filters.
Print and Export Sales Purchase Ledger
The PRINT and EXPORT options, located in the upper right corner, allows printing the Sales Purchase Ledger report for the specified time period, or exporting the file.s
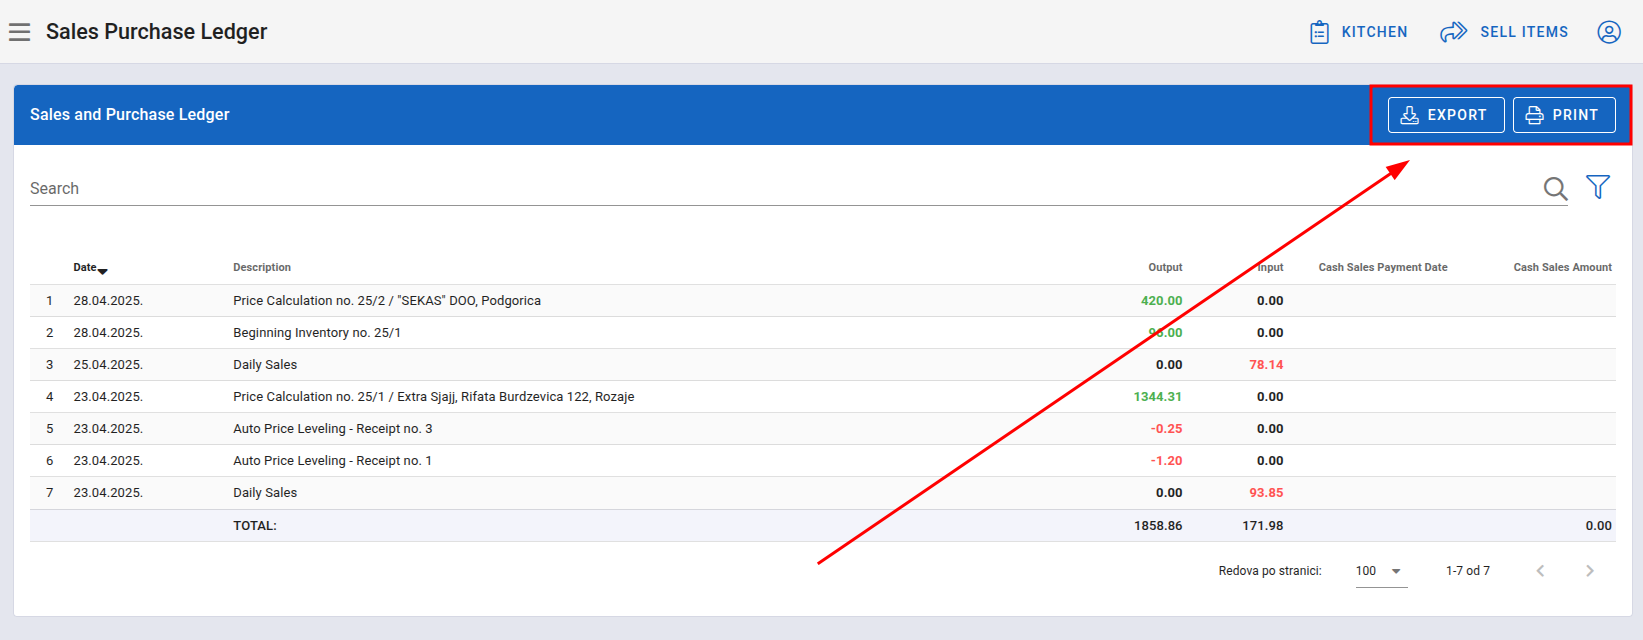
Buttons for Printing and Exporting the Sales Purchase Ledger Report