Settings
The last section in Administration is Settings. The structure is as follows, consisting of the following items:
Tax Rates
The first item is Tax Rates. By clicking on it, the following screen will appear:
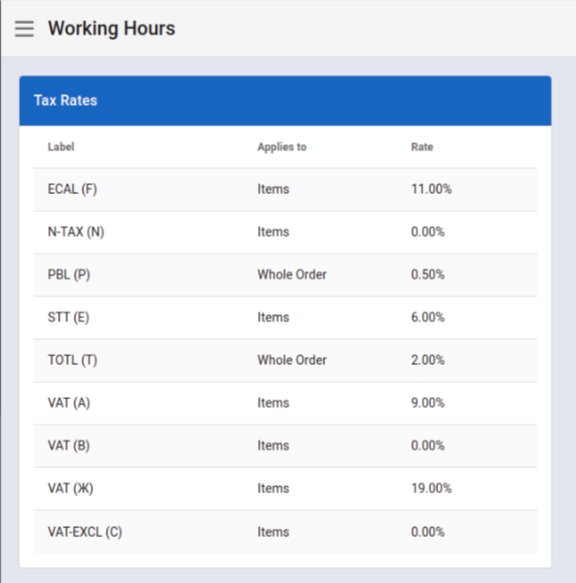
Tax Rates
This table is informative only and is used solely to show the tax rates. The system uses the currently valid tax rates, and they cannot be changed.
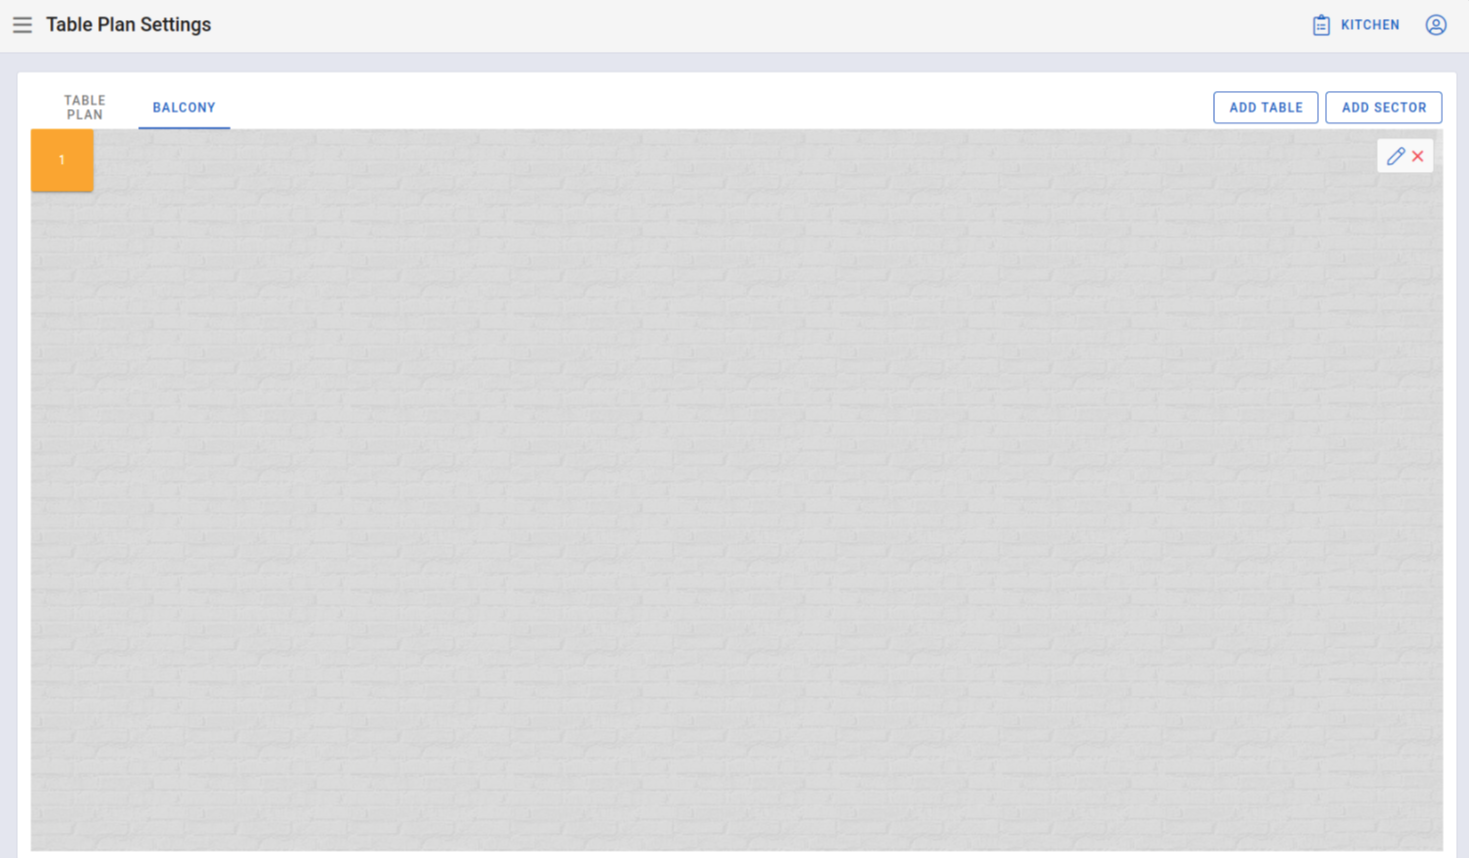
Table Plan Settings
The third item is Table Plan Settings:
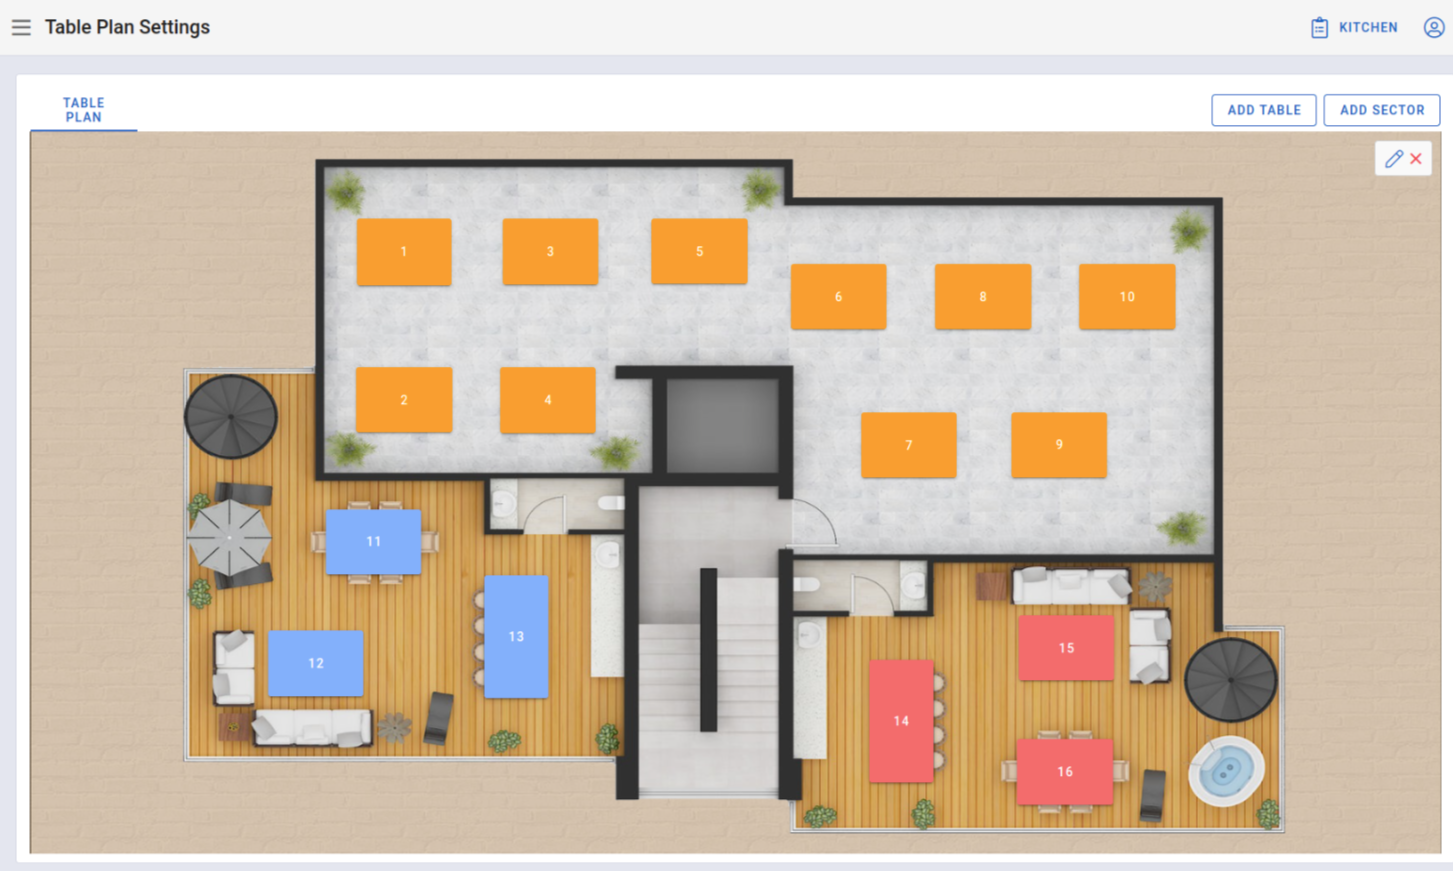
Table Plan Settings
Here, the user is visually shown the layout and table plan for their venue, including the number of sectors.
Add Sector
Clicking the ADD SECTOR button, located in the top right corner, opens the following window:
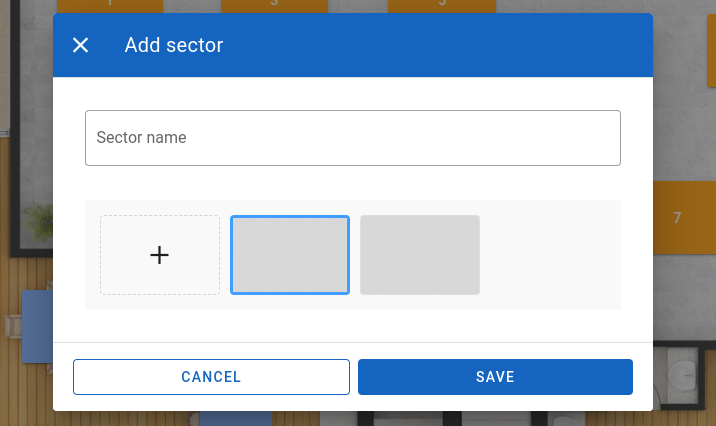
Window for adding a sector
In the Sector name field, enter the desired sector name, e.g., Balcony.
Clicking the + button allows you to select a background image for that sector. In this case, a gray background is chosen. SAVE button creates the sector where tables can be added:
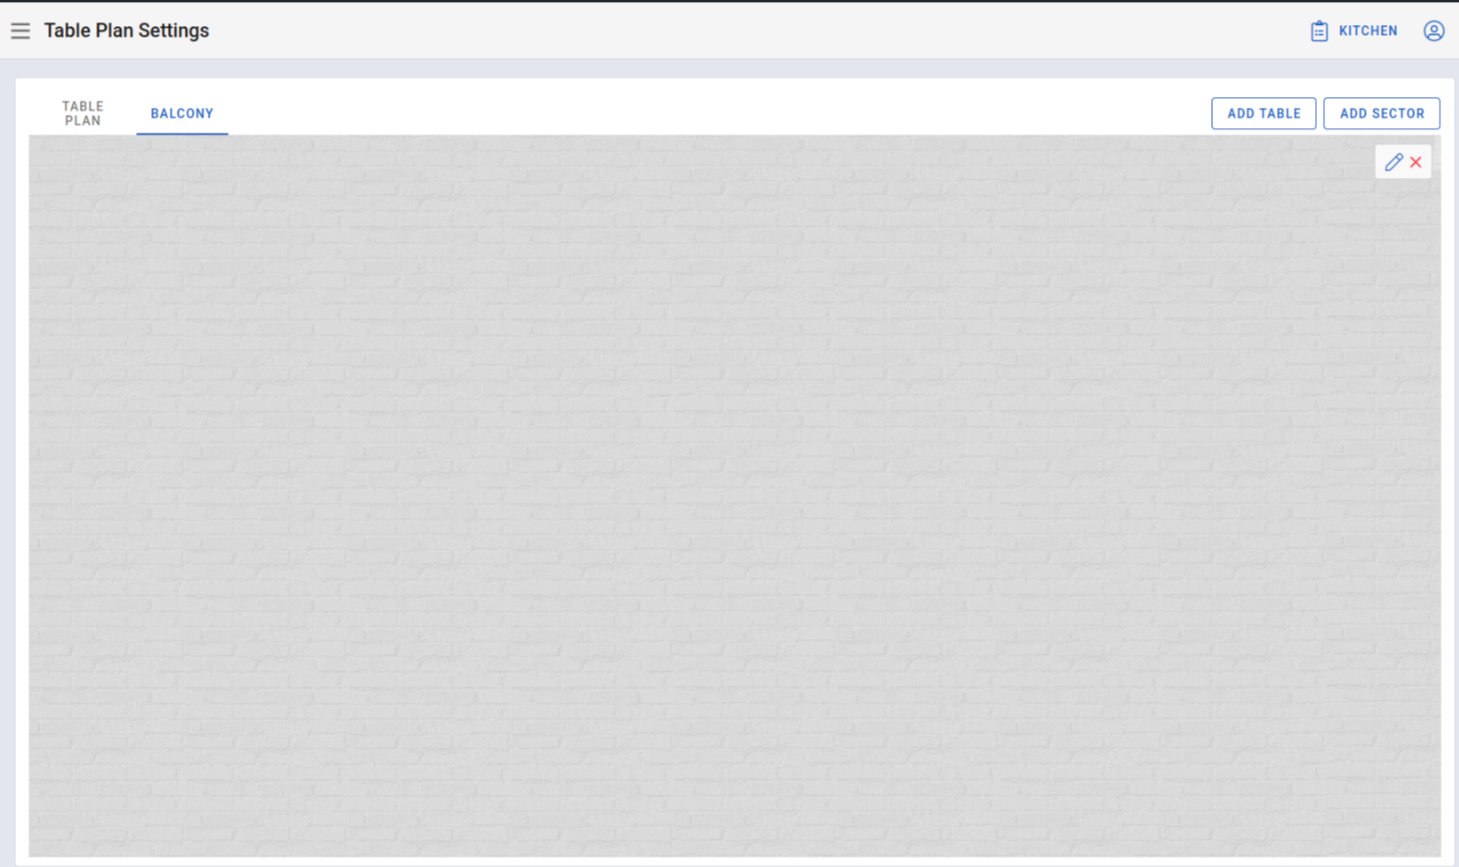
New sector added
Add Table
After adding a sector, you can add a table. ADD TABLE, located in the top right corner of your screen, creates a table with the number 1 in the top left corner:
Sector after adding a table
If you want to change the location of table number 1, hold the table icon and drag it to the desired location.
The size of the table icon can be adjusted by clicking on the edges of the icon, where arrows will appear, indicating the directions in which the icon size can be changed.
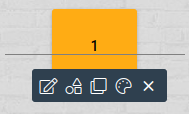
Options for editing the table
Additional options for the table are displayed above. From left to right, these are:
- Edit text
- Change shape (square or round)
- Duplicate
- Change background color
- Delete
Edit Sector
Clicking the pencil icon, located below the ADD SECTOR button (see image below):

Edit sector button
opens a window to edit the sector we are currently in:
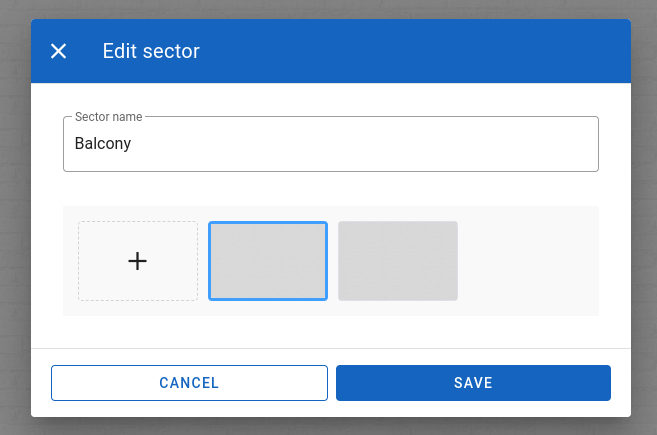
Window for editing a sector
Modify the fields as needed and click SAVE to permanently change the selected sector in the system.
Delete Sector
Clicking the X icon, located below the Add Sector button (see image below):

Delete sector button
opens a window confirming the deletion of the sector:
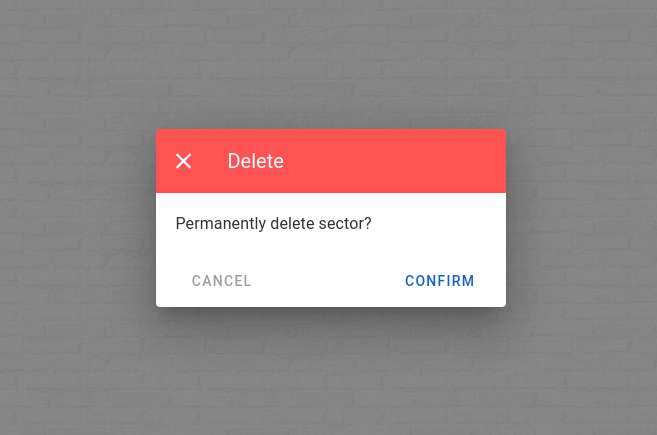
Sector deletion confirmation window
Sales Interface Settings
In this section, the arrangement of existing items for how they will appear in the sale interface is configured:

Sale Interface settings screen
Clicking the AUTO-GENERATE button will automatically generate the sale interface based on item categories.
Clicking - Columns and + Columns, or - Rows and + Rows, removes or adds new columns or rows.
The first row contains the item categories. Adding a new category is done by clicking the Add category dropdown menu.
Other rows contain items related to that specific category. For example, all these 16 items (from the last image) are related to the category named DRINK.
After adding an item or category to the sale interface, hovering over a specific item or category opens options for manipulation:
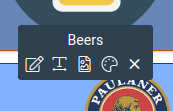
Options for managing an item or category in the sale interface
These options include:
- Edit
- Align text
- Adjust image
- Background color
- Remove item or category from the sale interface
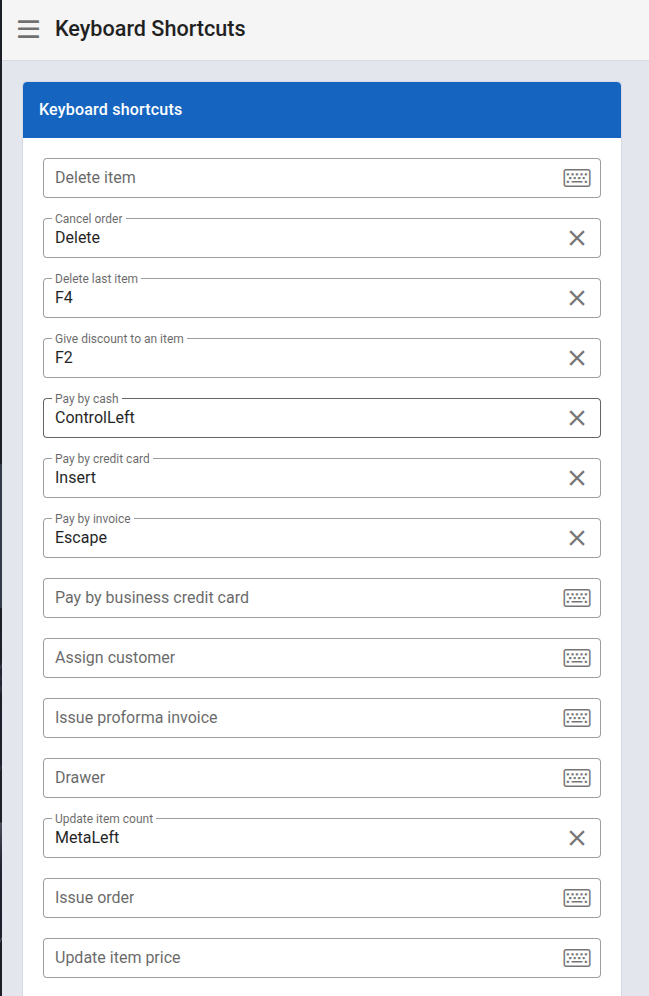
Keyboard shortcuts
These settings allow you to modify your keyboard shortcuts:
Terminals
Terminals
The final item in the Settings section, Terminals. Going to this page will display:
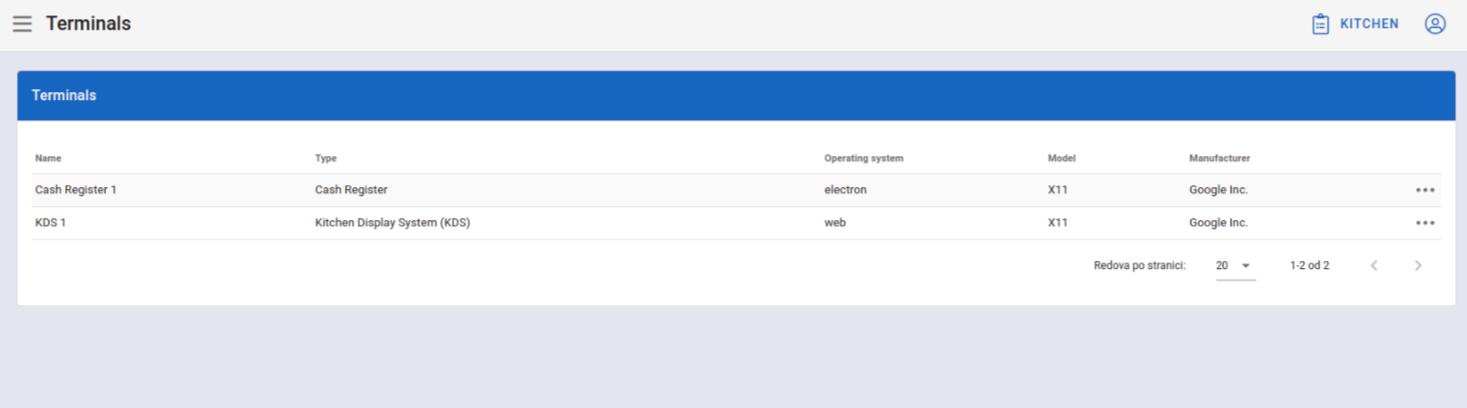
Terminals
Here, all terminals registered in the system are displayed. You can view and edit them. Each terminal has information on the following fields:
- Terminal name
- Terminal type
- Operating system
- Model
- Manufacturer
Clicking the three dots at the end of the row for a specific terminal will reveal options for the terminal:
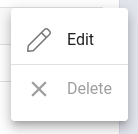
Terminal options
Edit Terminal
If we want to edit an existing terminal, we click the Edit option from the terminal options (shown above), opening the following screen:

Window for editing a terminal
After making the desired changes, click SAVE to save the changes.
NOTE: A terminal of type Cash Register cannot be deleted.
Delete Terminal
If we want to delete an existing terminal, click Delete to remove the selected terminal after confirmation.