Clients
The sixth item in the Administration menu is Clients. Clicking on this item opens the following options:
Clients
The first option are Clients:
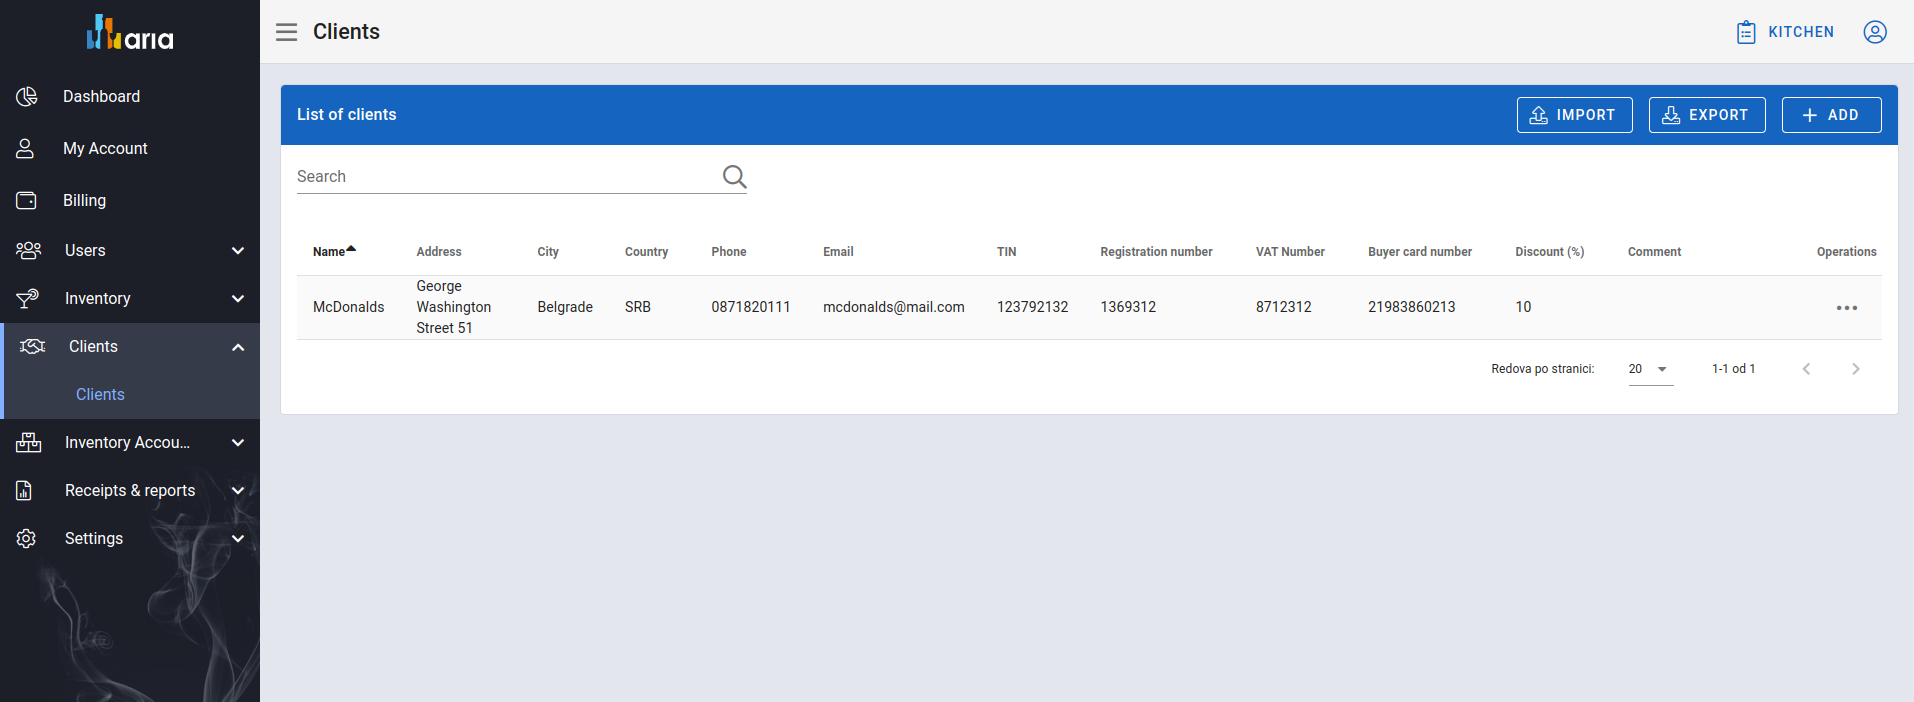
Clients
Search and Import Clients
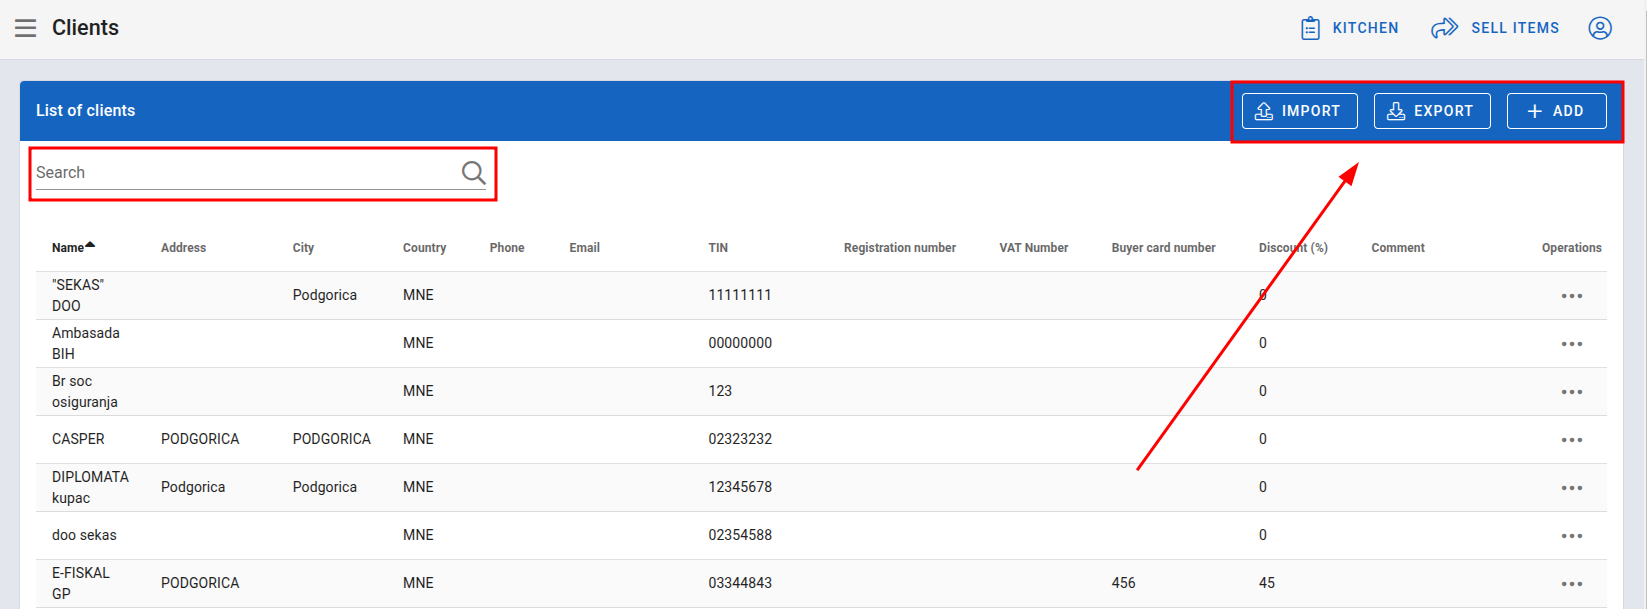
Searching for all available clients in the system is possible by simply entering the name of the client you wish to find into the Search field located above the table.
Clicking on the IMPORT button, located at the top right corner above the table, allows the user to enter multiple clients at once through a file.
After the user clicks IMPORT, the following window will open:
Window for adding clients through import
A detailed explanation is given in the newly opened window. After selecting a file that meets the specified criteria, clicking on the IMPORT button will add all clients from the file into the system, displaying them in the table.
Export Clients
EXPORT button will download an Excel file with all your clients.
Add Client
The next option, next to the import and export options, is ADD, which allows you to add a new client individually into the system. Clicking on this button will open a window with a form:
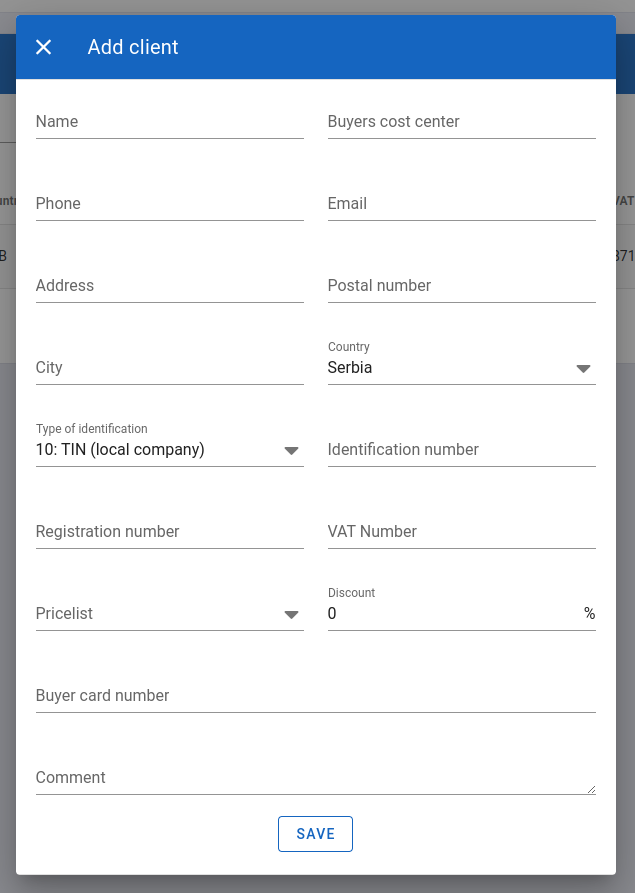
Window for adding a new client
After filling in the required and optional fields, clicking the SAVE button will successfully save the client into the system.
Options for Client Management
To access additional options over clients, you need to click on the three dots in the row in which a specific client is located. The following options will appear:

Options for managing clients
Edit Client
Clicking on the first available option Edit will open a window for editing the client with the form pre-filled with their information. The form is the same as for adding a client.
After making the desired changes, clicking the SAVE button will save the changes in the system and close the window.
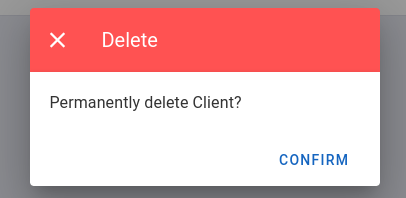
Delete Client
If you want to delete a client, select the Delete option. A window will appear to confirm the deletion:
Window for confirming client deletion
If you choose CONFIRM , the system will permanently delete the client.
Client Transactions
The second item under Clients is the Client Transactions. Clicking on it will display the following window:

Client Transactions
Search Client Transactions
Searching is done by entering the name of the client whose transactions you want to find in the Search field above the table.
After entering the search term, the system will, if it exists, display the requested client and their transactions.
View Client Transaction
On the client transaction page, where you currently are, you can view all transactions for a specific client. In the last column of the table, next to the Balance column, clicking on the three dots will open the View option:

Options for Client Transactions
Clicking on View will display the following screen:
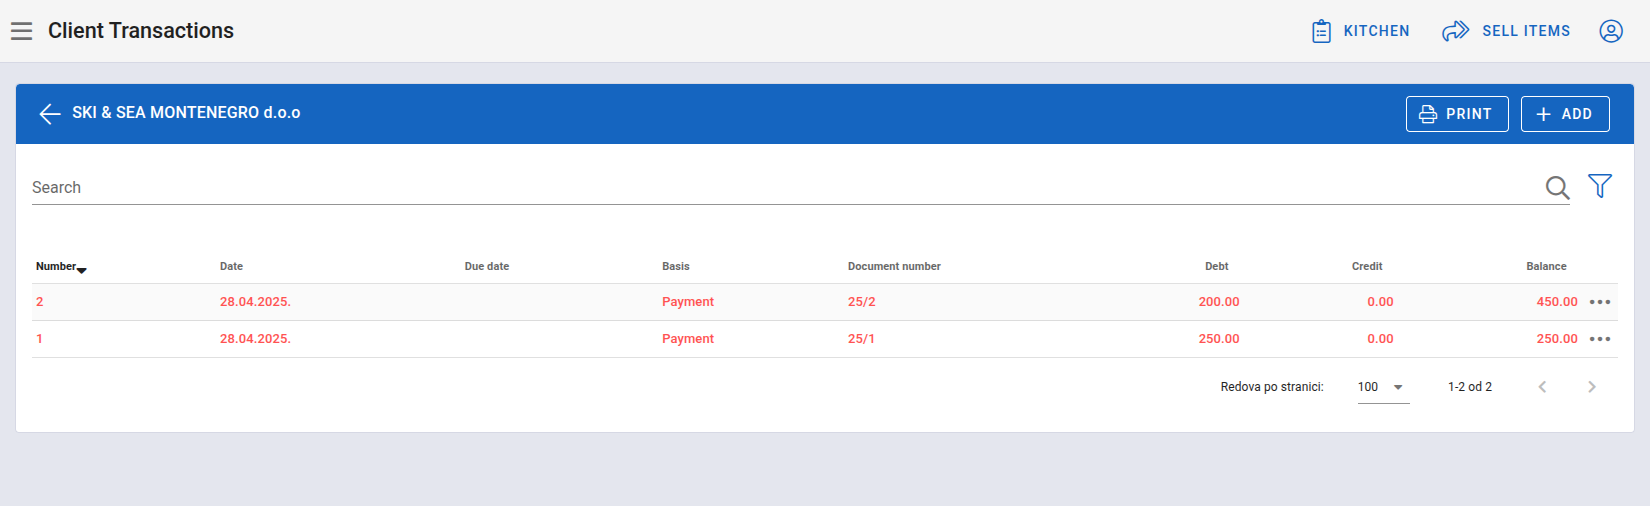
All transactions for a specific client
In addition to standard search, clicking on the funnel icon in the top right corner, a smaller area will appear above the table, containing advanced search where you can search by one parameter or by multiple parameters simultaneously:
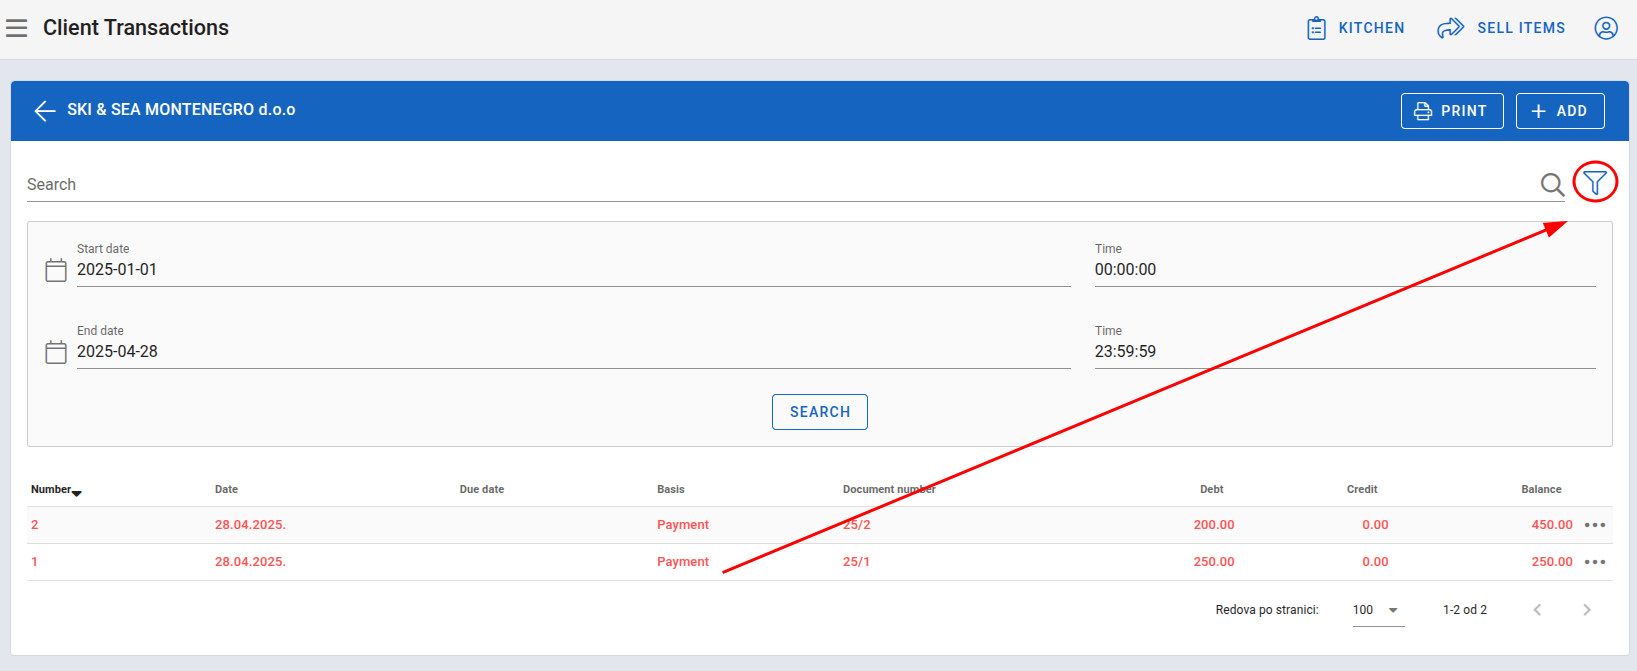
Filter individual transactions by date and time
Here you can filter data by:
- start and end dates
- time for those same dates
After entering the filters, clicking SEARCH will perform the search.
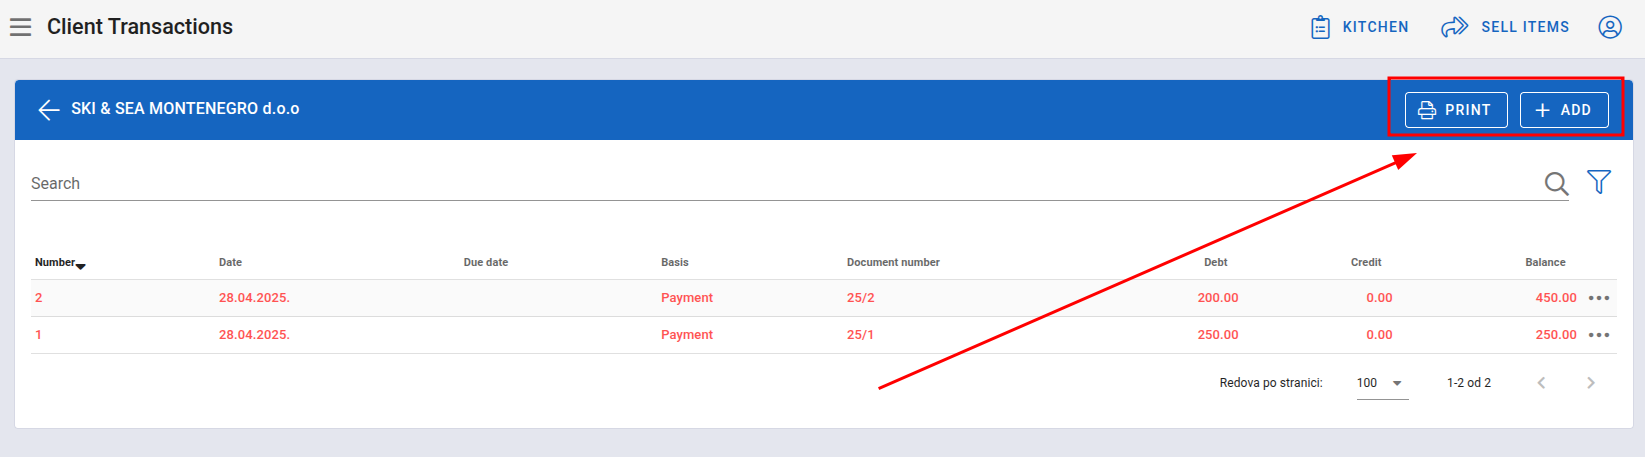
Print Client Transaction
Printing is also possible by clicking the PRINT button located above the table:
Print and Add Buttons
Add Client Transaction
By clicking the ADD button located next to the print button:
Button for adding
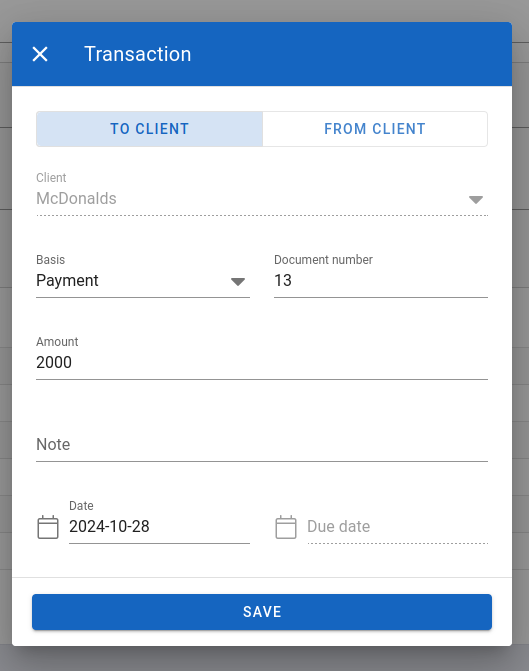
a window for adding a transaction opens:

Window for adding a transaction
The field for the client will be pre-filled with the selected client whose transactions we are observing. It is possible to create a transaction FROM CLIENT and TO CLIENT. After filling in the necessary information, clicking SAVE will create the transaction.
Options for Client Transaction Management
Transactions added automatically, such as during invoicing, cannot be edited. By clicking on the three dots in the last column of the row we want to edit, two options will appear:

Options for an individual client transaction
Edit Client Transaction
Transactions that have been manually added can be edited. Clicking on the first available option Edit will display:
Window for editing the transaction
After making the desired changes, clicking SAVE will successfully save the previous changes in the system.
Delete Client Transaction
Deleting transactions is done by clicking on the three dots in the last column of the desired transaction, then selecting the Delete option:
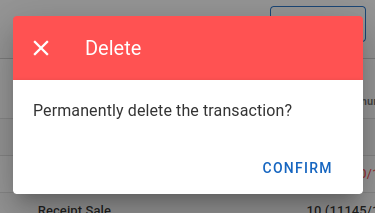
- window for confirming the deletion of the client transaction
By selecting CONFIRM, we confirm the deletion from the system.
Bank Statements
The third and final item under the Clients section is Bank Statements:
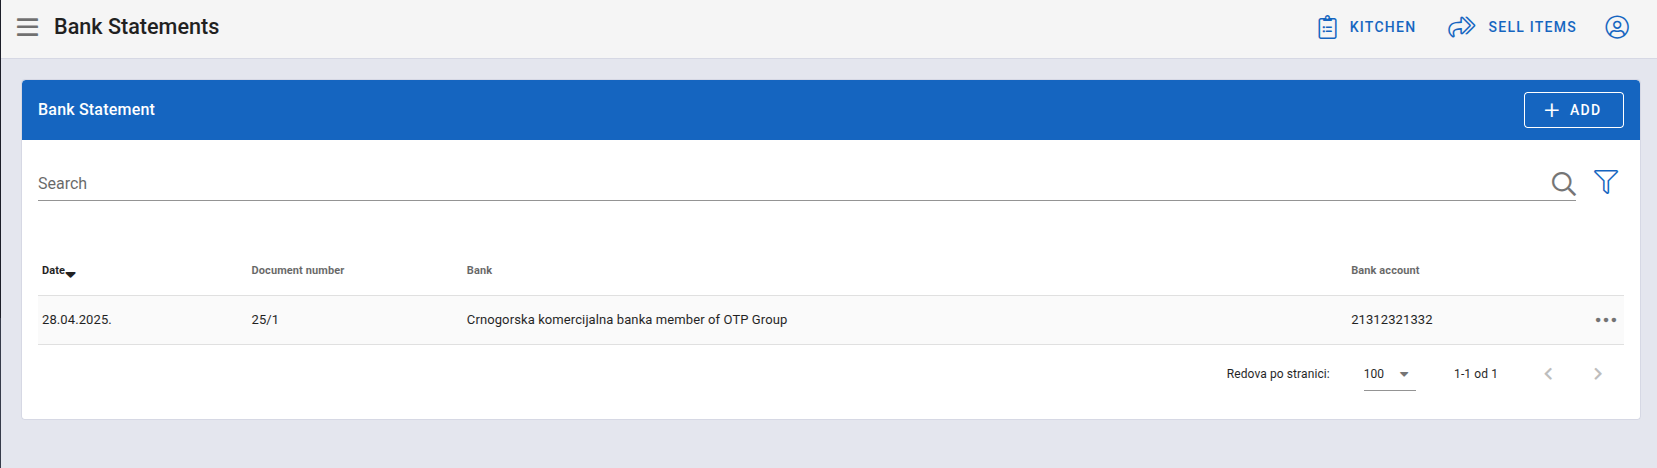
Bank Statements
Searching is done similarly to other places (see searching and filtering in Client Transactions).
Add Bank Statement
By clicking the ADD button located in the top right corner above the table, the application will take us to the following screen:
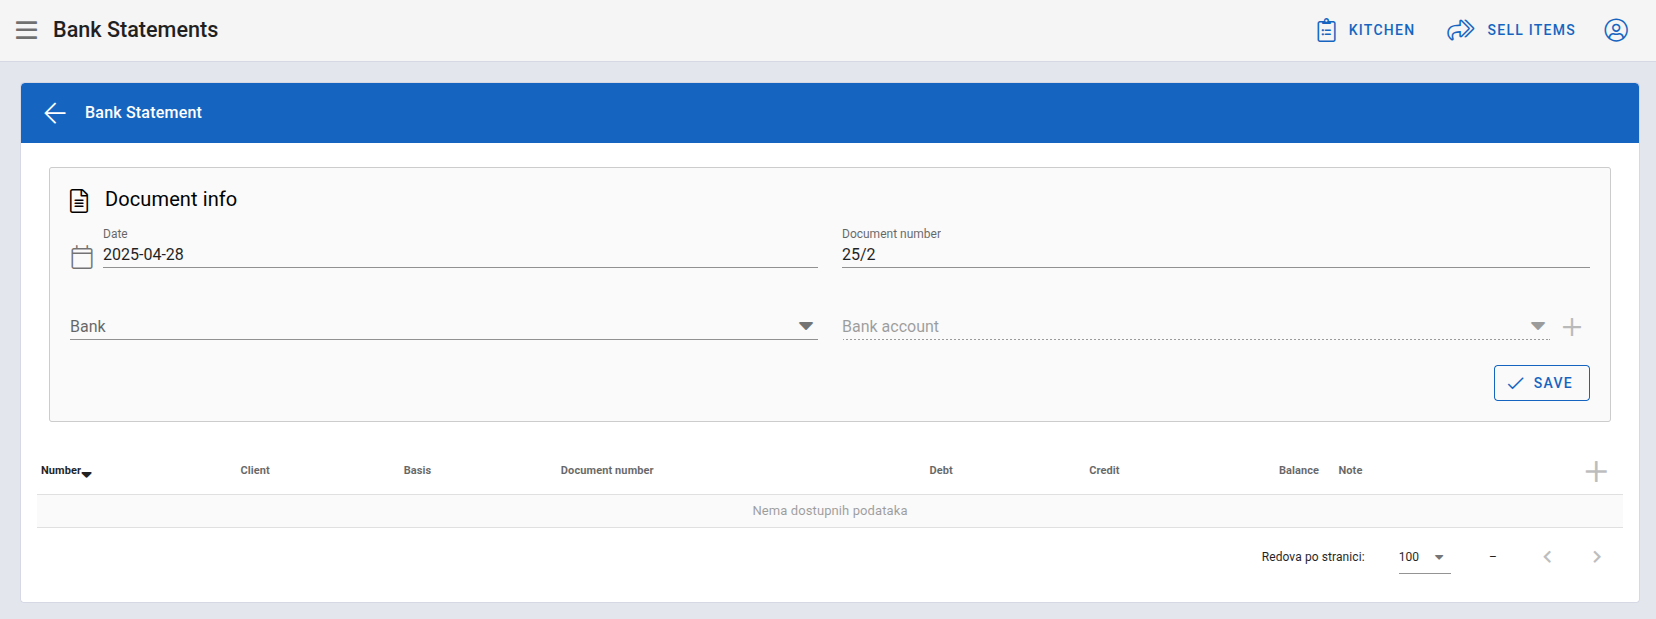
Form for adding a bank statement
The date will be pre-filled with today's date, while the other fields to fill in are for Document Number, Bank, and Bank Account. All fields are required.
After we have properly filled out the form:
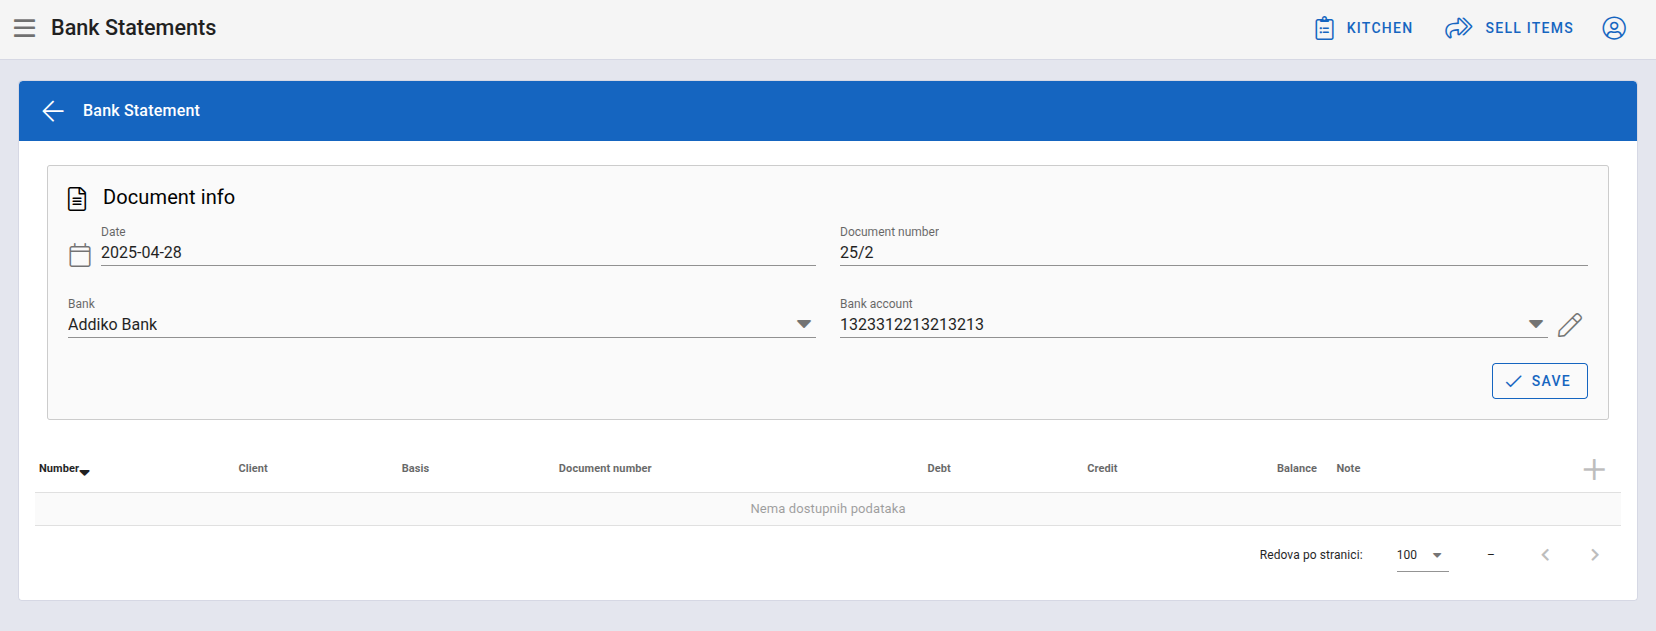
Filled form for adding a bank statement
clicking the SAVE button will create a new statement.
NOTE: You can change the bank account by clicking the pencil icon next to the field for the Account Number in the form shown above. A window will open:
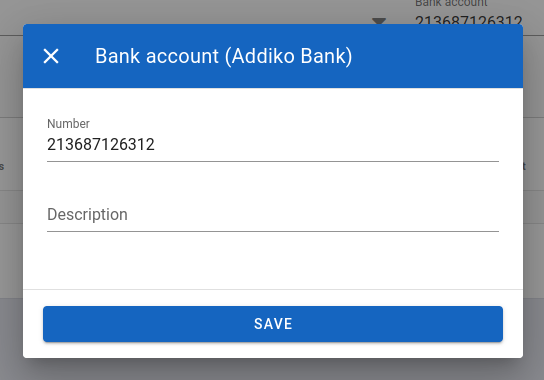
Window for changing the bank account
Create a transaction
To create a transaction at the Bank statement, click the + button in the bottom right corner below the bank statement form which will open a window for adding details for that transaction:

Window for adding a transaction to bank statement
Clicking Save adds the transaction. If the transaction is in red color, it is to a client, and if it's green, it's from a client:
Newly added transactions
Options for Bank Statement Management
By clicking on the three dots in the last column of the row for the statement we want to view, two options will appear:

Options for bank statement management
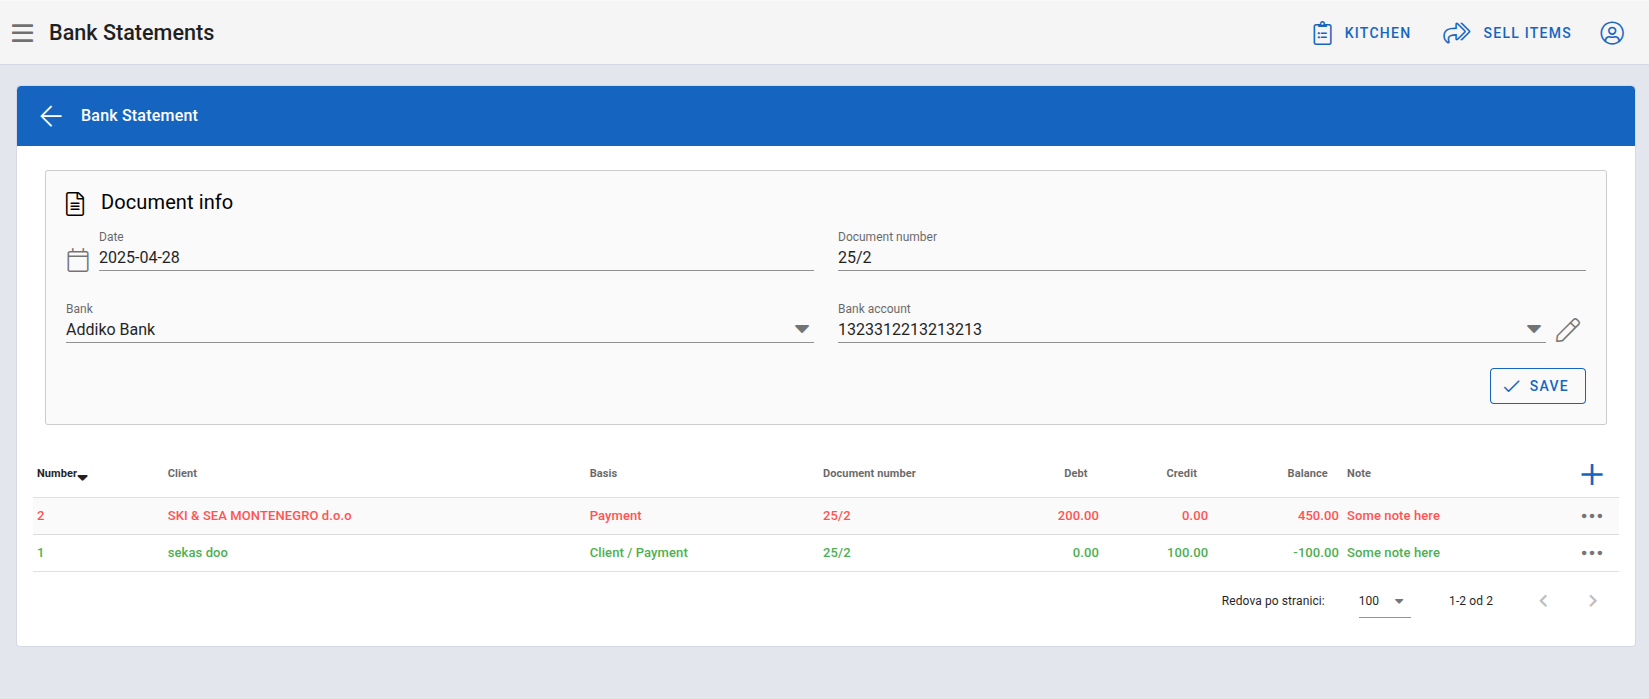
View Bank Statement
After selecting the View option, the application will take us to the next screen where we can see the details of that bank statement for that particular document, as well as a table below that shows all transactions to and from clients:
Details of the bank statement
It is also possible to edit the statement by modifying the fields in the form above and clicking the SAVE button.
Adding a new client transaction is possible by clicking the + icon located in the corner of the table, which opens the form explained here.
Delete Bank Statements
Deletion is performed by going to the view of all bank statements and clicking on the three dots at the end of the row of the statement we want to delete, then selecting the Delete option, which opens a confirmation window, where by clicking CONFIRM we confirm the deletion:
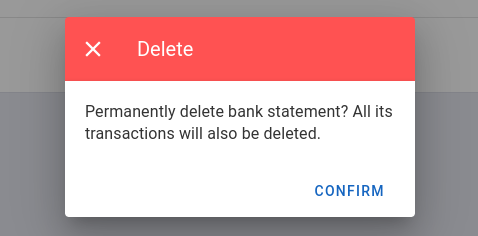
Window for confirming the deletion of the statement