Sell Items - Hospitality
After we start the shift on the Working Day page, the Sell Items screen will be enabled for use and will look as shown in the image below:

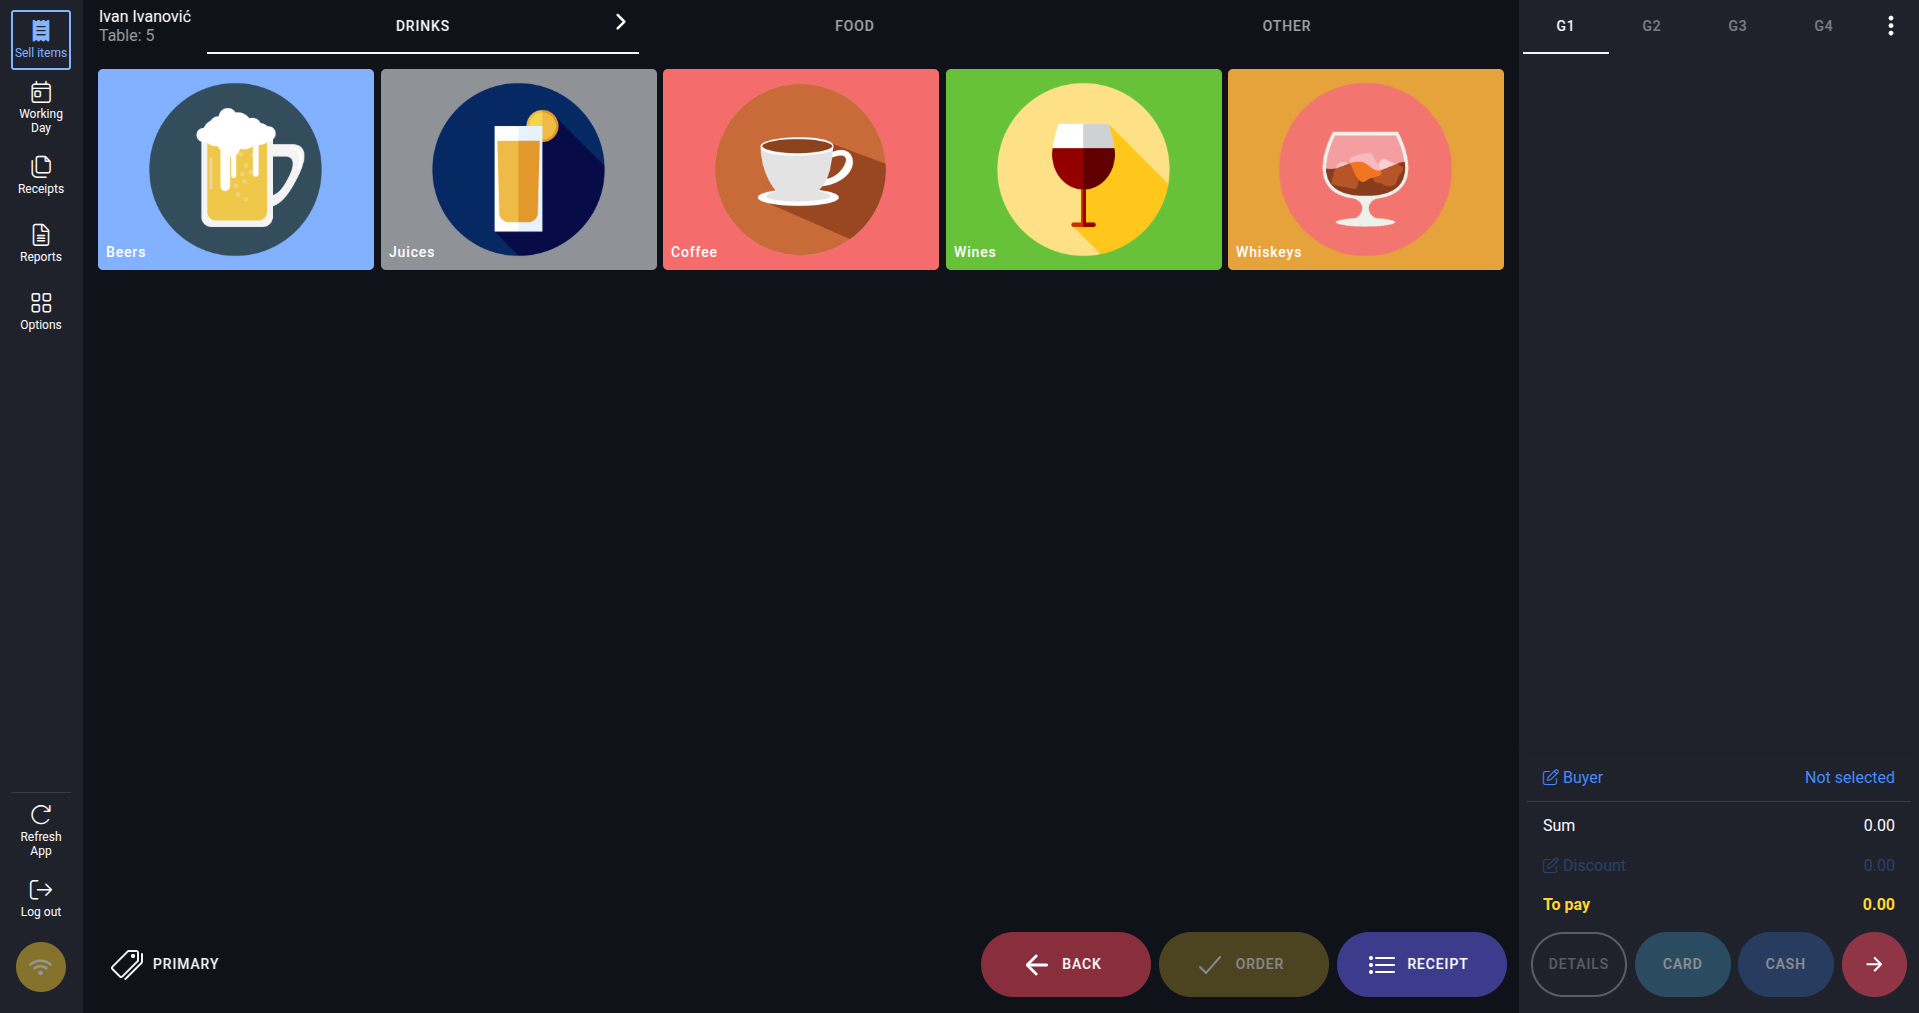
Sell Items Screen
The Sell Items page is the main page of the application and it's the page where you will spend most of your time.
For easier understanding of the page and its functionalities, we will split it in three parts:
Overview of the business space and table selection
The first part of the Sell Items page, which we will call Overview and table selection, is highlighted in the following example:

Overview and table selection
In this section, the layout of the tables in your hospitality space is displayed. It is possible to have multiple sectors, which will be shown at the top of the screen. In our case, we have only one, named Table Plan.
Selecting a table
Clicking on one of the tables, let's say table number 1, opens the interface for adding items:
Interface for adding items
Add items to an order
This page is used for adding items to the order and issuing the order for that table. The left part, highlighted in the image below:
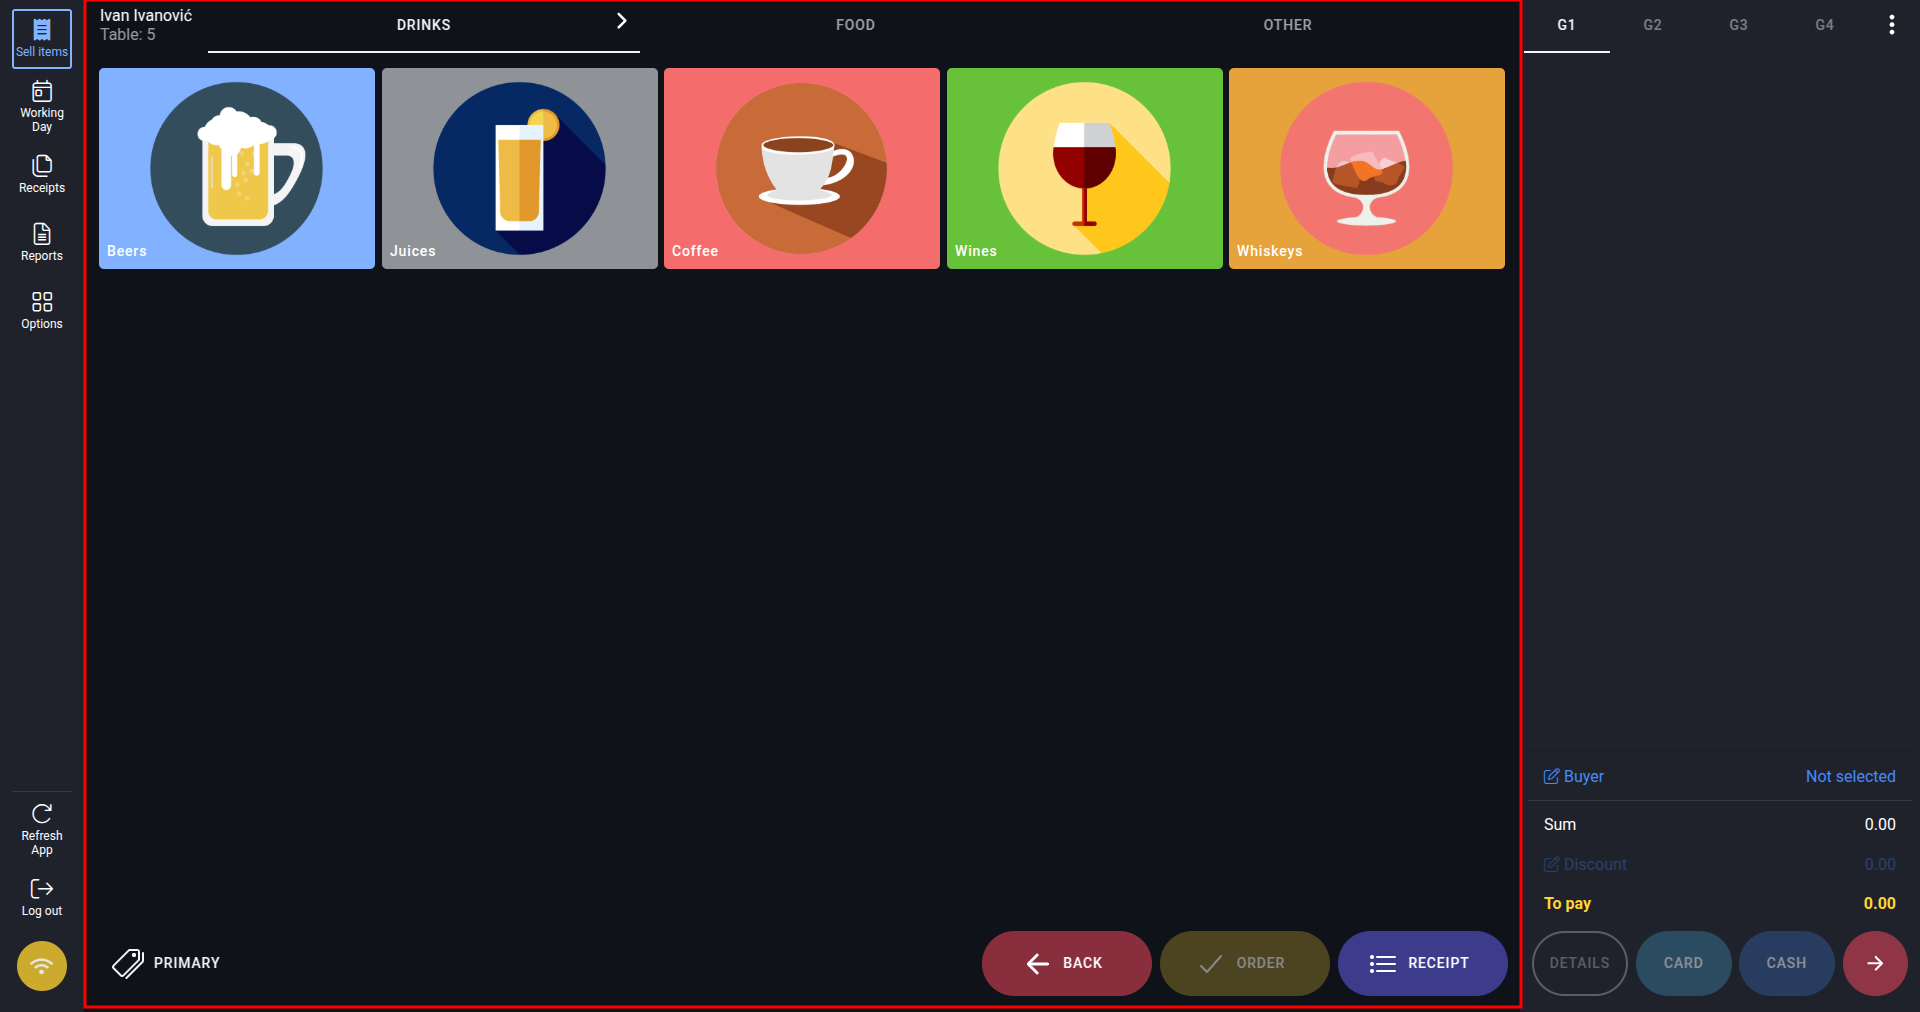
Overview of item groups in the item addition interface
represents an overview of all available items and simple addition to the order. All items are organized into groups for easier access. The main item groups are displayed at the top:
- DRINKS
- FOOD
- OTHER
While within a group like DRINKS, all drinks are divided into subgroups: Beers, Juices, etc.
On the right side of the interface, we see order details, which items have been added, and similar information:
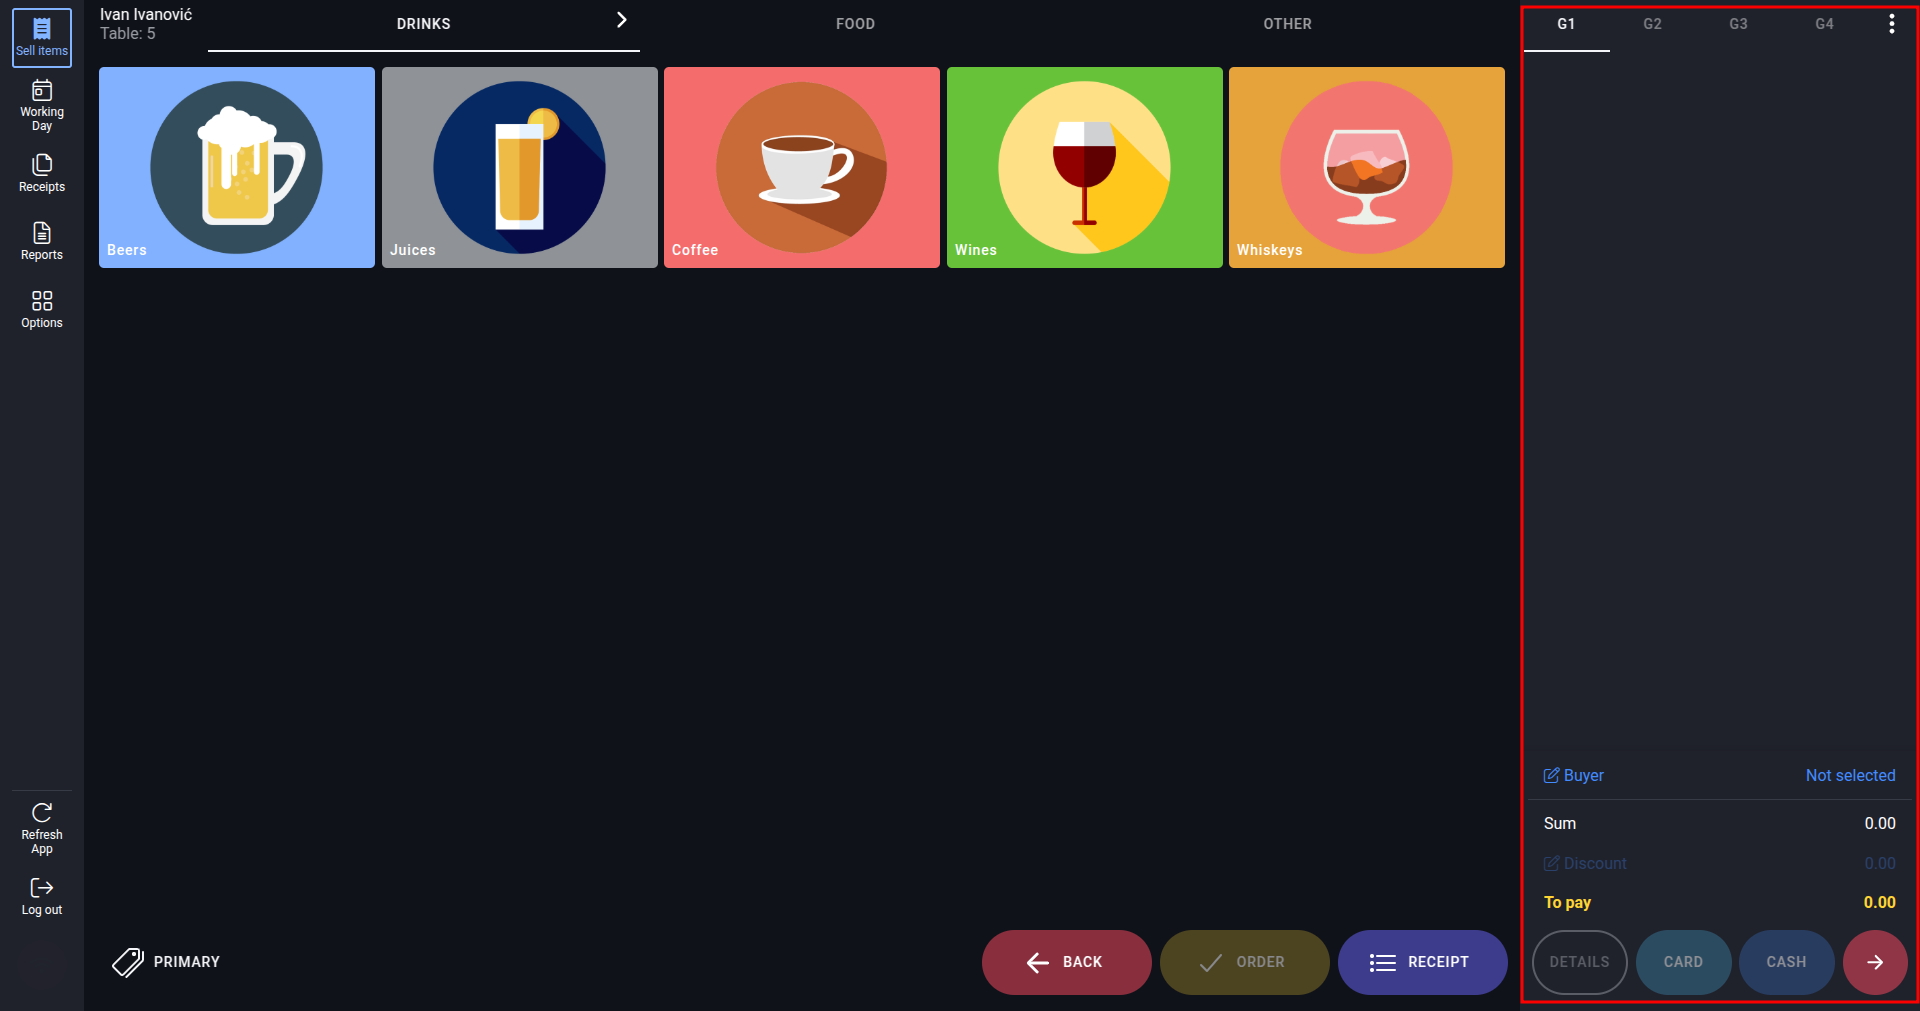
Overview of order details
We will explain this section in more detail after adding items to the order.
After selecting a table and being directed to the interface for adding items, we have created a temporary empty order. To add items to the order, simply click on one of the item cards, such as Beers, and it will display all items from the Beers group:
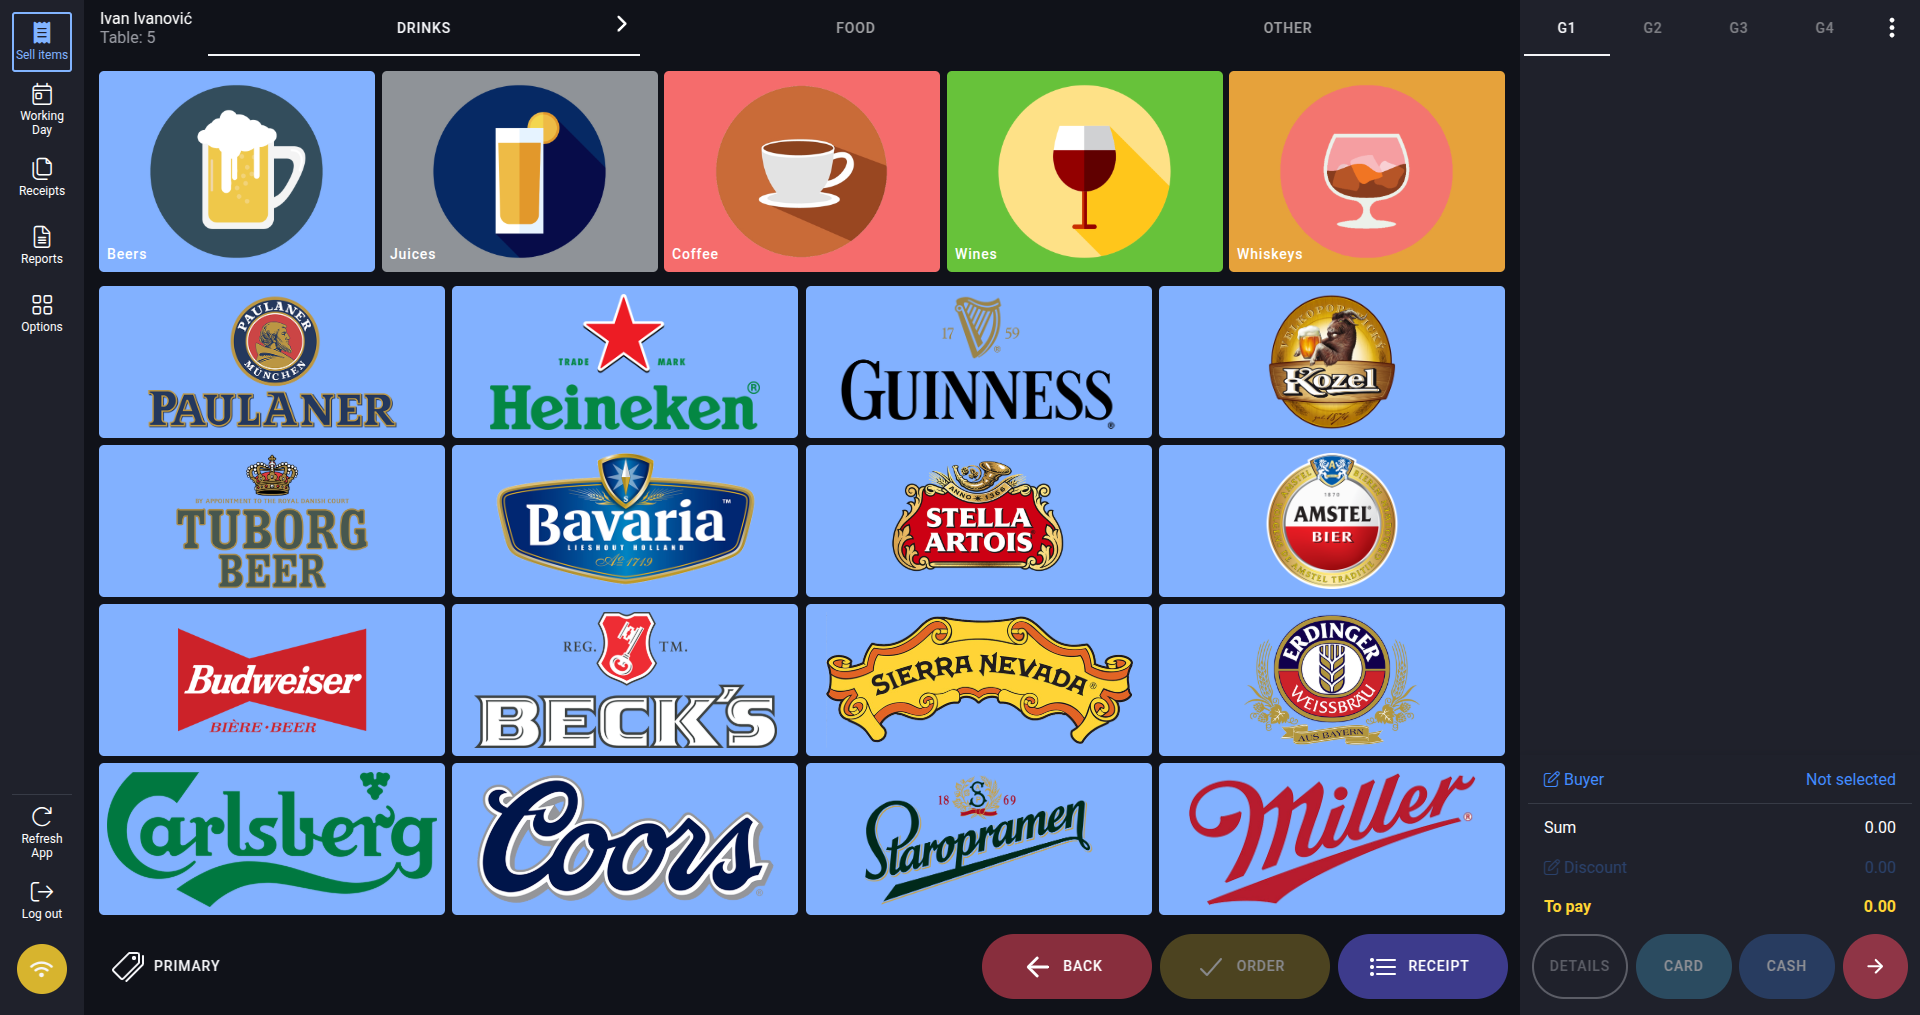
Interface for adding items after selecting a category
Let's say we want to add 3 Paulaner beers to our order. Click the card for that beer 3 times to add it to the order:

Interface for adding items after adding 3 Paulaner beers
You can see that the selected item card has an indicator showing three items selected. Additionally, the order details are shown on the right side of the screen:
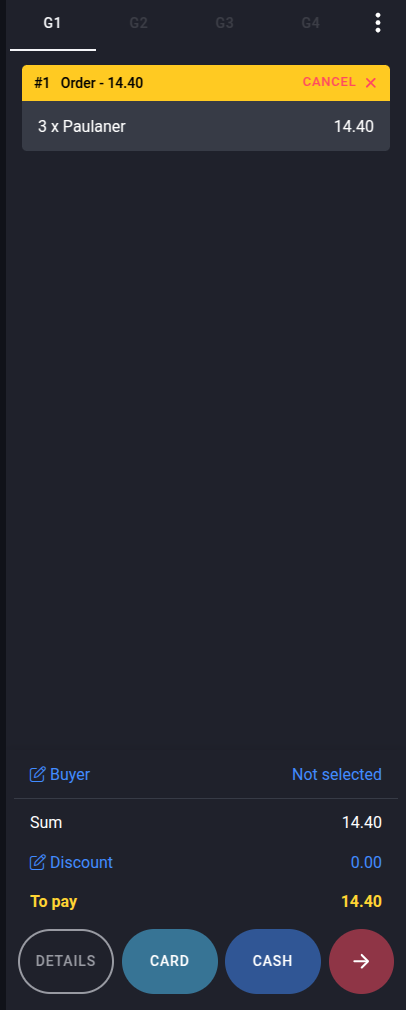
Order details
The receipt can be canceled using the CANCEL button. At the top, there are four sections:
- G0
- G1
- G2
- G3
These sections allow splitting the receipt into multiple parts for payment. For example, if guests at that table want to split the payment, these sections allow for that.
Options to modify receipt item
An item added to the receipt can be modified further. Clicking on an item opens the following options:
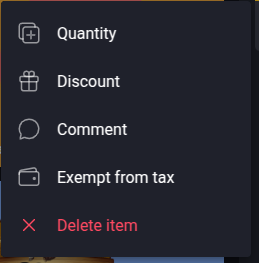
Options for managing an item on the receipt
Item Quantity
The Quantity option allows you to change the number of items later. Selecting this option opens a window for entering a new quantity:
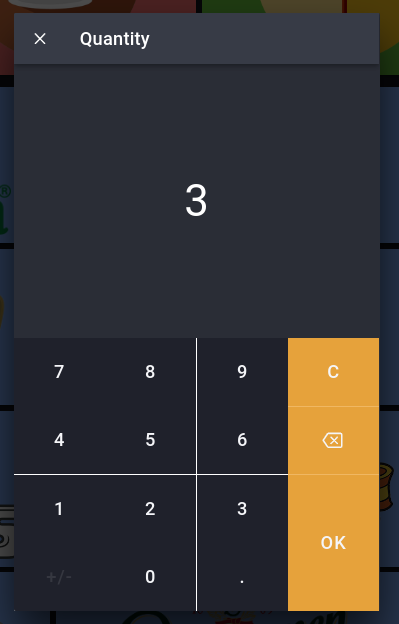
Window for entering a new quantity
To change it, enter the number 5 and click OK. The window will close, and the quantity of the Paulaner item will now be 5.
Item Discount
The Discount option allows you to apply a discount to an item. Clicking the option opens a window for entering the discount:
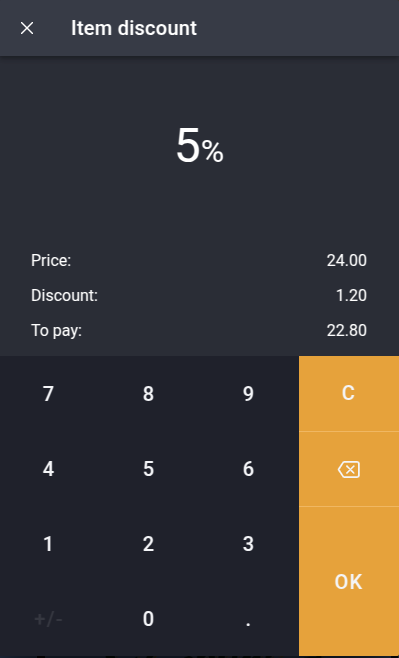
Window for entering a discount
You will see that alongside the original price, the discount is calculated, along with the total payment amount. We will enter a 5% discount. Clicking OK applies the desired discount and closes the window.
Receipt details after applying a discount to an item
Item Comment
The Comment option for an item allows adding a note for the item, which can depend on specific item details, such as modifiers, discounts, special requests, or packaging types.
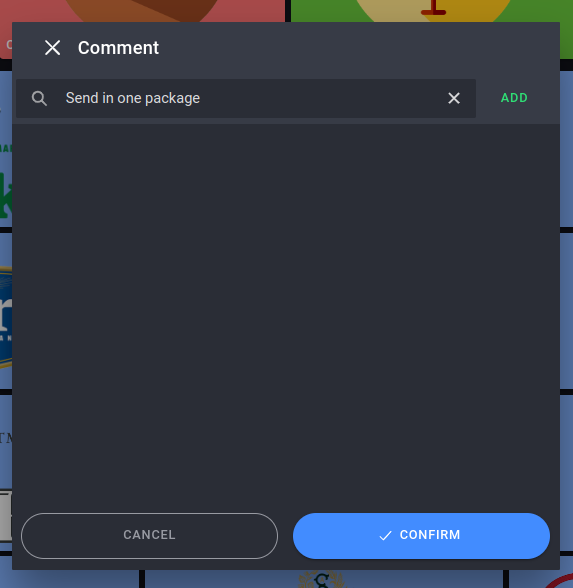
Window for adding a comment for an item
After entering a comment, click the green ADD button to add the comment to the item. An item can contain multiple comments.
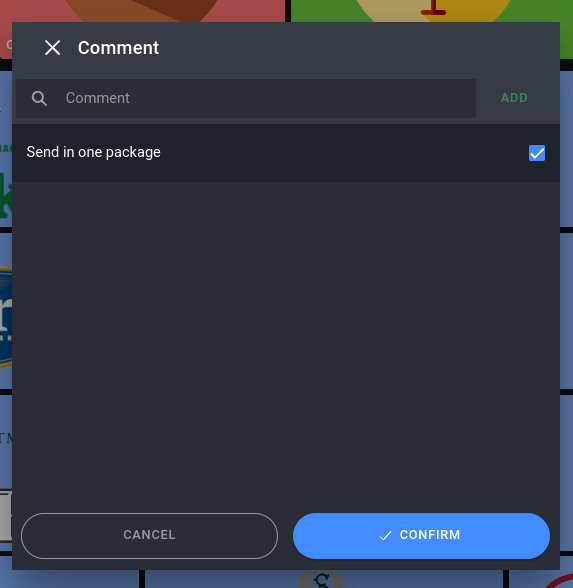
Item after adding a comment
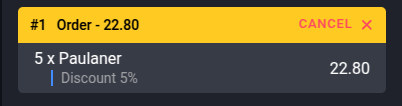
Clicking CONFIRM saves the added comment for the item and closes the window. After that, in the list of items on the receipt, you can see an indicator that the item has a comment, displayed as a bubble icon:

Order details after adding a comment to an item
Item Extemp from tax
The second-to-last option for managing an item on the order is Extemp from tax, which allows you to extemp an item from the order from some type of tax.
Item Delete
The final option, Delete item, removes an item from the order.
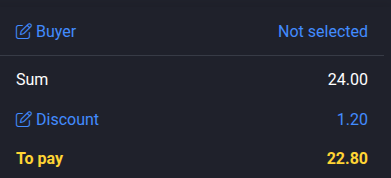
Add a Buyer to the Receipt
If you want to add a buyer to the order, click on the Buyer option, as shown in the following example:
Button for adding a buyer
After clicking on the highlighted option, a window for adding a buyer to the order will open:
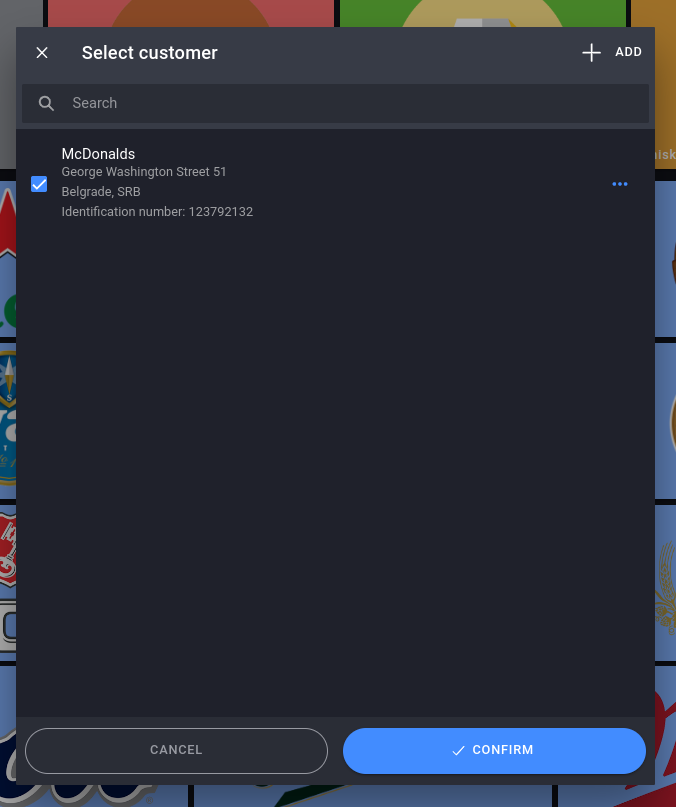
Window for adding a buyer
In the window shown above, you can choose a buyer from your list of clients that were previously added in the client addition section in Options. If you want to add a new client here, simply click the ADD button in the top right corner, and a form for adding clients will open.
Once you've selected a buyer, click CONFIRM to add the buyer to the order.
NOTE: Adding a buyer is not mandatory.
Add a Discount to the Entire Receipt
To add a discount to the entire order, simply click on the Discount option, that is below the option for Buyer.
After that, in the window that opens, enter the total discount for the entire order and click OK.
Primary Order
To issue a primary order, click on the PRIMARY option in the bottom left corner of the interface for adding items:
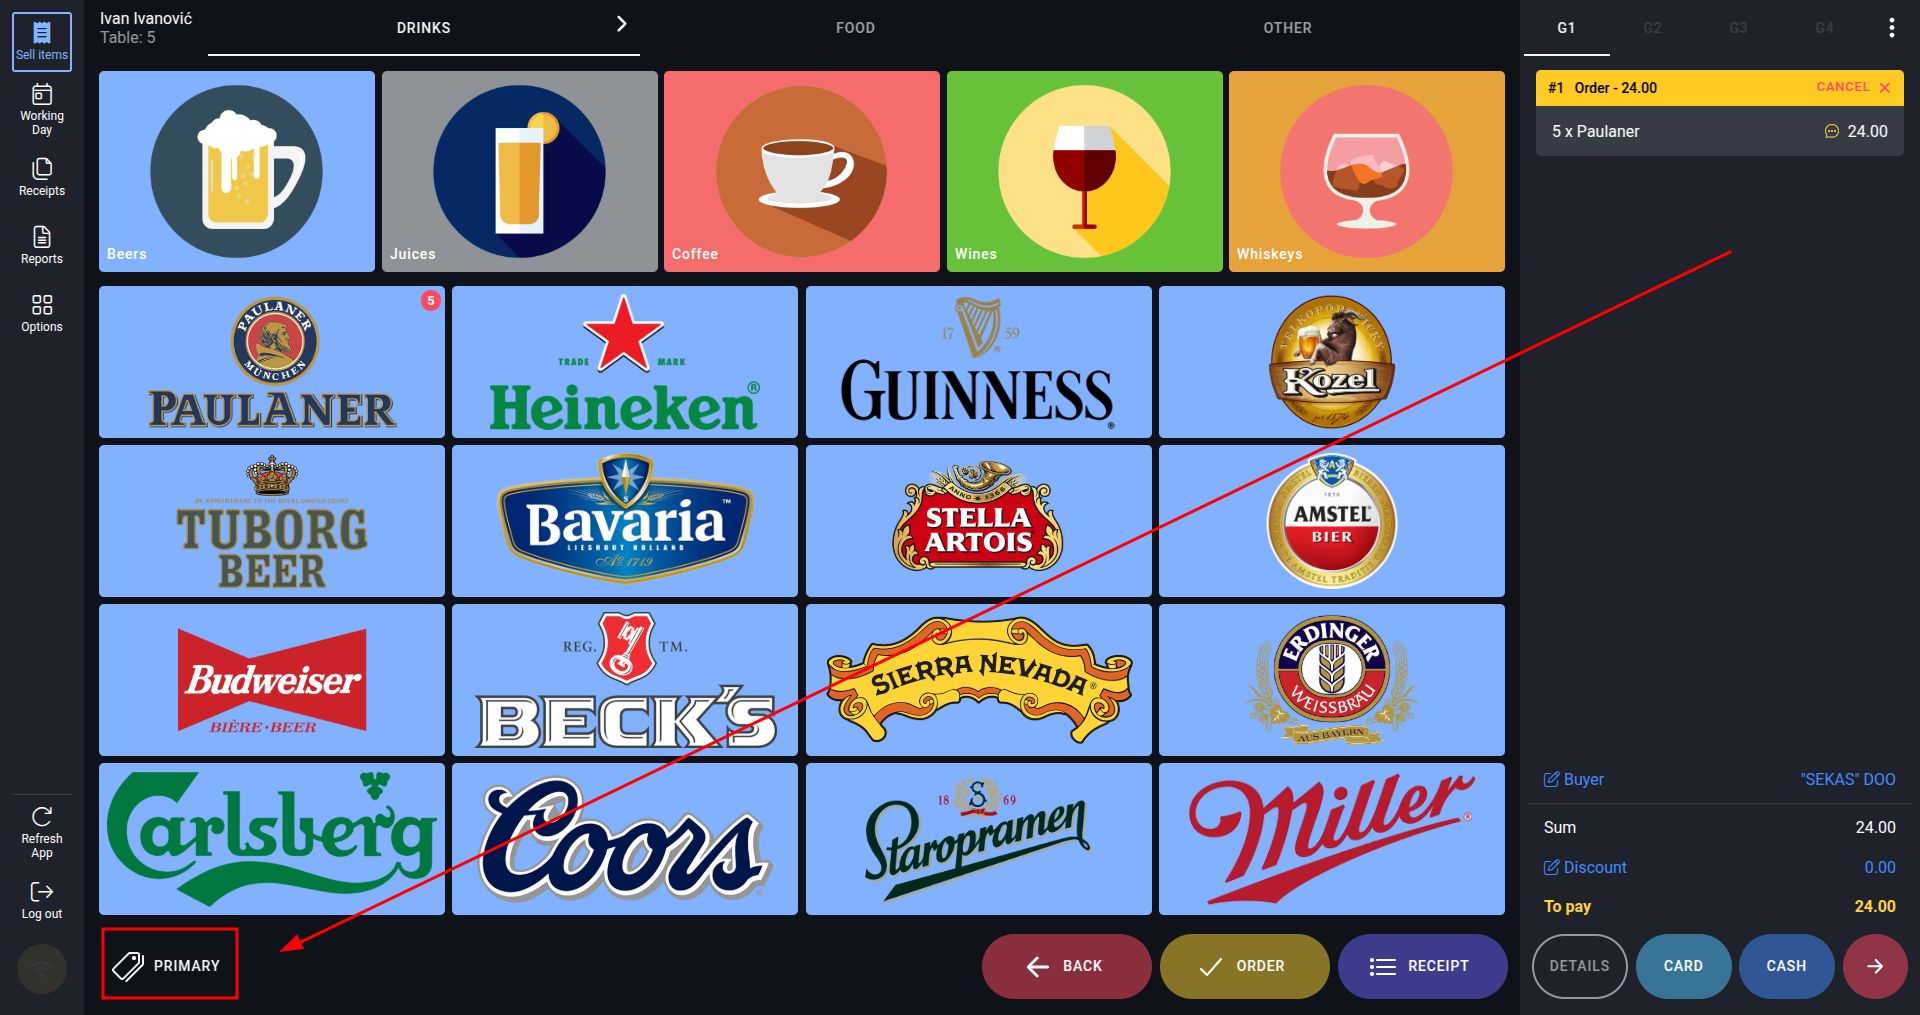
Button for primary order
Create (issue) an order
To create an order, click the ORDER button:
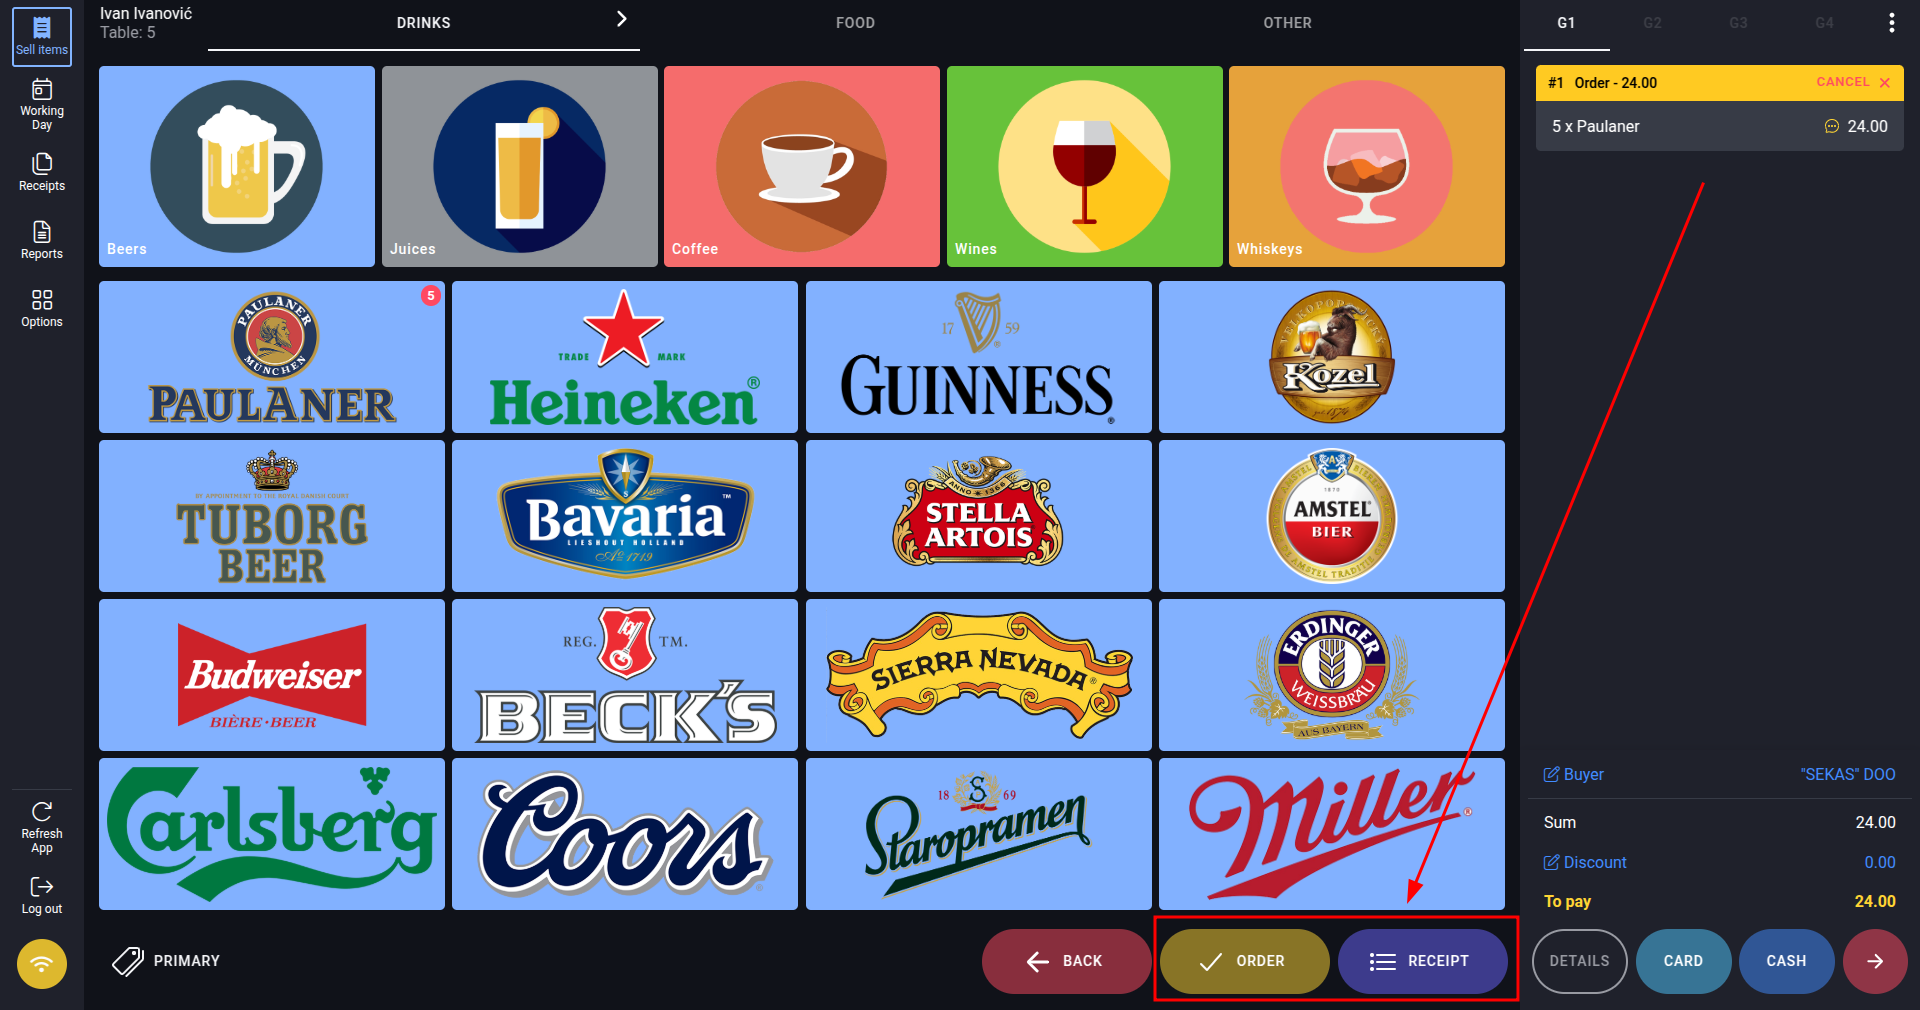
Button for order
After creating an order, the application will return you to the home screen, where you will see an indicator that an order has been made for that table. For example, if we made an order for table 3:
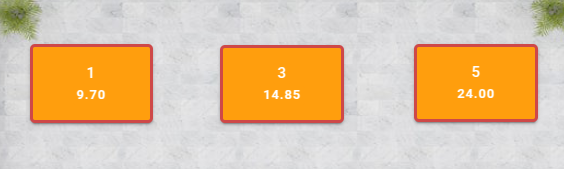
Table after an order is made for it
By clicking on the table again, application will take you to the interface for creating, editing and issuing the order.
Payment Method
To issue an order and its payment method, click on either the CASH or CARD buttons, located at the bottom right of the interface, depending on the payment method.
Details
If you want to set additional settings for the invoice, such as type, payment terms, and similar options, click the DETAILS button, which will open a window:

Order details
There are three types of invoices:
- Sale
- Advance
- Proforma
Each of these order types has its own settings. The options for Payment Method are as follows:
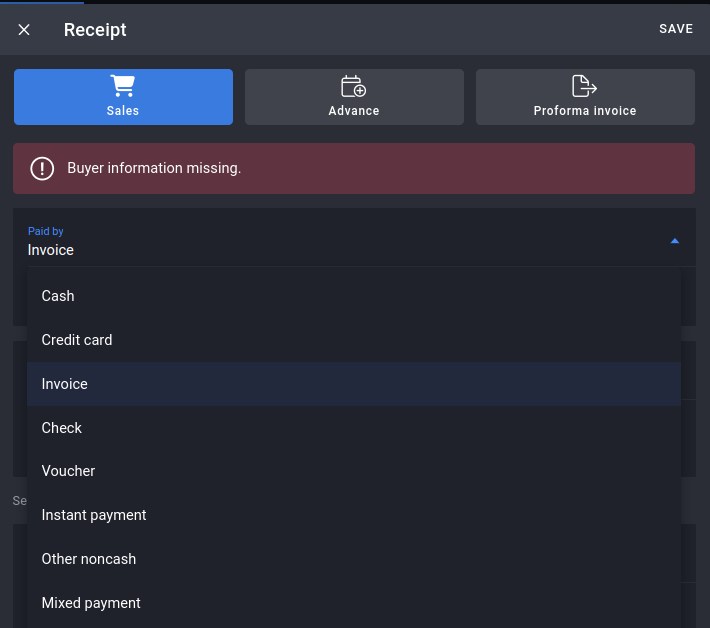
Payment methods
After selecting the type of order, in our case Sales, click NEXT to start the order issuance process.
Kitchen
To access Kitchen, click the button located at the bottom left part of the interface:
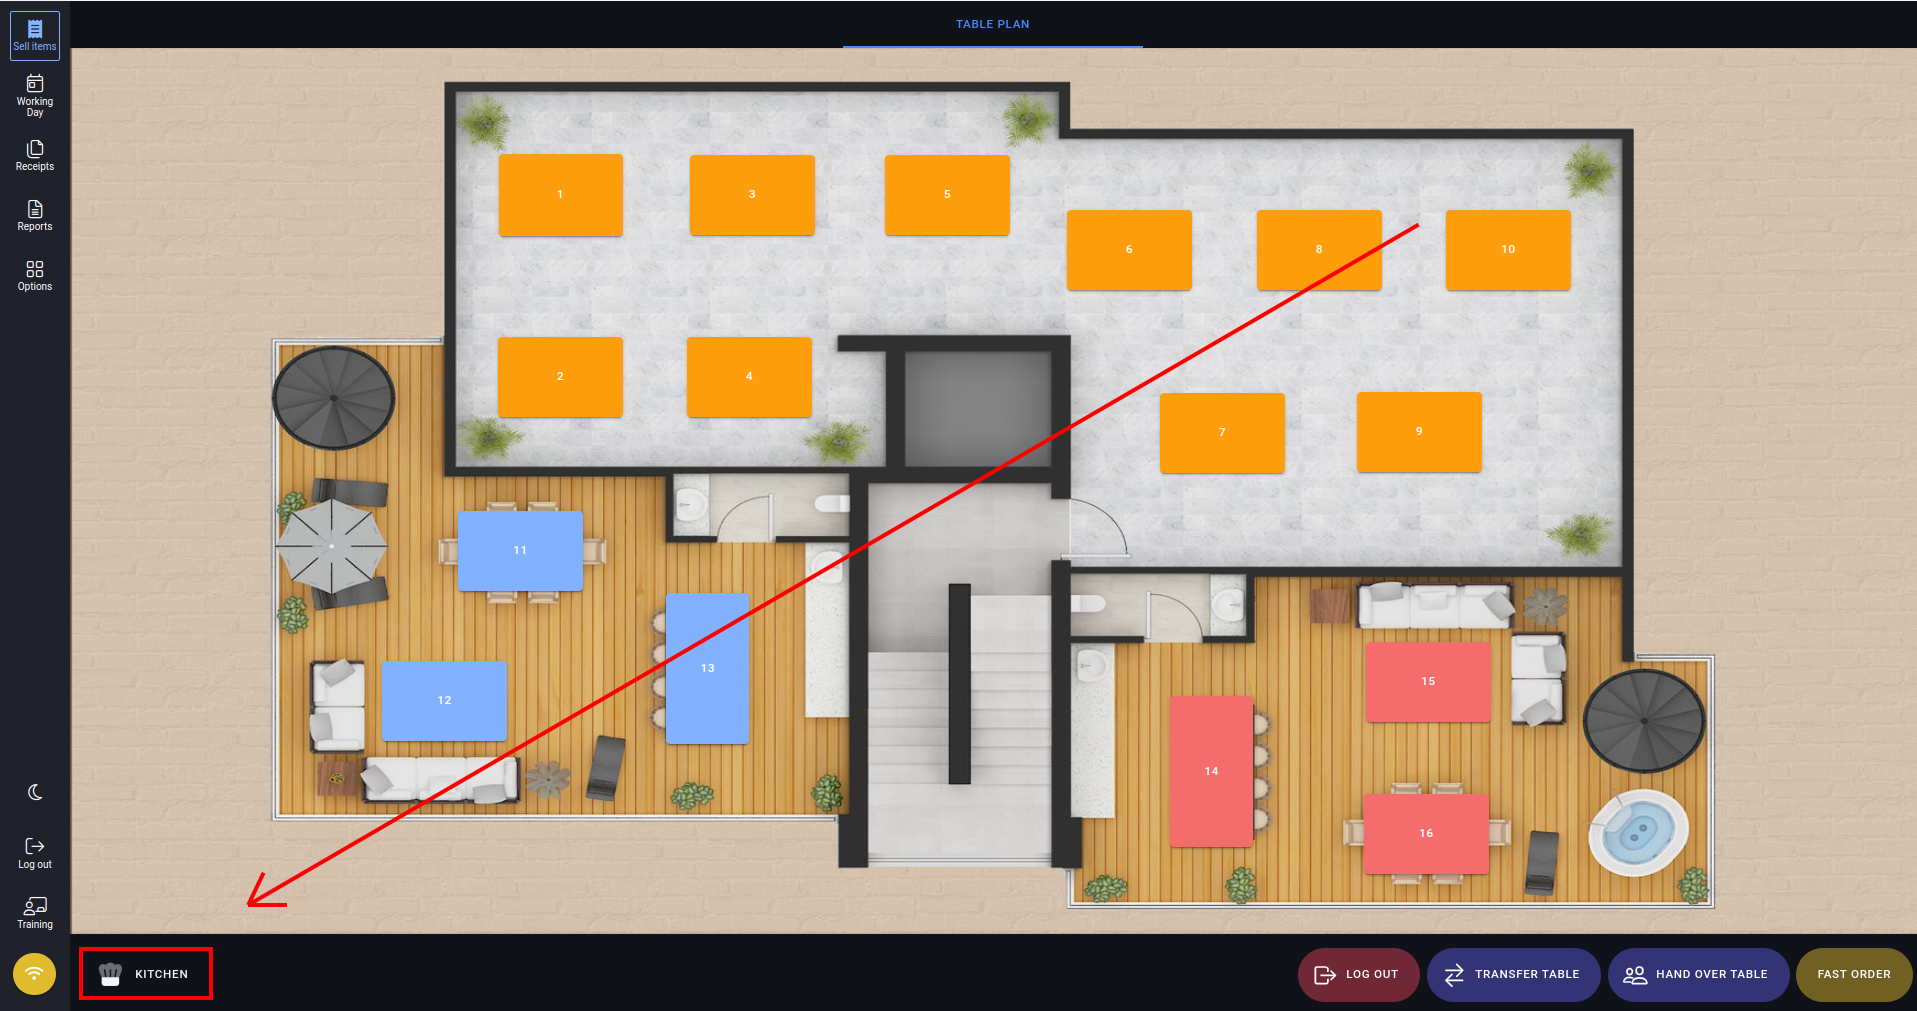
Kitchen Button
Or in case of mobile screens, by clicking three white dots in top right corner and then first option, Kitchen:
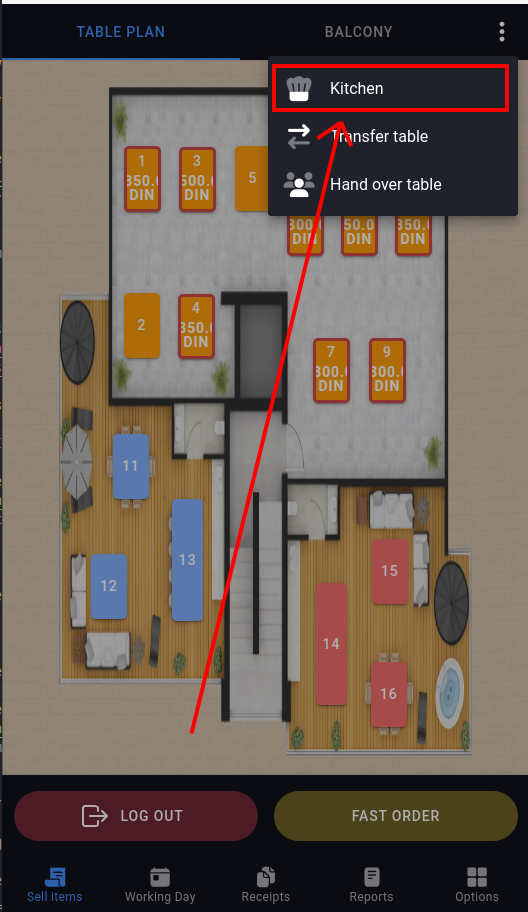
Kitchen button for mobile screens
After that, the system will take you to the Kitchen section of the application. Initially, this screen will look like this:

Kitchen
Navigation through the Kitchen
To display order cards on the kitchen display, it is necessary to first create food orders through the sales interface for issuing receipts. Once orders are entered on the sales interface, they will automatically be forwarded to the kitchen display, where they will be visible for further processing and preparation. This procedure allows for more efficient communication between sales and kitchen staff.
(Meanwhile, we will create a few food orders to explain the kitchen operation in more detail). The screen will then look like this:
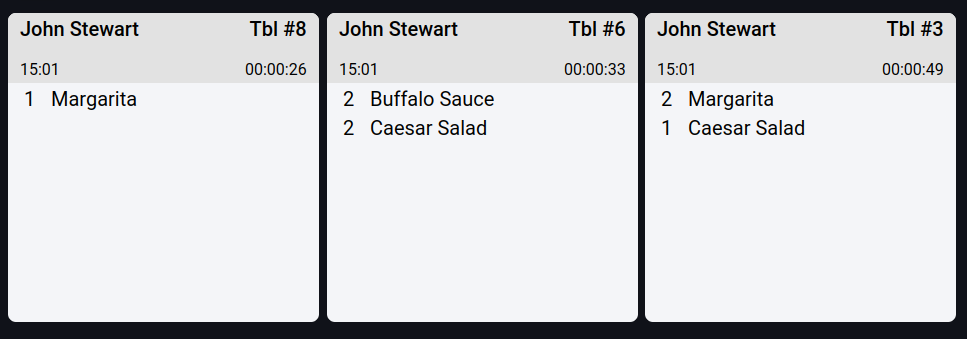
Kitchen Orders
The white cards display all the food orders that have arrived in the kitchen. For each order, we can see:
- the waiter who issued it
- the table number
- the time the order was issued
- a timer indicating how long it has been since the order was issued and sent to the kitchen
- the details of the order (food items)
In the upper left part of the screen, we see options for:

- Returning to the previous screen
- 'Refresh' orders (reload them)
- Internet connection status
In the middle of the upper part of the screen, we see options for displaying open and completed orders:

Options for open and completed orders
Clicking on the three horizontal lines in the upper right corner opens the kitchen navigation menu:

Kitchen Navigation
Clicking on the three dots in the line where it says KDS, opens options to:
- Return to the Table Plan
- Go to Administration
- Log out
All Day
The All Day option allows us to view all requested items for the entire day:
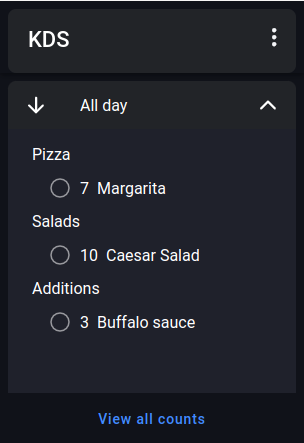
All Day
By clicking on any of these items, dishes, or ingredients, we mark which order contains that dish. For example, we will click Margarita:

Selecting all items from orders for the whole day
Settings
Settings consist of the following items:
- Number of tickets per page
- Font size
- Timers
Tickets per Page
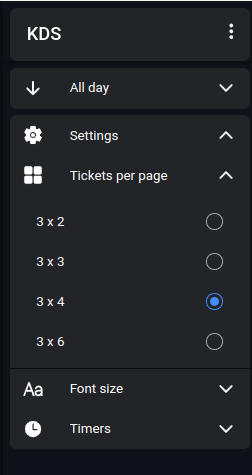
Number of Tickets per Page
This setting allows us to choose the layout and number of order tickets. If the total number of orders exceeds the entire screen space, there is an option for Pagination:

Pagination
Font Size
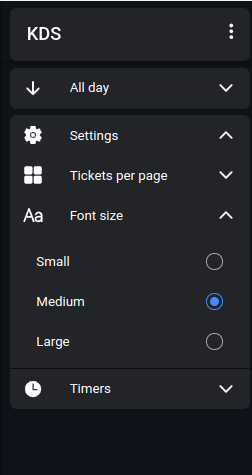
Font Size
Allows changing the font size on the order cards.
Timers
Timers serve as indicators of how long an order or dish has been waiting. For each order, we have a timer that counts how long it has been since the order was received. Depending on the yellow and red timer settings, the order cards will have indicators if an order has exceeded one of these timers.
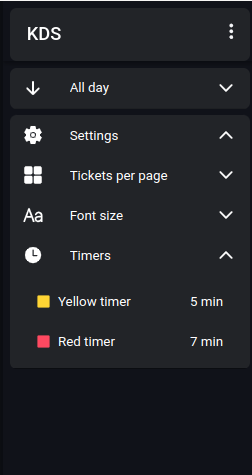
Timers
By clicking on the yellow and red timers, we open windows to adjust their activation time:
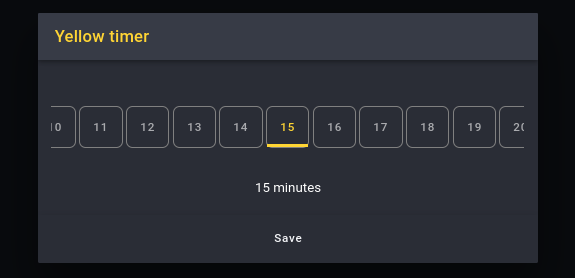
Yellow Timer
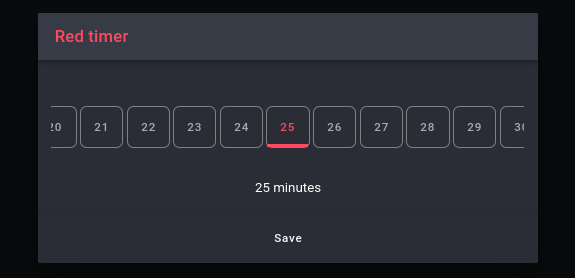
Red Timer
We have set the yellow timer to activate after 15 minutes and the red one after 25 minutes, then clicked Save.
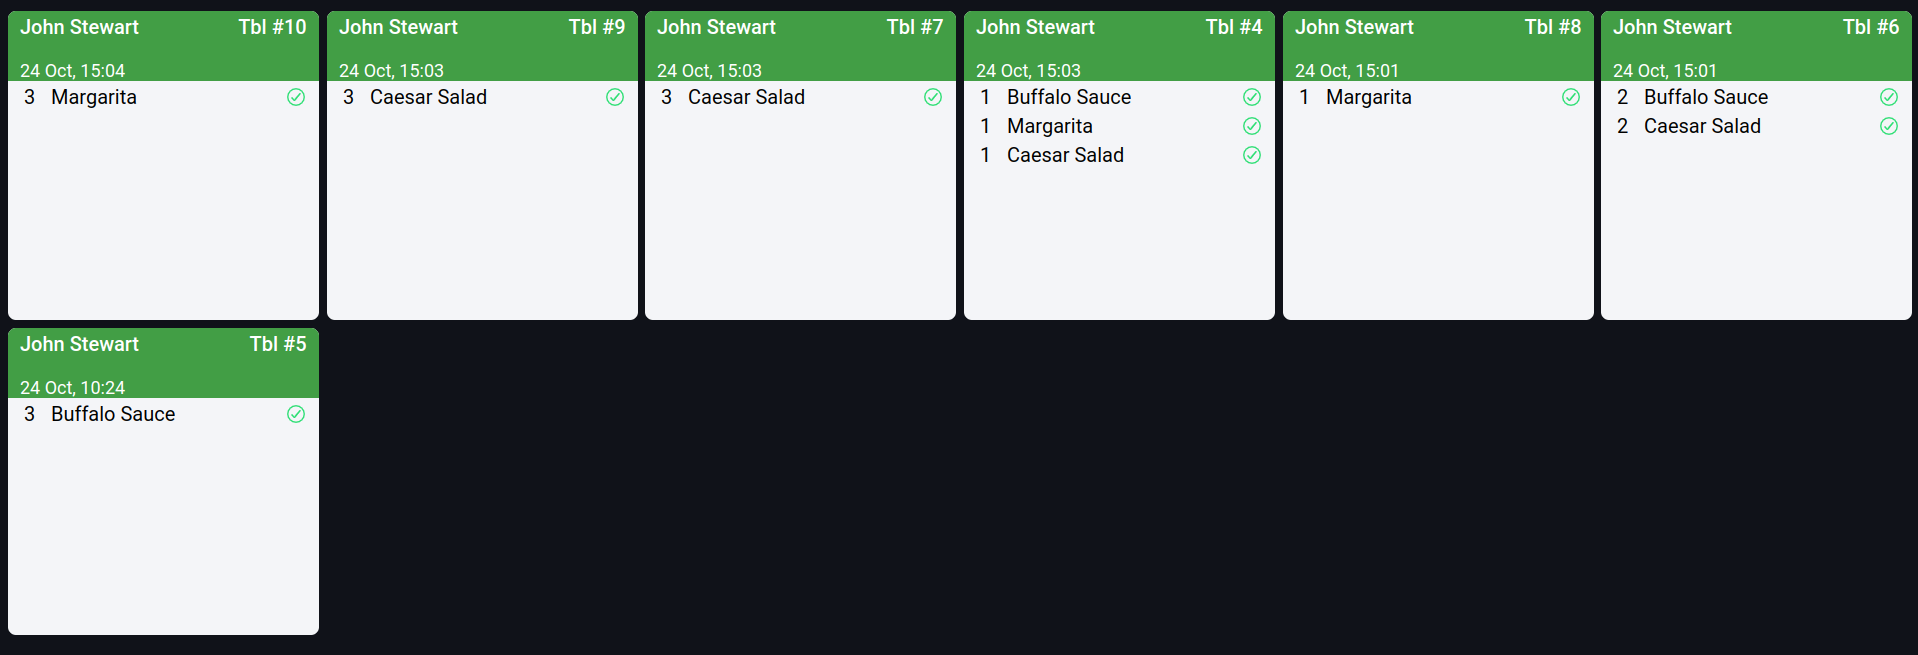
As some of our orders were received more than 15 minutes ago, the yellow timer has been activated for them, marking them like this:
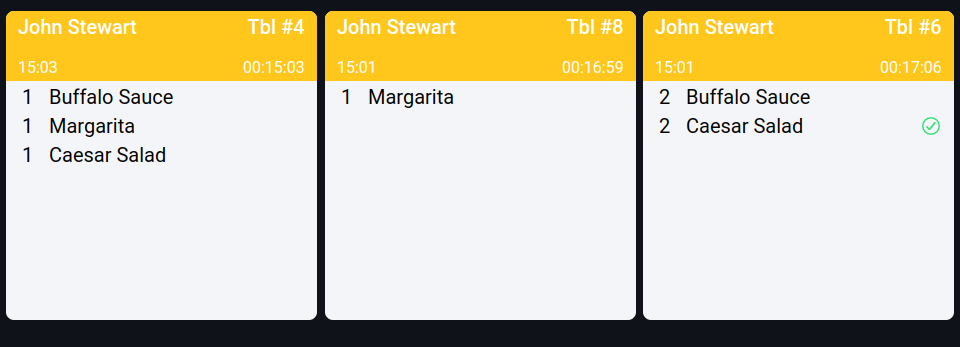
Orders waiting for more than 15 minutes
Here's how an order looks when it's been waiting for more than 25 minutes:
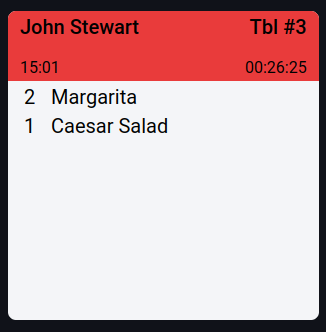
Orders waiting for more than 25 minutes
Mark an Order as Complete
When an order is ready in the kitchen, simply click on the top part of the order card, and the option COMPLETE will appear:
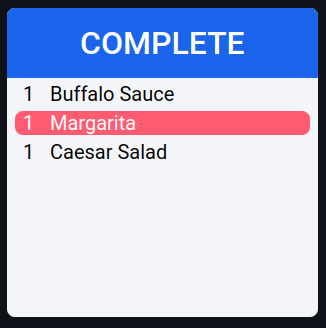
Marking an Order as Complete
Clicking on COMPLETE marks the order as ready, and it moves to the completed orders section.
Mark Part of an Order as Complete
It is also possible to mark only part of an order as complete.
To mark only the Caesar salad as ready, simply click on it on the order card:
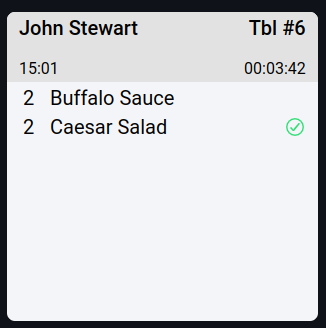
Marking Part of an Order as Complete
Clicking on the same part of the order again will undo the previous mark indicating that part is ready.
Completed Orders and Their Recalling
By clicking on the COMPLETED option, the Kitchen takes us to a page where all completed orders are displayed:
Completed Orders
A completed order can be recalled. This is done by clicking on the top part of the completed order card, after which the option RECALL will appear:
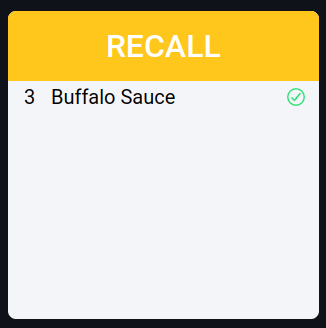
Recall an Order
Clicking on RECALL will recall the order and return it to the open orders section.
Additional Options
Additional options for Sell Items are located at the bottom of the sales interface:
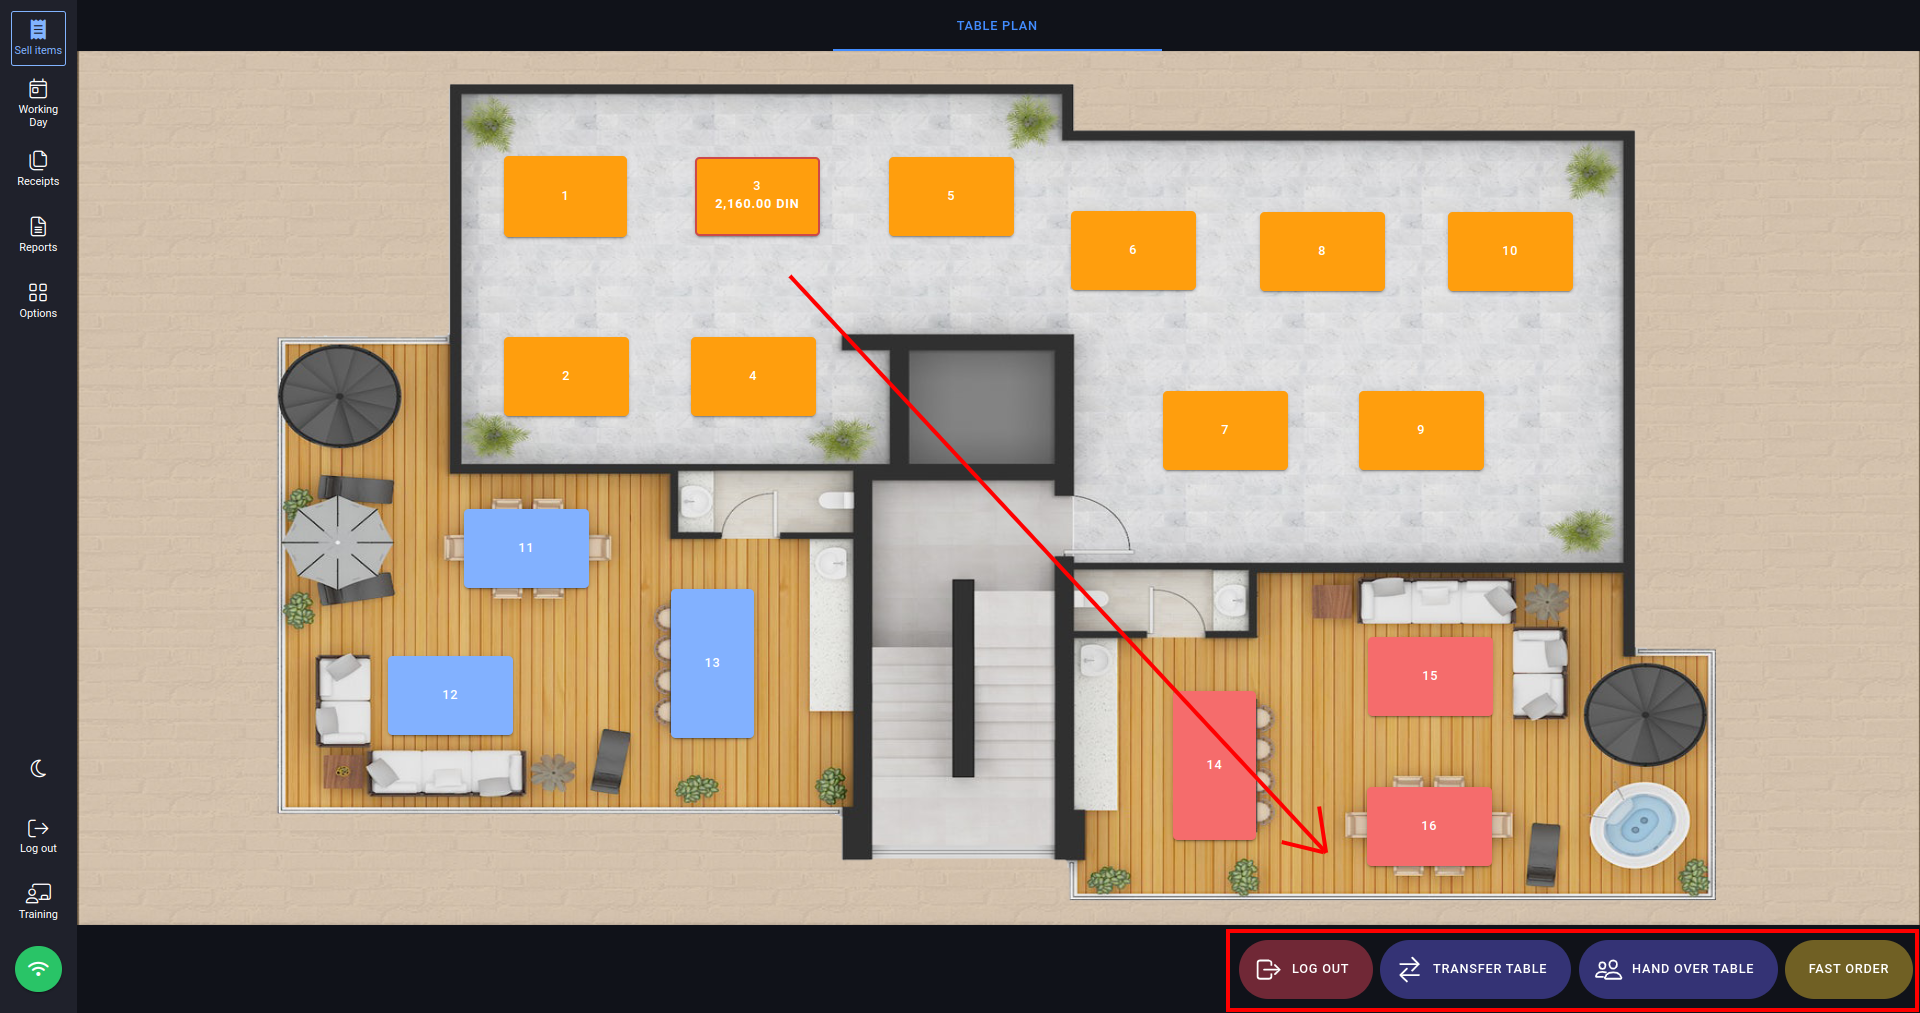
Additional options
And on smaller screens they are located at two different places. LOG OUT and FAST ORDER are located at the bottom of your device, while the rest of the additional options can be accessed by clicking the three white dots in top right corner:

Access button for additional options on mobile screens
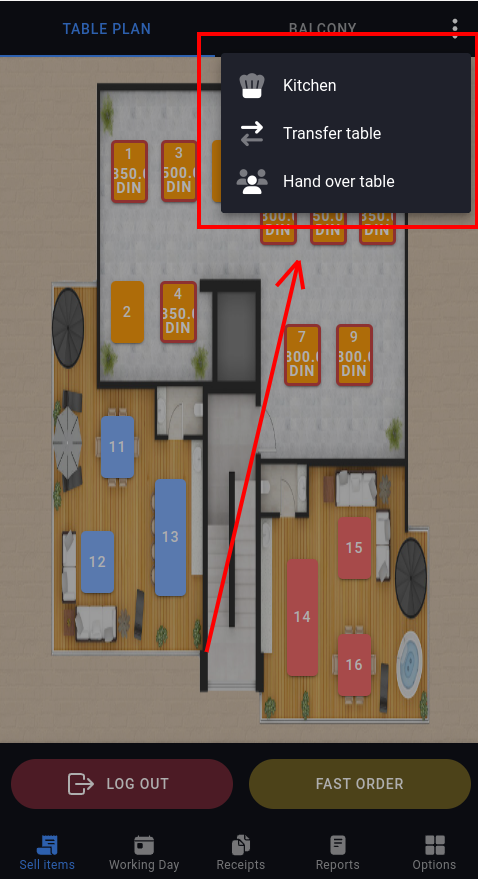
Additional options for Sale Interface on mobile screens
Log Out
The LOG OUT option logs the user out of the system and returns to the PIN entry page.
Transfer Table
The TRANSFER TABLE button allows an order to be moved from one table to another. For example, if we want to transfer from table 3 to table 7, we will click on the TRANSFER TABLE button. The sales interface will then look like this:
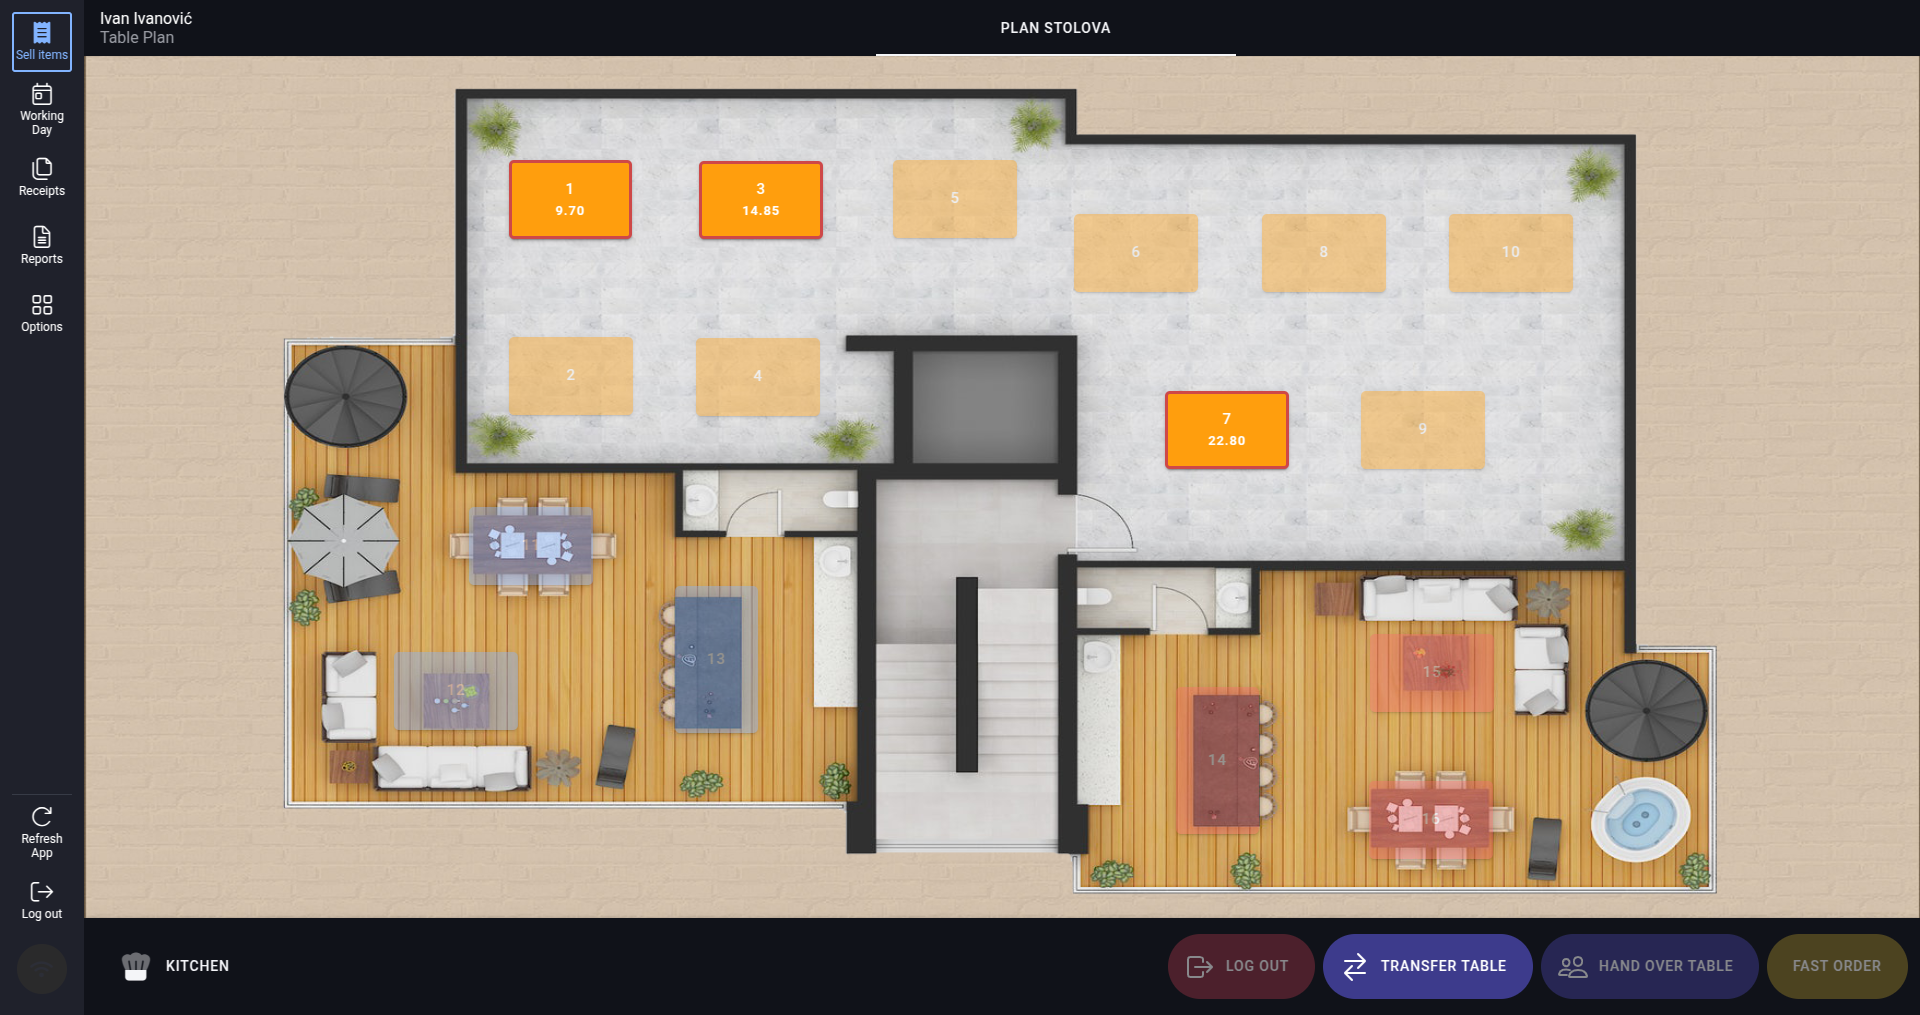
First step for table transfer
We see that the only tables available for transfer are tables 1, 3 and 7, as it has an order. Then we click on that table (let's say 3), and the second step follows:
Second step for table transfer
Now we need to select the table to which we want to transfer the order. In our example, we will select table number 8 and click on it. Then a confirmation window for the transfer will appear:
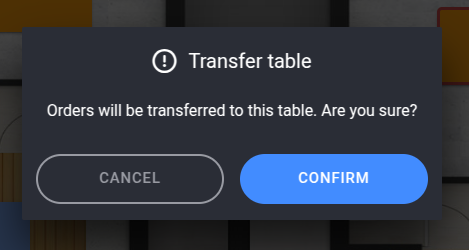
Confirmation window for table transfer
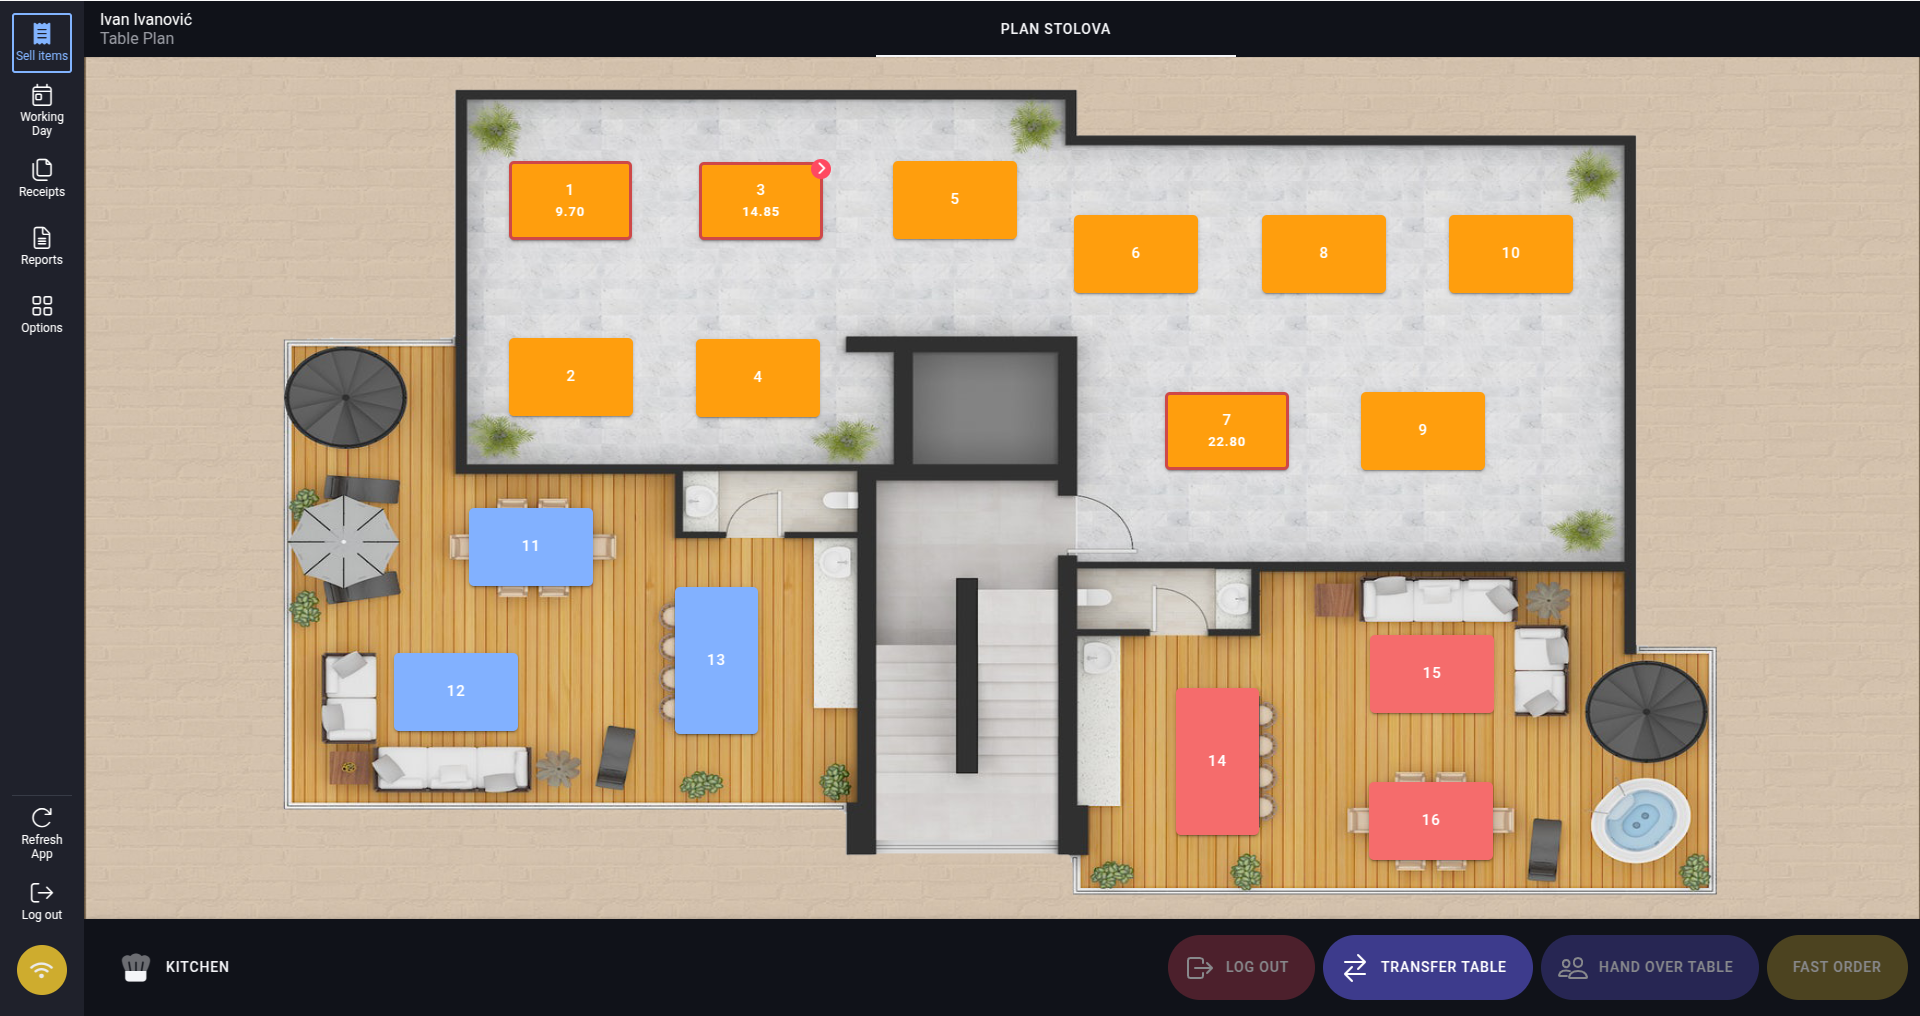
By clicking on Confirm, we confirm the transfer of the orders from table number 3 to table number 8. After that, the sales interface and the table layout will look like this:

Table layout after transfer
Now we see that the order from table number 3 has been moved to table number 7.
Hand Over Table
To hand off tables between waiters within the same shift, the following steps must be followed:
- First, the waiter who wants to hand off the table should click on the button HAND OVER TABLE.
- After that, the waiter should click on the table they want to transfer.
- Then, a list of available waiters in the same shift opens, where the waiter selects a colleague from the shift to whom they want to hand over the table. After selecting the appropriate waiter, the handoff must be confirmed for the table to be transferred.
This procedure facilitates better organization and more efficient work among waiters during the shift.
Fast Order
The last button, FAST ORDER, allows for creating a quick order and leads to the item addition interface.