Working Day
The second item in the navigation is Working Day.
After the user logs into the application for the first time and enters their PIN, they will be redirected to the Sale page.
At that point, it will look the following.
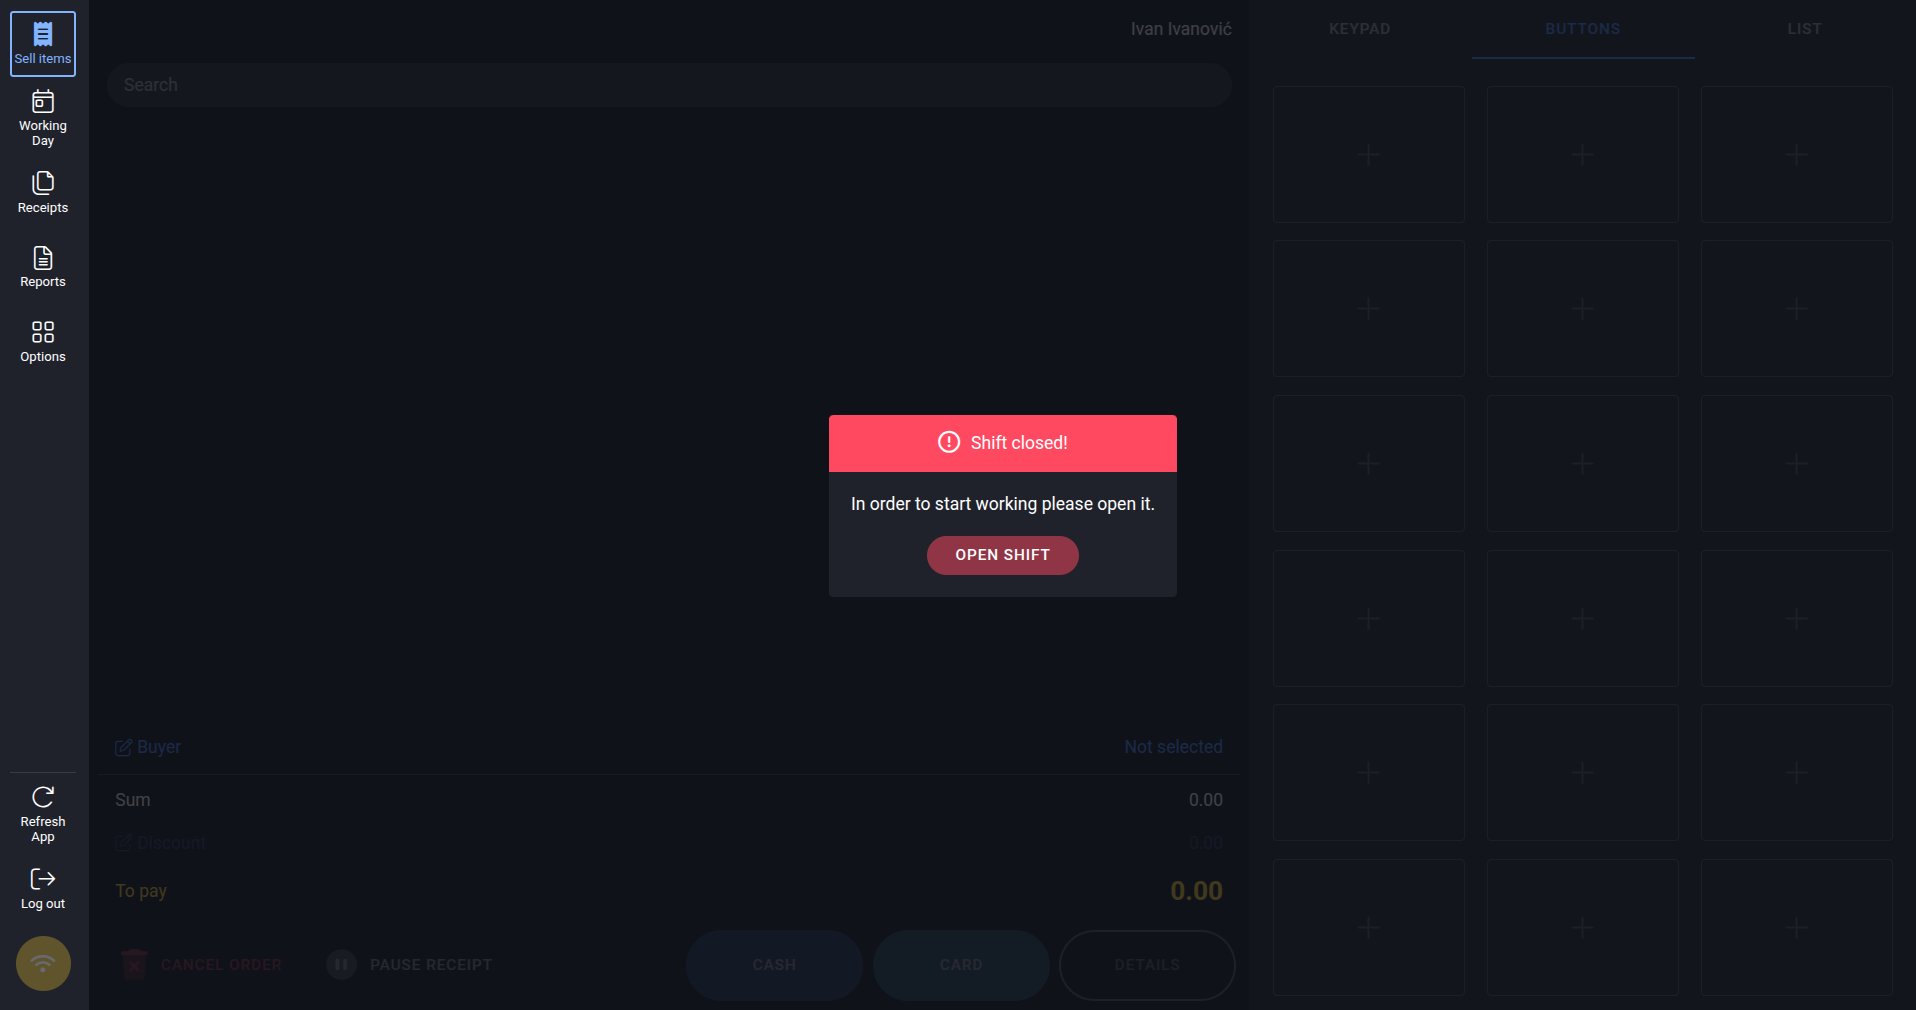
Sales for Retail page, disabled
Sales for Hospitality page, disabled
As you can see, all options and features on that page are currently disabled.
To enable sales operations, it is necessary to open a shift. This is done by going to the second item in the application's navigation, Working Day.
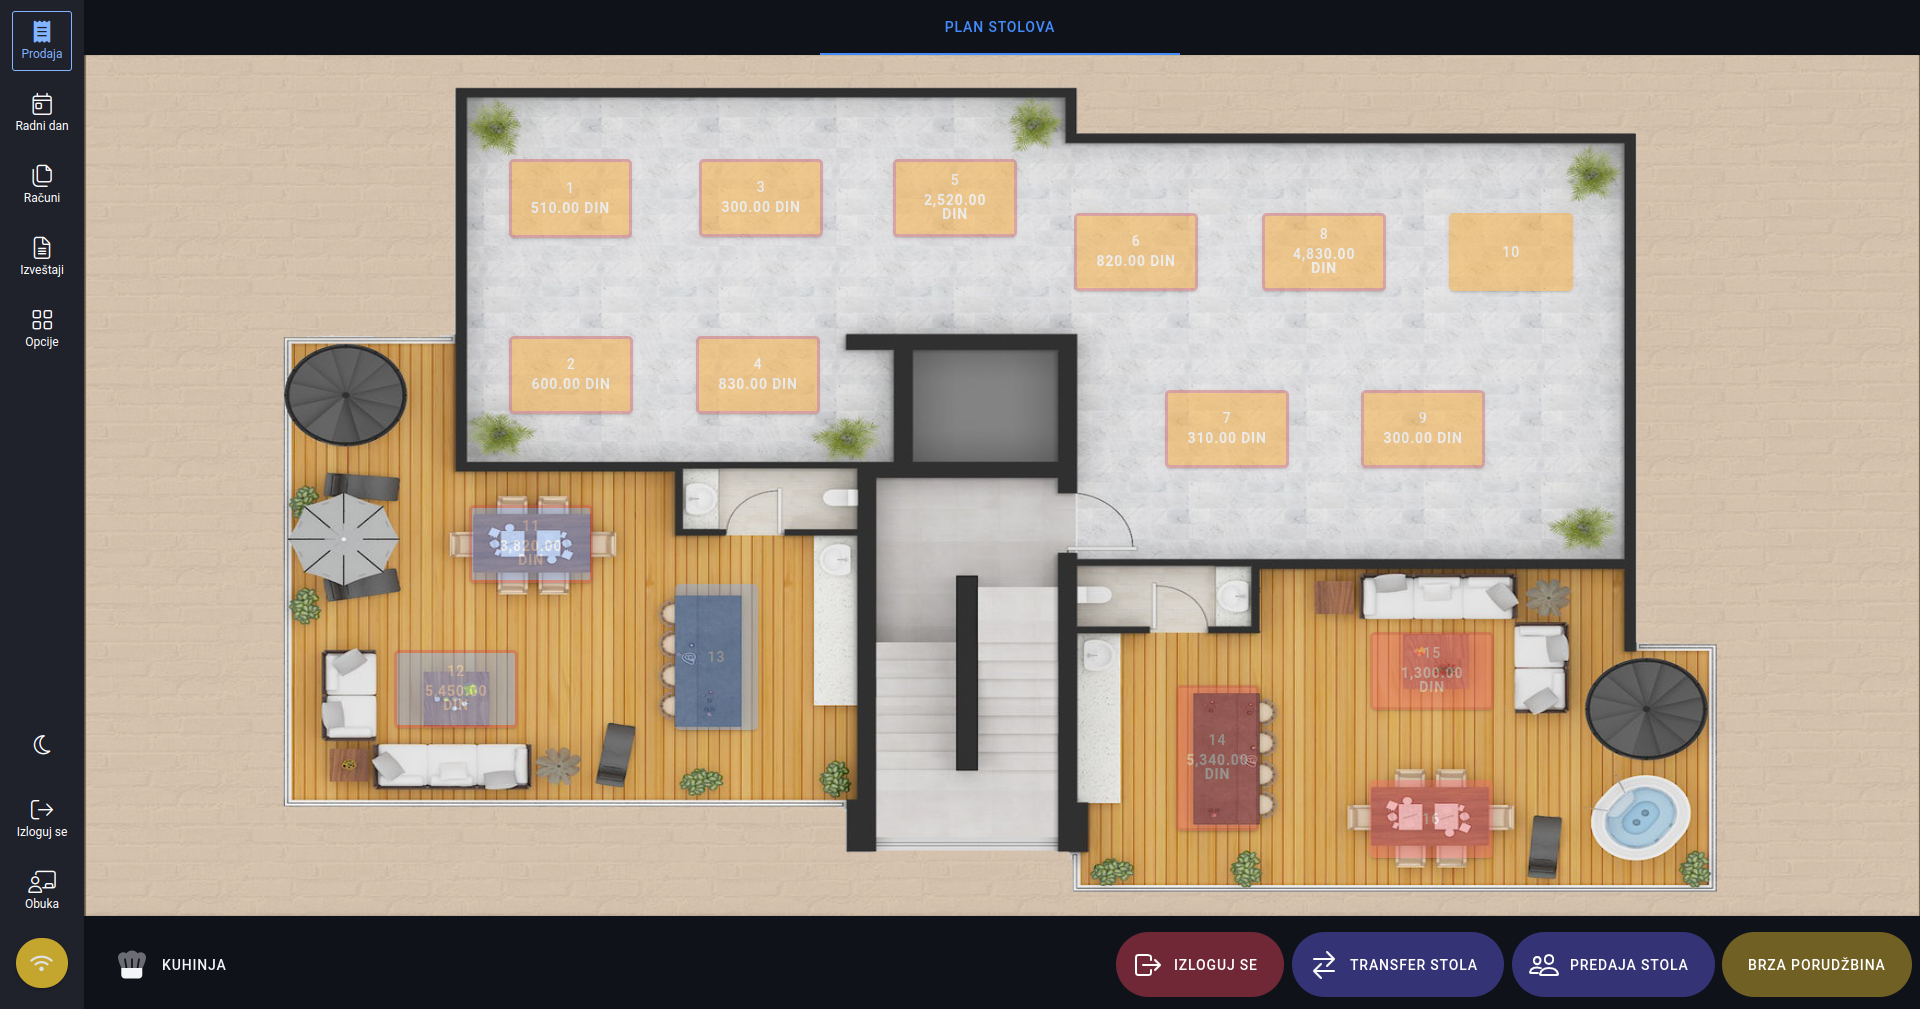
There, the following screen will be displayed:
Working Day page
So, to reiterate: before you start working on the Sales page, where you will spend most of your time, you need to perform a few steps on the Working Day page, which are explained in the next few sections:
Shift
Opening Shift
The first step needed to enable the application's operation is opening a shift. To start a shift, click the button named Open Shift on the first card you see on the page. After that, a window will appear where after clicking Confirm, the shift will be started. Once the shift is started, the first card related to the shift will look like this:

Shift card when the shift is started
Once the shift is open, you can start using the application by going to the main Sales page.
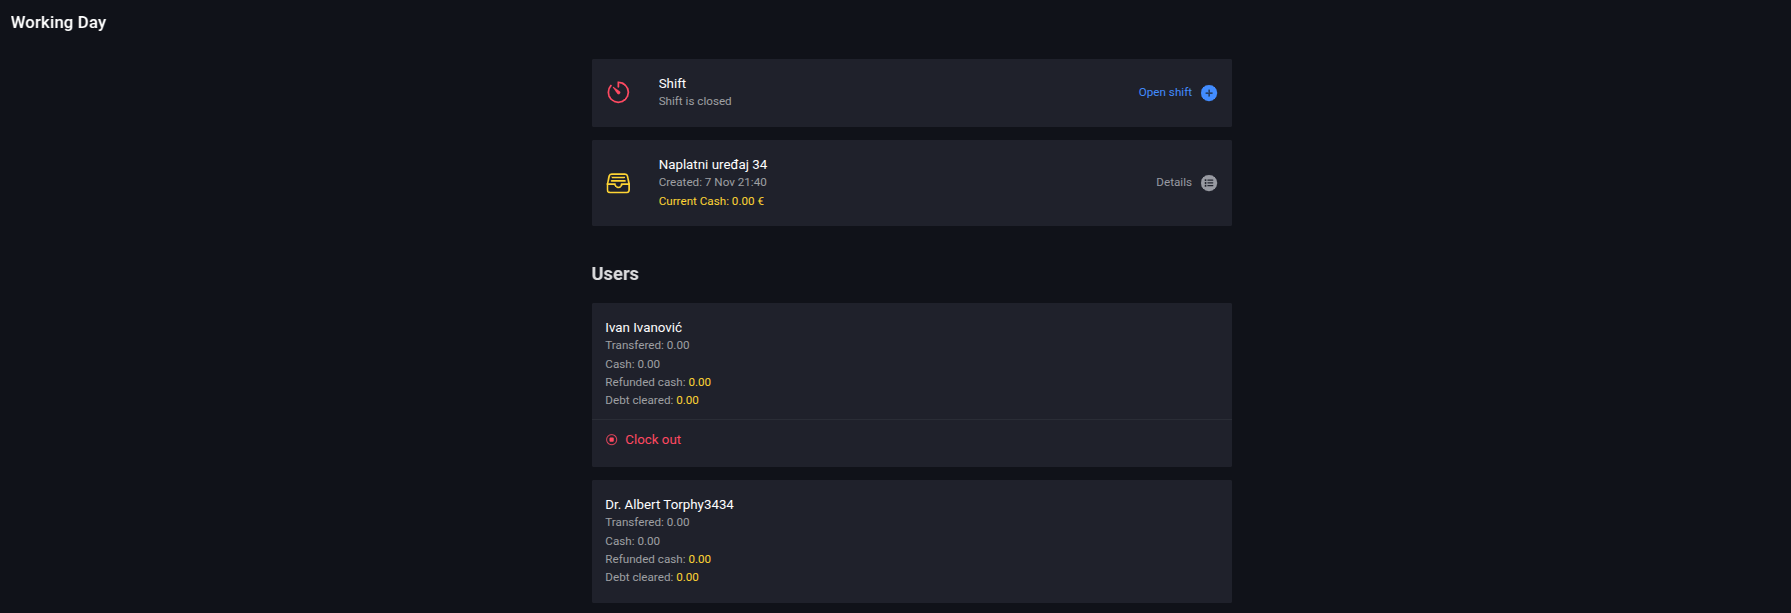
Closing Shift
If you want to close the shift, simply click the Close Shift button located at the right end of the shift card.
Cash Register

Cash Register card
By clicking on the Cash Register card, a view of the payment device options will open. Here, you can see basic information about your payment device, as well as the current cash balance in the register, which is calculated by adding the deposited amount and received cash and subtracting the withdrawn cash:

Cash register overview window
Withdraw Cash
By clicking the WITHDRAW CASH button, a window will open where you can enter the amount you want to withdraw from the cash register:
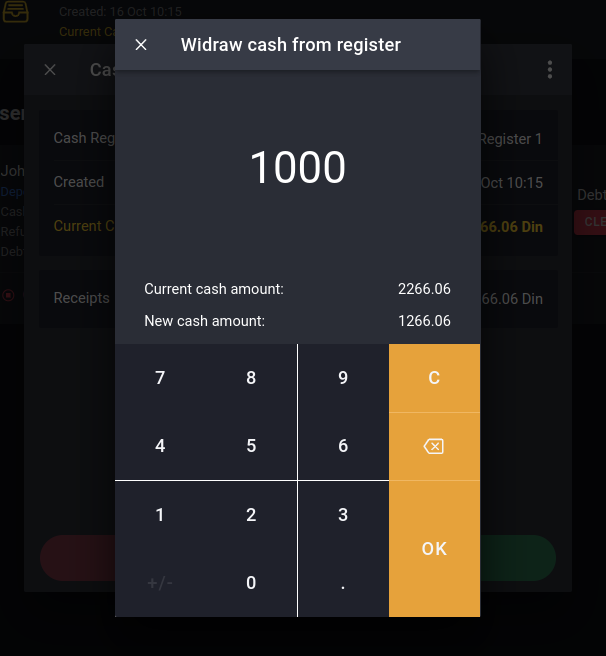
Cash withdrawal window
Once you enter the amount you wish to withdraw, click OK to save the new cash balance and record the transaction of the withdrawn amount.
Deposit
It is possible to add a deposit to the cash register. By clicking the DEPOSIT button, a window for entering a deposit will open where you can enter your deposit amount:

Deposit entry window
Users
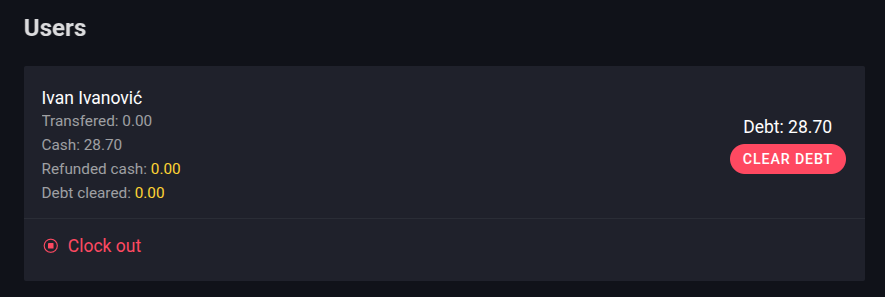
Users
User Overview
By clicking on the Users card, you can see all the information about the current user of the cash register:
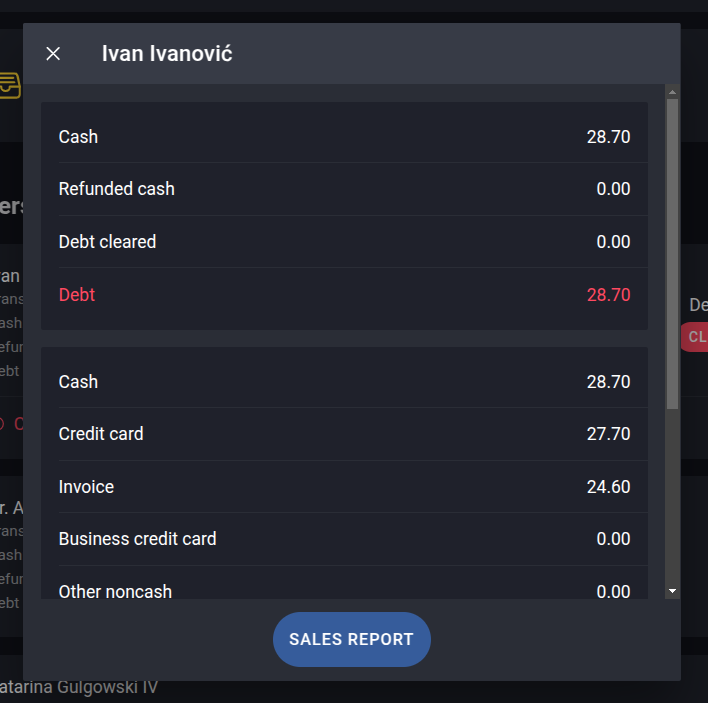
Current user overview window
User Deposit
It is possible to enter a deposit for an employee by clicking on the user card, then on the first field Deposit. By clicking on this field, a window for entering the user's deposit will open. After entering the deposit amount for the user, click OK. The deposit amount given to them will then be visible in the user overview window.
Sales Report
By clicking the SALES REPORT button, you can print a sales report for that employee during their shift:
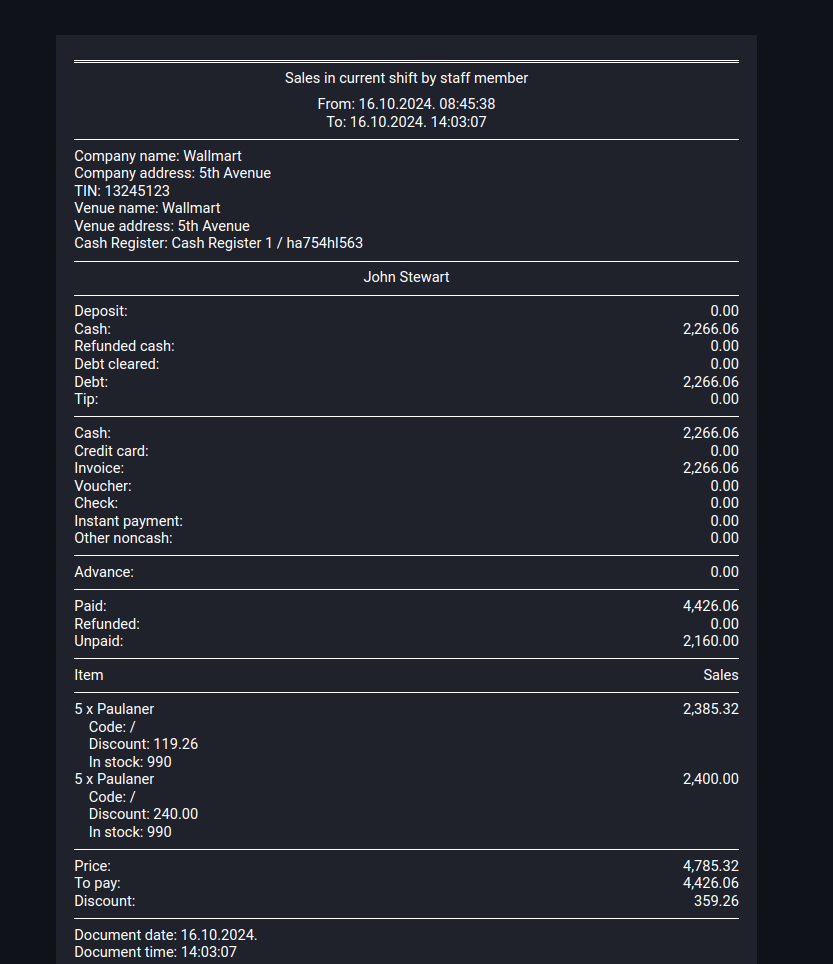
Sales report
Printing the report is possible by clicking the PRINT button in the top right corner.
Clearing User's Debt
At the end of the employee's shift, you must clear their debt. You can access this option by clicking the red CLEAR DEBT button:
Button for clearing employee debt
After that, the employee's debt will be cleared.
Clock Out
Clicking the Clock out button, the shift is ending and the user is redirected to the log in screen