

Switch theme
Price Calculations and Price Levelings
With a price calculation, you put the goods from a supplier's invoice into stock and set their selling price. With a price leveling, you change the selling price of goods you already have. Once you book the document, the new price applies immediately, at the registers too. The terms draft, booking and unbooking are explained on the page Inventory Accounting.
Availability
The Price Calculations and Price Levelings pages are available when the venue keeps inventory accounting. They require the user group permissions of the same name.
What do you want to do?
| Situation | Action |
|---|---|
| Goods arrived with a paper or PDF invoice | New price calculation |
| The supplier's invoice is already in the app, on the Incoming tab of Receipts & Orders | Price calculation from an incoming invoice |
| You paid the supplier's invoice | Recording a payment |
| You are changing the price of goods you have in stock | Changing a price with a price leveling |
| The list of price levelings has a document you did not create | Automatic price levelings |
New price calculation
A price calculation follows one supplier's invoice: for each item on the invoice it records the quantity, the purchase price and the selling price you set. When you book it:
- the stock of the items increases by the quantities on the price calculation;
- the selling price of the items becomes the price on the price calculation;
- the purchase price is recalculated as the average of the booked price calculations;
- if the new selling price differs from the previous one and the item already had stock, an automatic price leveling is created for the goods that were already in stock.
Document and invoice details
- In the menu, choose Inventory Accounting → Price Calculations and click ADD. The Price calculation document opens in DRAFT status.
- In the Document info section, check the Date and the Calculation number (suggested, for example 26/1). The Description is optional.
- In the Supplier invoice section, fill in the details from the invoice (see the table below).
| Field | What you enter |
|---|---|
| Supplier | The supplier on the invoice — search by name, TIN or registration number. The supplier must exist in Clients. Required. |
| Invoice number, Invoice date | The number and date on the invoice. Required. |
| Due date | The invoice's payment deadline. In the list of price calculations, an icon warns you when it has passed. |
| Paid date | The date you paid the invoice, if it is already paid (you can also enter it later — see Recording a payment). |
| Invoice value before tax | The invoice total before tax. Required. |
| Dependent costs before tax | Purchase costs outside the invoice (transport, customs…). 0 by default. Required. |
| With purchase tax | Ticked by default. Untick it if the supplier is not in the tax registry (no tax on the supplier's invoice). |
| Create invoice | When ticked, saving the price calculation also creates an incoming invoice linked to it, in Receipts & Orders → Incoming (see Incoming invoices). If an incoming invoice with the same number already exists, the price calculation is linked to it instead of creating a new one; if that invoice already has a price calculation, the price calculation is not saved. Not ticked by default. |
The Summary section on the right shows the document's totals and updates as you add items.
Warning
You can add items only once the required document and invoice fields are filled in. The Date, Invoice value before tax, Dependent costs before tax and With purchase tax are locked when you add the first item. Enter them before the items. Dependent costs are spread over the items in proportion to each item's invoice value.
Adding items
- Click + ADD ITEM (or press =). The Add item window opens.
- In the Inventory item field, search for the item and click it. Only items of the Goods type that are not made of ingredients are offered; an item without a tax rate cannot be chosen. The + icon next to the field opens the form for a new item, and once an item is chosen, the pencil icon opens it for editing (see Inventory).
- In the According to supplier invoice section, enter the Quantity, the Invoice price before tax and the Discount (the supplier's discount on the invoice price, in percent; 0 if there is none). The invoice value, dependent costs, purchase value, price difference and selling value are calculated automatically.
- In the Define price section you see the Purchase price before tax. Enter one of the fields Margin %, Selling price before tax or Selling price after tax (the tax rate is in brackets) — the other two are calculated automatically. The app suggests the item's current selling price.
- Click SAVE, or SAVE AND NEXT for the next item.
The selling price cannot be lower than the purchase price, and the margin cannot be negative — in that case the fields are marked with an error and the item is not saved.
Booking the price calculation
When all items are entered, check the values in the Summary section and click:
- BOOK — the price calculation is saved and booked. The stock and prices change immediately.
- SAVE — the price calculation is saved as a draft; you will book it later.
Once the price calculation is booked, the header shows only UNBOOK. Unbooking restores the stock and prices and deletes the automatic price leveling created by this price calculation. You cannot change or delete a booked price calculation until you unbook it.
Price calculation list
For each price calculation, the list shows the date, the invoice date, whether it is booked, the number, the supplier and the values: invoice value, dependent costs, purchase value (in red), purchase tax, purchase value after tax (in red), price difference (in yellow), selling value, tax amount and selling value after tax. In FILTERS you choose the period and the supplier. EXPORT downloads an Excel file with the price calculations from the chosen period.
Next to the invoice date of a booked price calculation there is an icon:
| Icon | Meaning |
|---|---|
| Red calendar | "Due date has expired" — the due date has passed and no payment has been entered. |
| Green check mark | The payment has been entered; the paid date is in the icon's tooltip. |
| Blue "i" icon | The due date has not passed yet; it is in the icon's tooltip. |
The ⋮ menu in a row offers Print (booked price calculation), View, Payment (booked price calculation) and Delete (draft). When asked "Permanently delete calculation?", click CONFIRM.
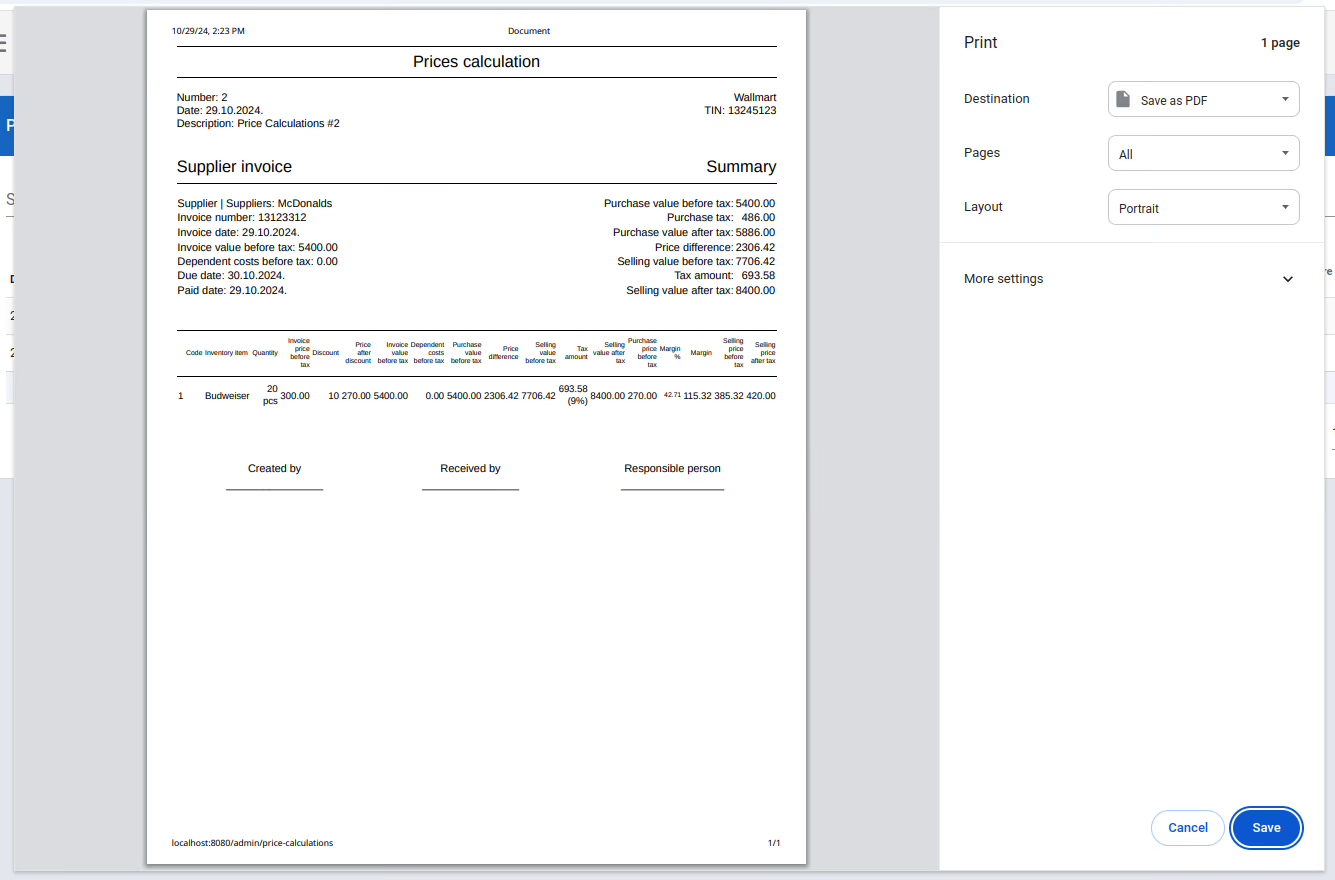
Printed price calculation: the invoice details, all items and the totals by tax rate
Price calculation from an incoming invoice
When the supplier's invoice is already in the app — on the Incoming tab of Receipts & Orders — you create the price calculation from it. You map the invoice items to your own items once, and the app remembers this for each supplier.
Availability
The Create calculation action is available in a venue with inventory accounting, for an incoming invoice that has no price calculation yet, and requires the Price Calculations permission. The invoice must have a supplier.
- In Receipts & reports → Receipts & Orders, open the Incoming tab and click the invoice.
- In the preview's ⋮ menu, choose Create calculation. A window with the invoice items opens.
- For each item, click MAP TO PRODUCT and find your item.
- In the Qty factor column, enter how many of your units one unit on the invoice contains — for example 24 when the supplier invoices a crate of 24 bottles and you sell by the bottle. The invoice price is divided by this number.
- Check the selling price (Selling price before tax or Selling price after tax); the Margin % is calculated automatically. The app suggests the item's current price.
- Exclude the items you are not taking over (the check box at the start of the row) or, for an item that is not mapped yet, click the Skip icon — skipping is remembered for that supplier.
- Click SAVE MAPPED ITEMS.
- Enter the Calculation number, the Dependent costs before tax if needed, and check the With purchase tax box.
- Click CONFIRM.
The app reports "Calculation created successfully." and opens the price calculation in DRAFT status, with the invoice date and the supplier. Check it and click BOOK (see Booking the price calculation). The invoice stays linked to the price calculation: Create calculation is no longer available for it, and a hand-entered invoice can no longer be changed.
The name of the mapped item in the window shows the item's state:
| Appearance | Meaning |
|---|---|
| Green, with a check mark | Mapped and saved. |
| Yellow | Mapped, but the mapping is not saved yet — click SAVE MAPPED ITEMS. |
| Red | The item is chosen, but the details are incomplete (for example the selling price is missing). |
| Skipped | The item is not taken over; the X icon undoes the skip. |
The X icon next to the item removes the mapping ("Reset mapping"). CONFIRM is active when the calculation number is entered and all ticked items are green. If the number is taken, the app reports "Calculation number is already taken." Mapping invoice items is described in more detail in Incoming invoices.
Recording a payment
When you pay the invoice from a price calculation, enter the payment date. The list of price calculations then stops warning about the passed due date.
- In Price Calculations, in the ⋮ menu of a booked price calculation's row, choose Payment.
- In the Choose payment date window, choose the Paid date.
- Click SAVE PAYMENT.
You remove a date already entered with the DELETE PAYMENT button. Payment is available only for a booked price calculation; for a draft, you enter the payment date in the Paid date field on the document itself.
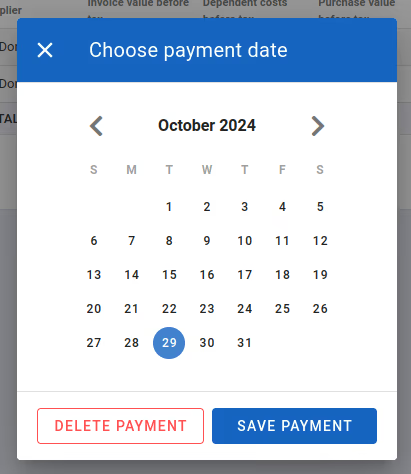
Entering the invoice payment date
Changing a price with a price leveling
With a price leveling you change the selling price of goods you have in stock. The document records the old and the new price and the difference in the value of the goods in stock (the value difference).
- In the menu, choose Inventory Accounting → Price Levelings and click ADD.
- In the Document info section, check the Date and Number, and enter the reason in the Description if you like (for example "Beer price correction").
- Click + ADD ITEM and choose the Inventory item.
- The Quantity is filled in with the item's current stock. It cannot be greater than the stock.
- The Item price section shows the Old selling price and Old selling price after tax. Enter the new Selling price or Selling price after tax — the other field and the values (old and new selling value, before and after tax) are calculated automatically.
- Click SAVE (or SAVE AND NEXT for more items).
- Click BOOK.
From booking, the new price applies at all registers. UNBOOK restores the previous price.
Note
A price leveling requires stock greater than zero. For an item you currently have no stock of, set the new price with a price calculation when the goods arrive.
The list of price levelings shows the description, old selling value, old tax amount, old selling value after tax, new selling value, tax amount, selling value after tax and the Value difference. In FILTERS you choose the period, and EXPORT downloads an Excel file. The ⋮ menu in a row offers Print (booked price leveling), View and Delete (draft).
Automatic price levelings
The app creates some price levelings by itself, so that the value of the goods in stock and the Sales Purchase Ledger follow the price change. You recognize them by their number:
| When it is created | Number |
|---|---|
| A booked price calculation changes the price of goods that were already in stock | KAL/ and the price calculation number |
| A price change of goods in the item or in the quick price change at the register, when price changes are allowed for the venue | PROD/… (one item) or PROD - … (several items saved at once) |
| A receipt with a discount on an item of goods | RAC/…/D |
| A receipt with a manually changed price of goods | RAC/…/CP |
| A receipt correction, when the price of the goods changed in the meantime | RAC/…/CPC |
Automatic price levelings are booked immediately and are for viewing only: they cannot be changed, unbooked or deleted. A price leveling from a price calculation disappears when you unbook that price calculation. In the Sales Purchase Ledger they are shown as "Auto Price Leveling - Price Calc no. …" or "Auto Price Leveling - Receipt no. …".